Let's start!
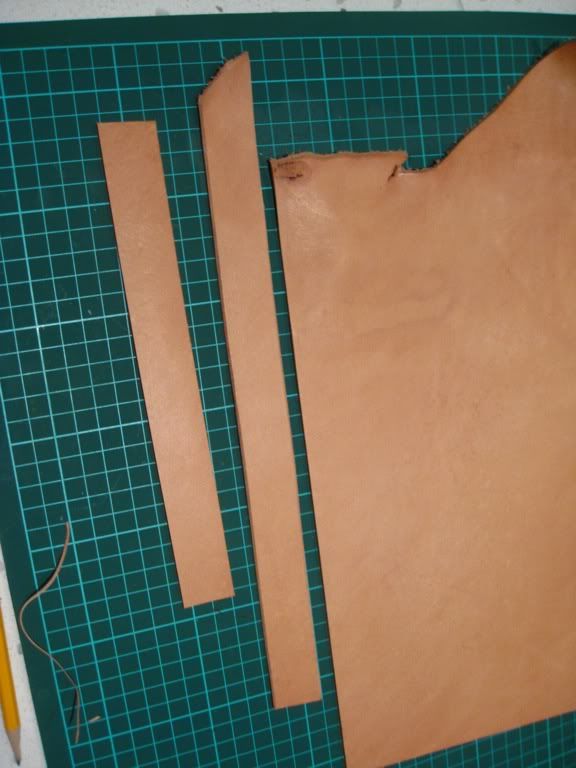
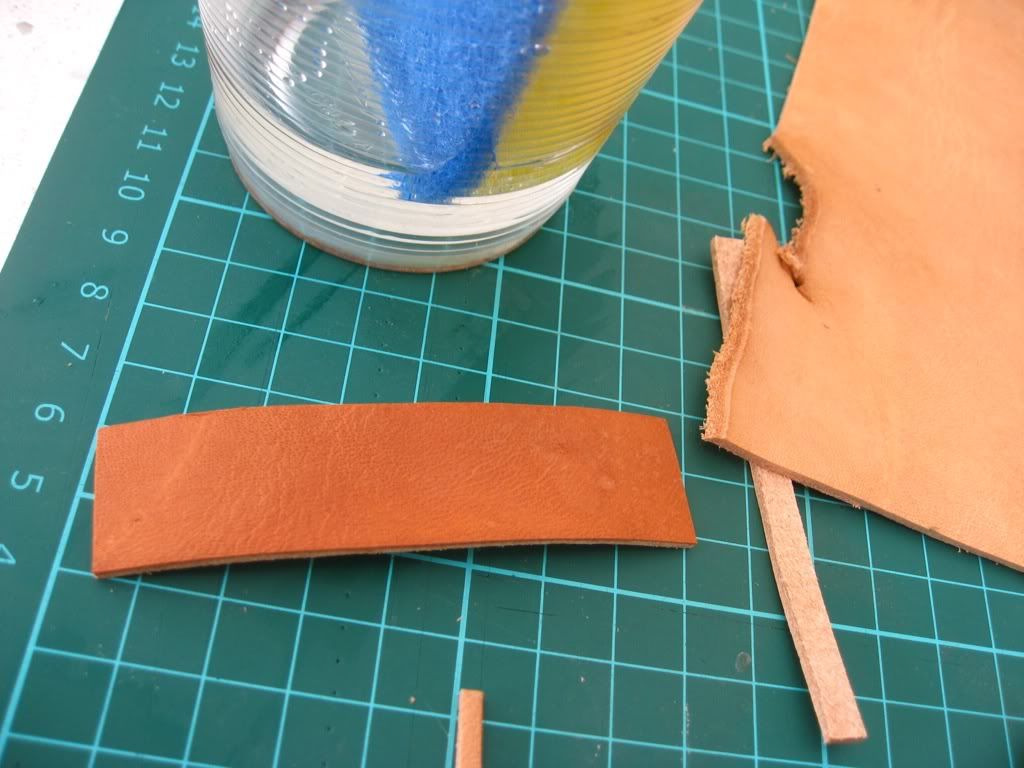
Start with shorter 26mm piece, which should be cut together in part 1.
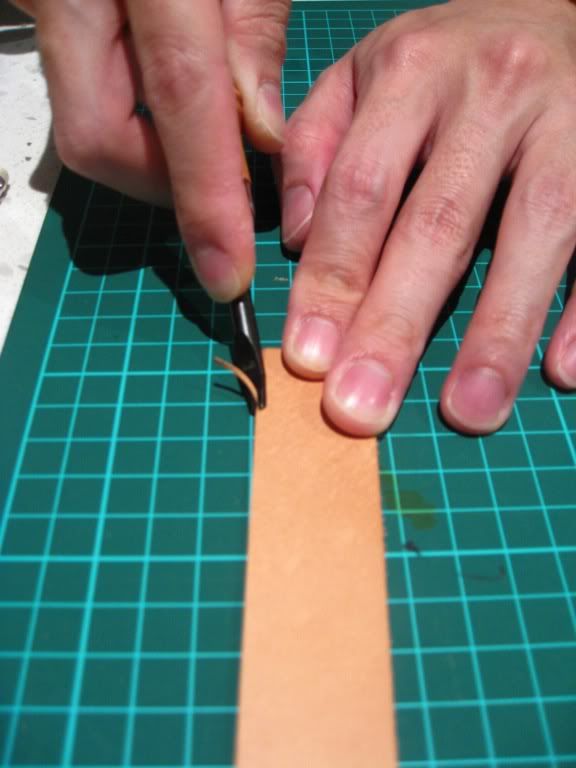
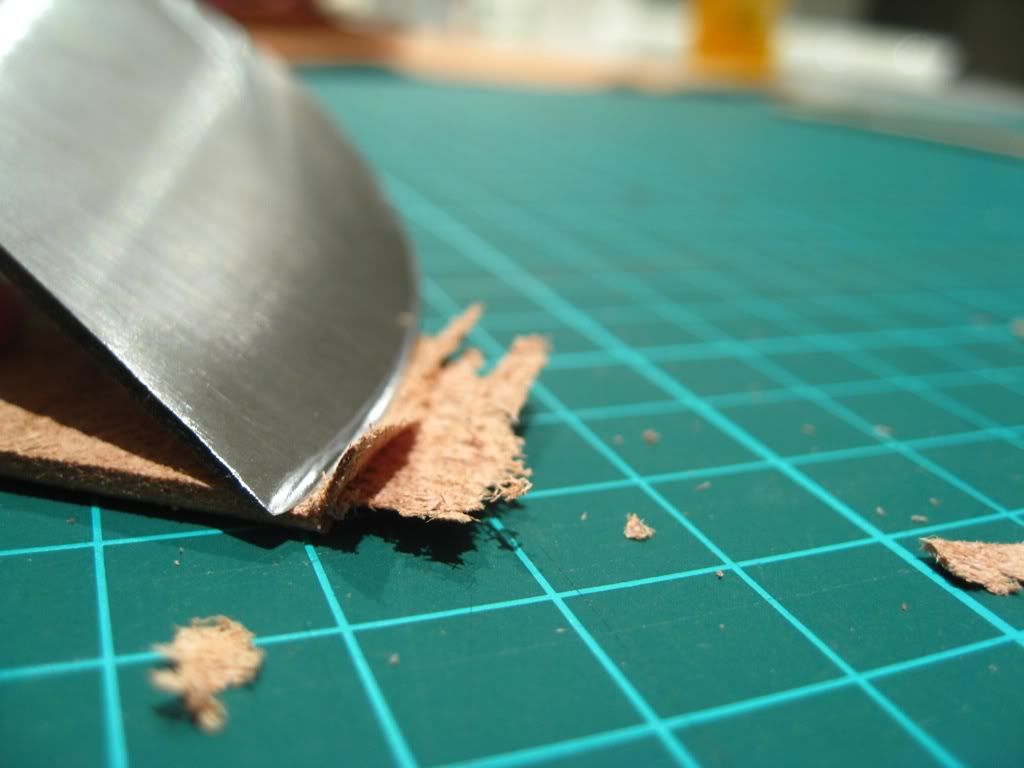
Bevel the edge using 'edge beveler'.
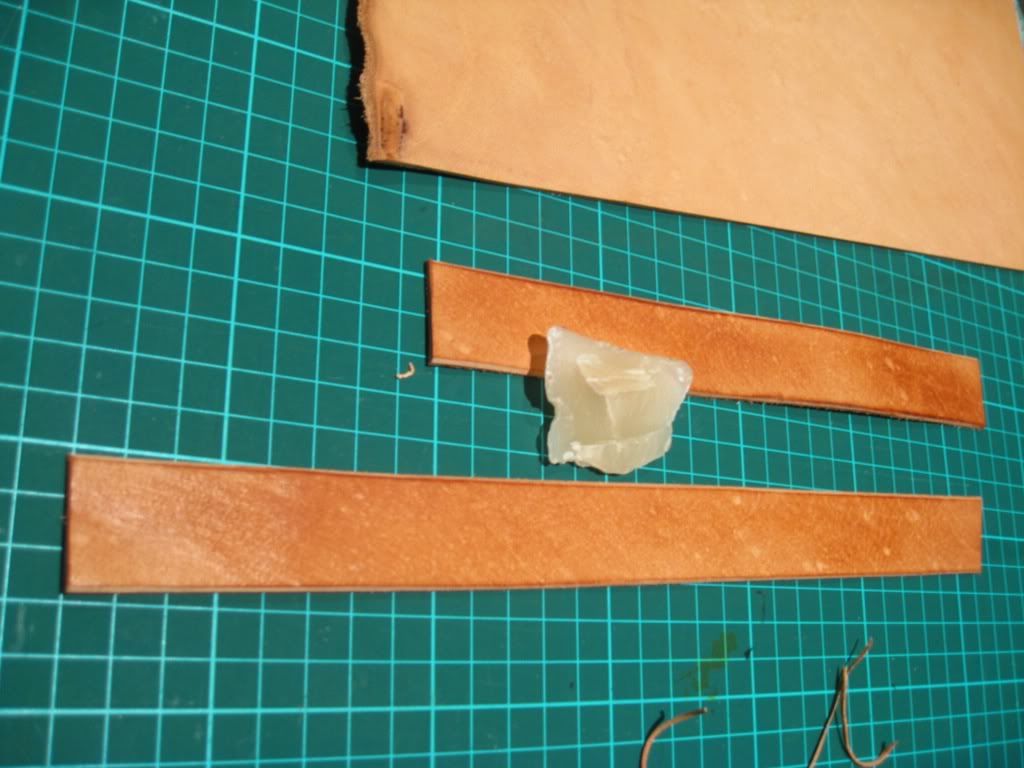
Burnish the leather and apply beeswax.
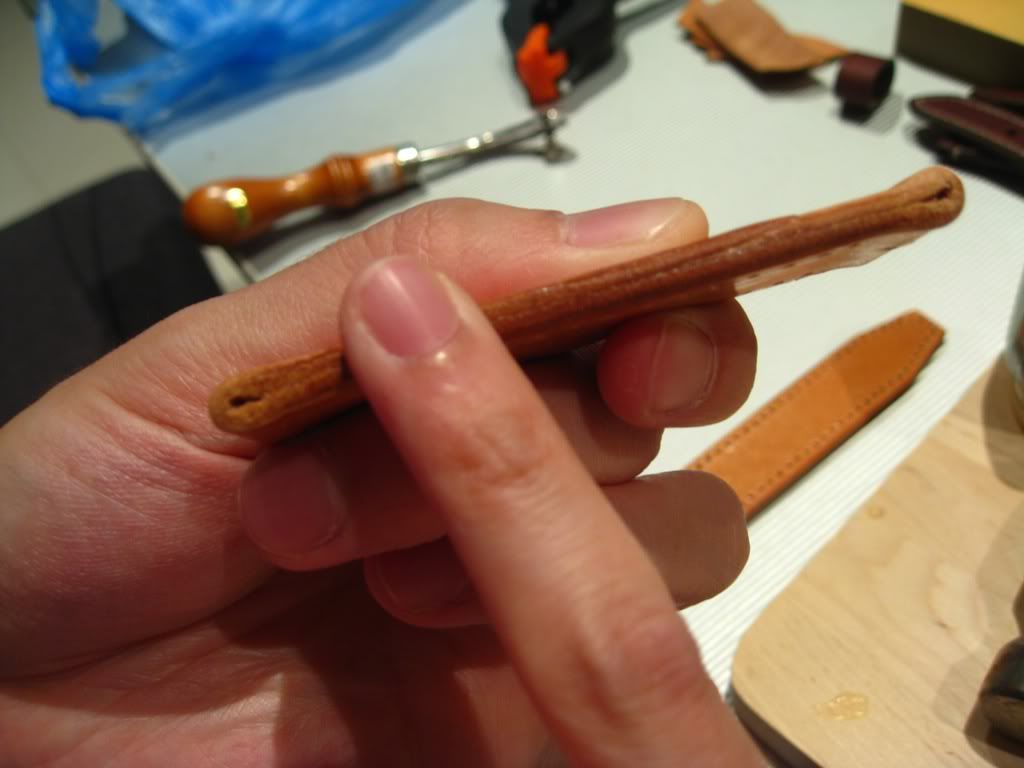
Test fold the leather first to determine point of contact for the overlap part.
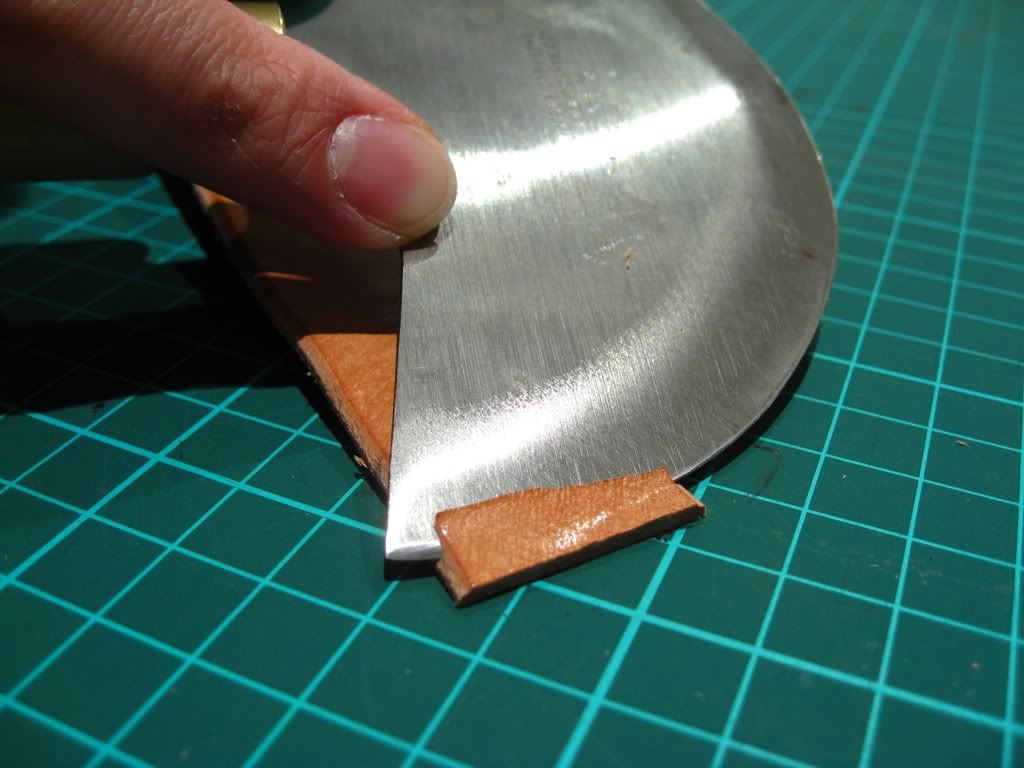
Once done, mark with pencil and start skiving.
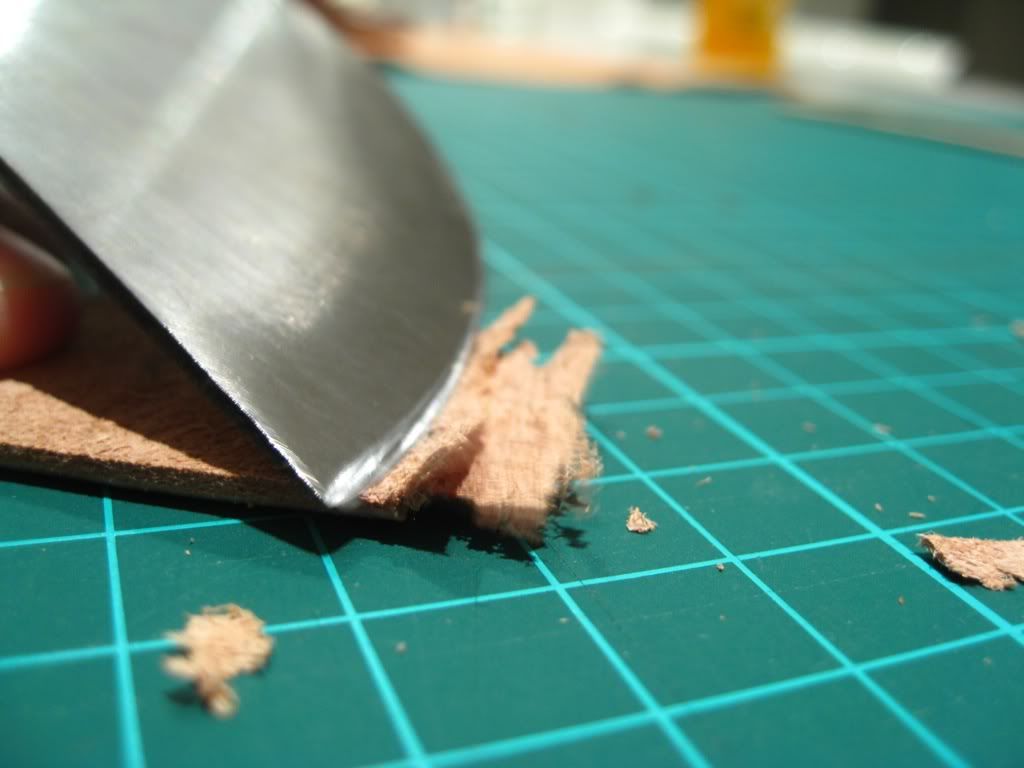
Start with the buckle side, skive the grain part.
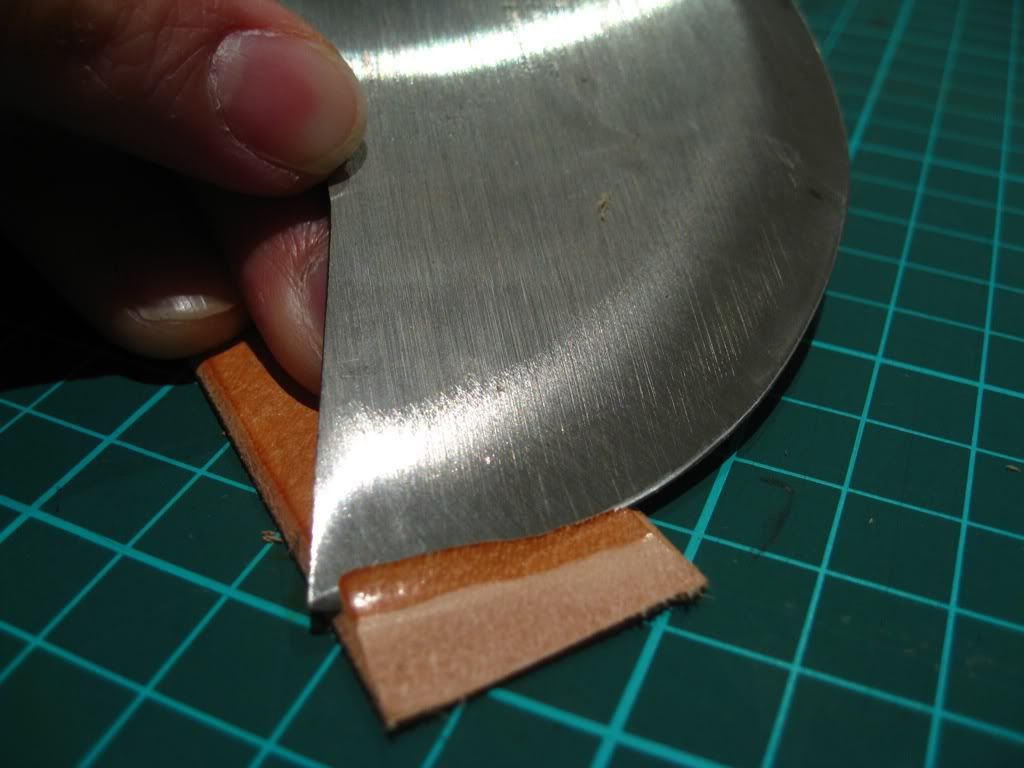
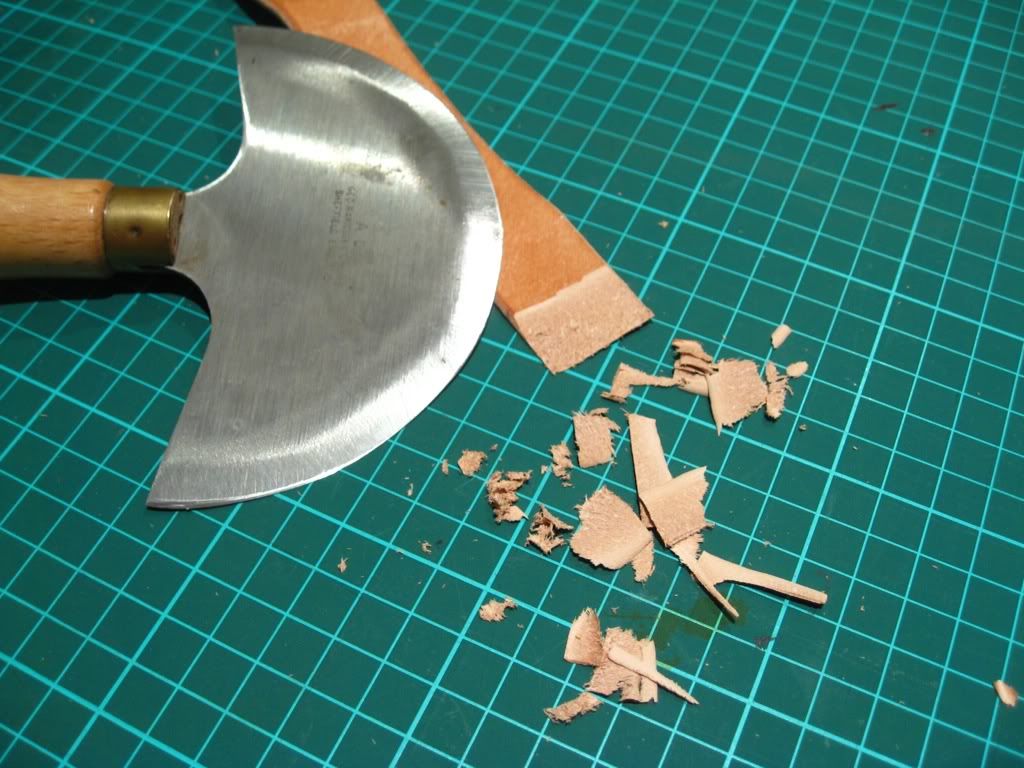
Now skive the flesh side of the other part that will overlap.

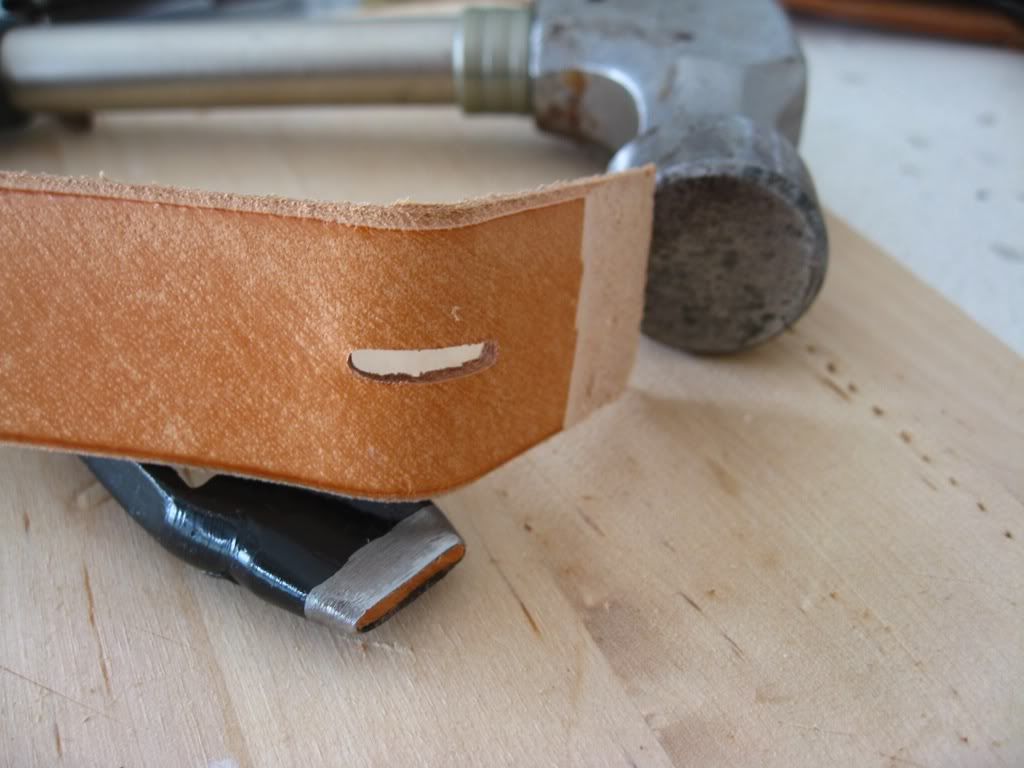
Slightly wet the flesh side to mark the punch hole for the buckle tongue (I use oblong punch) and
measured with ruler to ensure it's even from both side.

Start punching the hole.

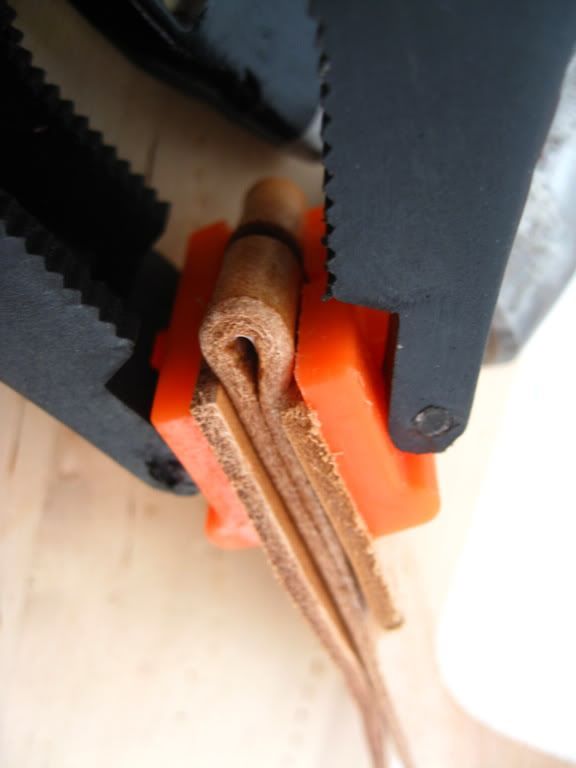
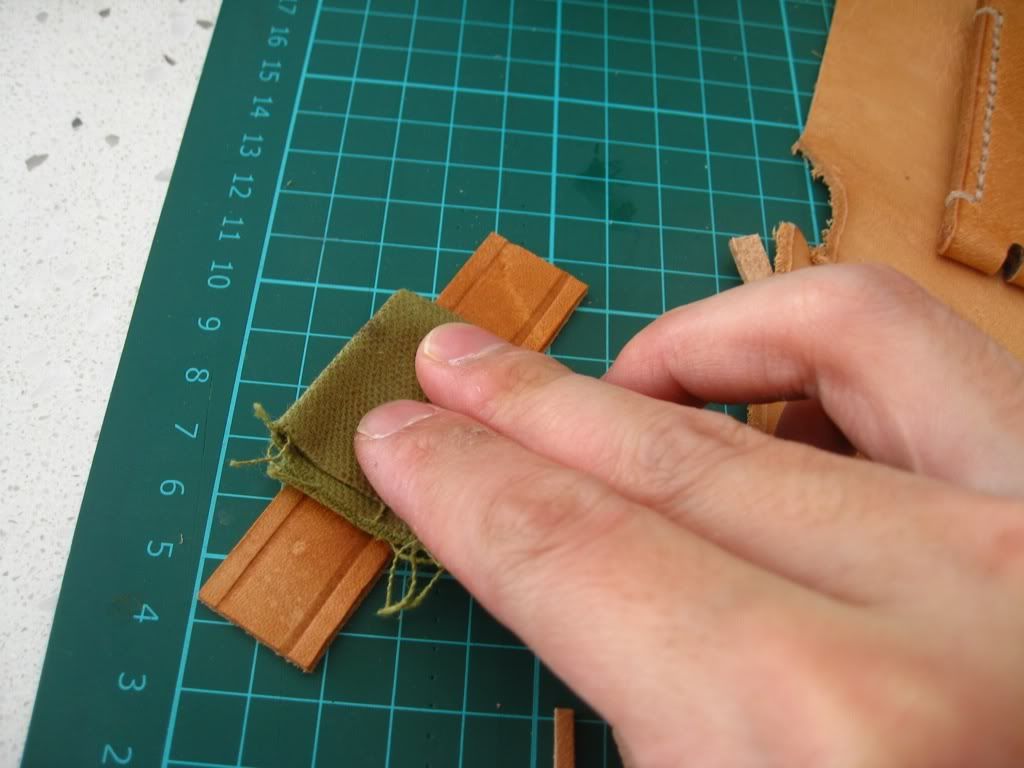
I prefer to glue the folds in two part rather than all at once to ensure consistency.
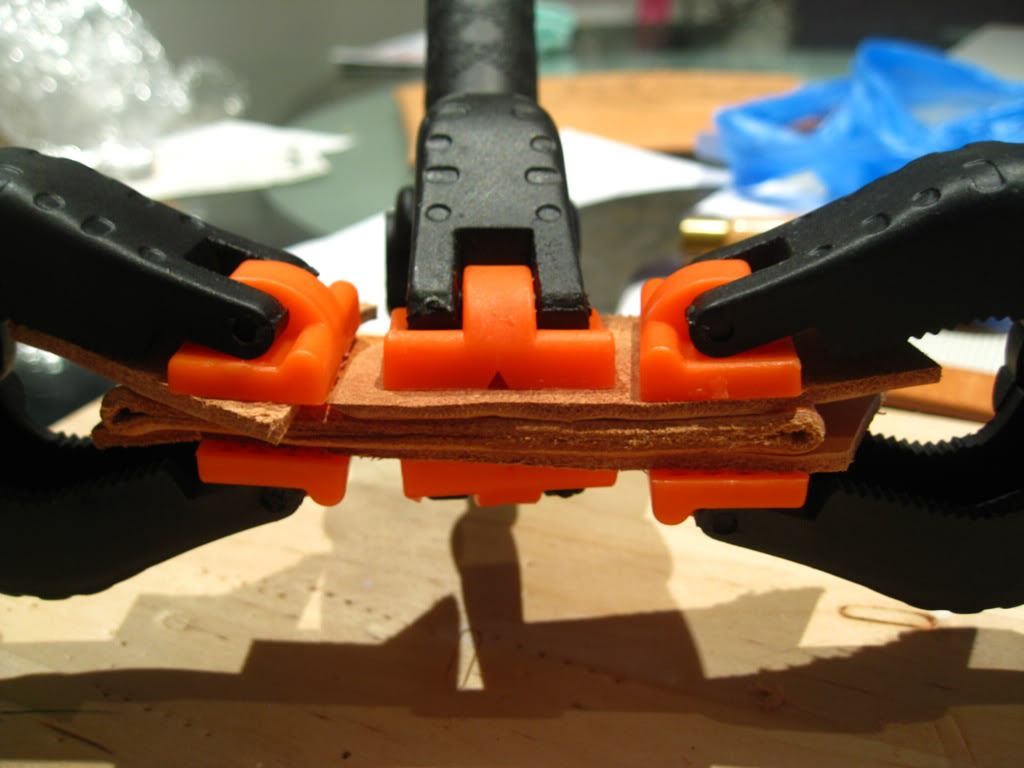
Glue the buckle side first, use clamp to secure, wait for few hours until glue has dried.
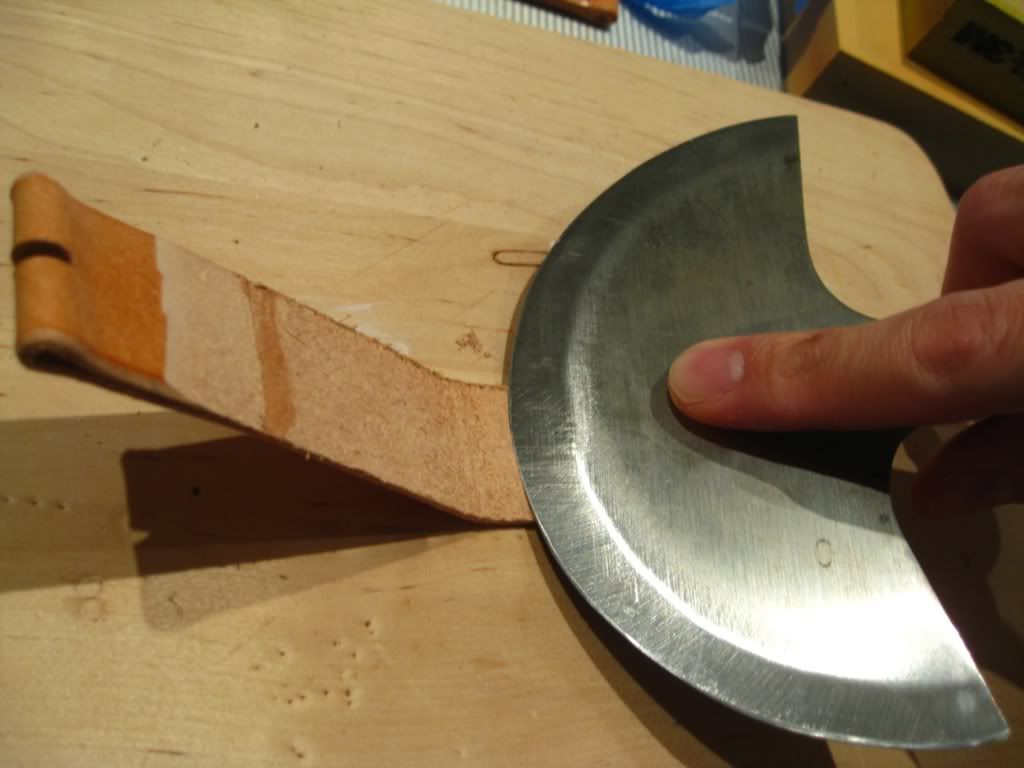
Once the buckle part has dried, thin/skive the part where the leather is to be folded to ensure good usability (I only do the lug side).
Now the other part is ready to be glued, secured with clamp, leave overnight to dry.

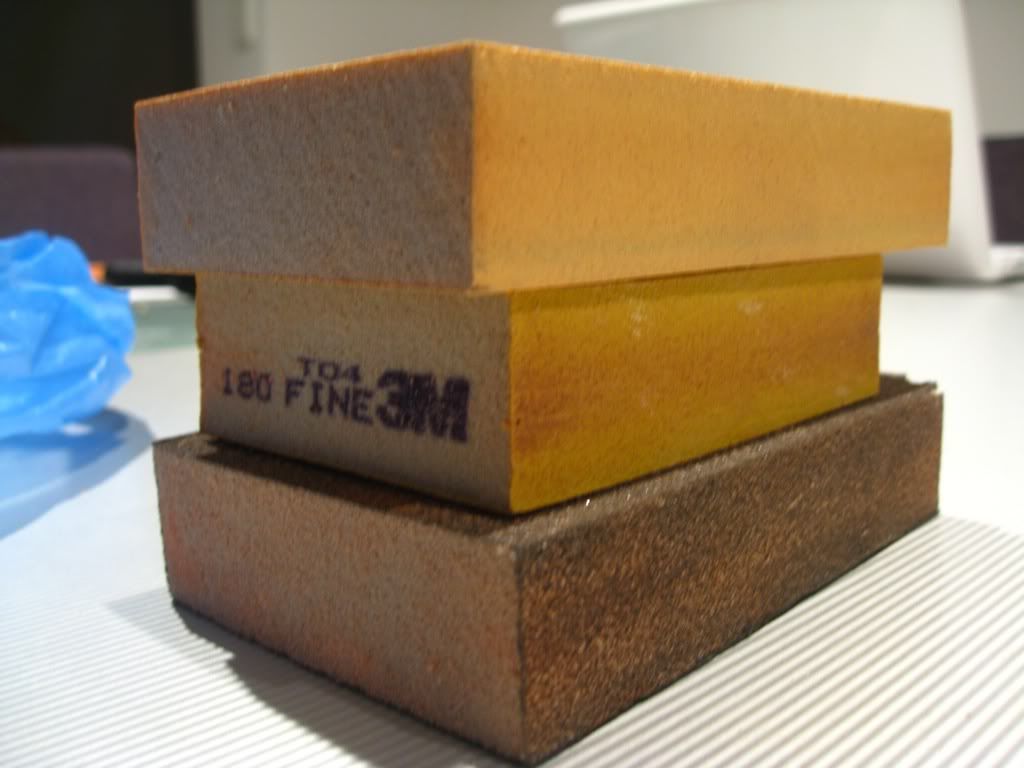
Once dried, smooth the edges using sanding block.

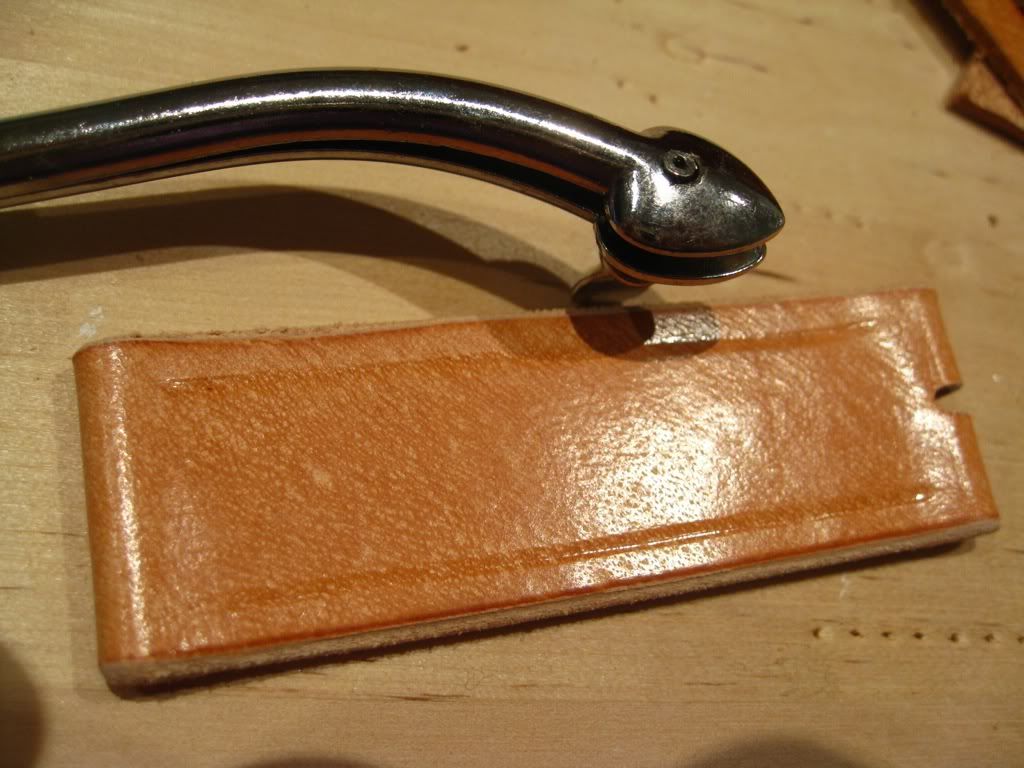
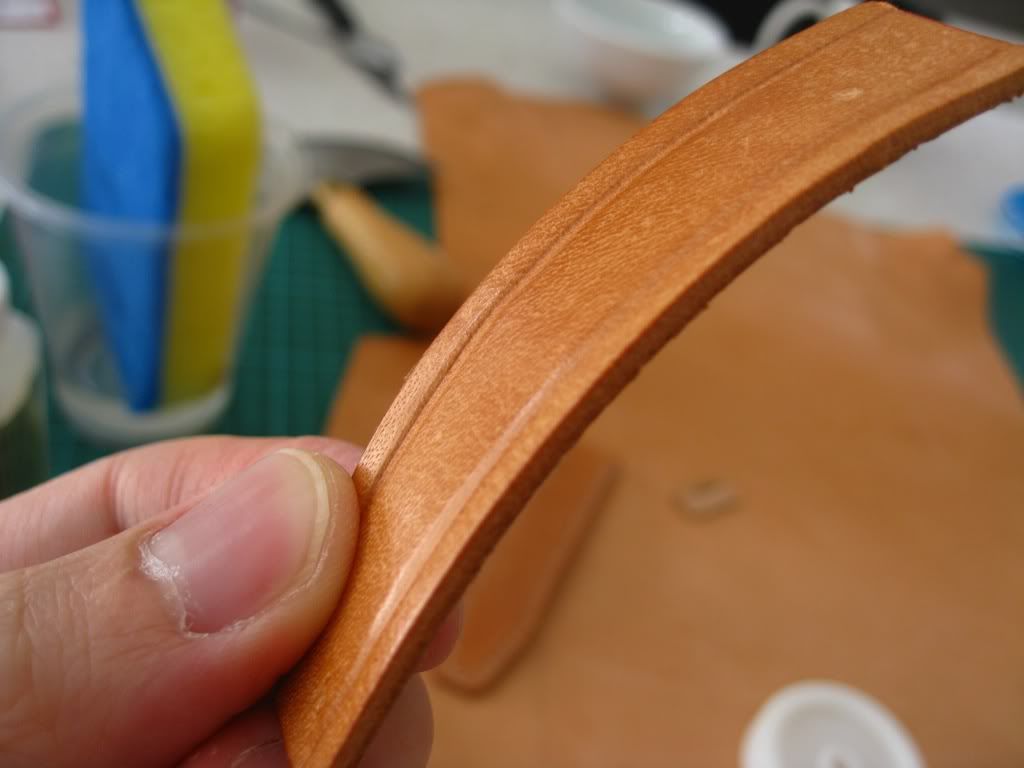
Using creasing tool, create parallel lines for stitching purpose.
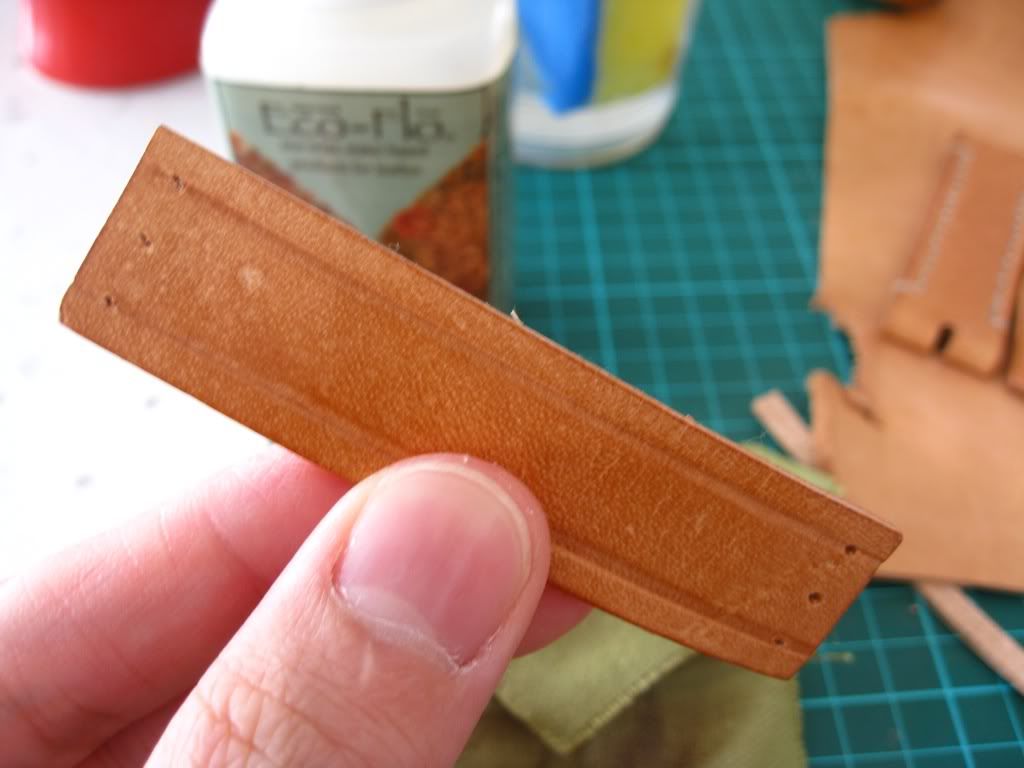
Mark the first stitching holes using an awl, then create more using stitching wheels.
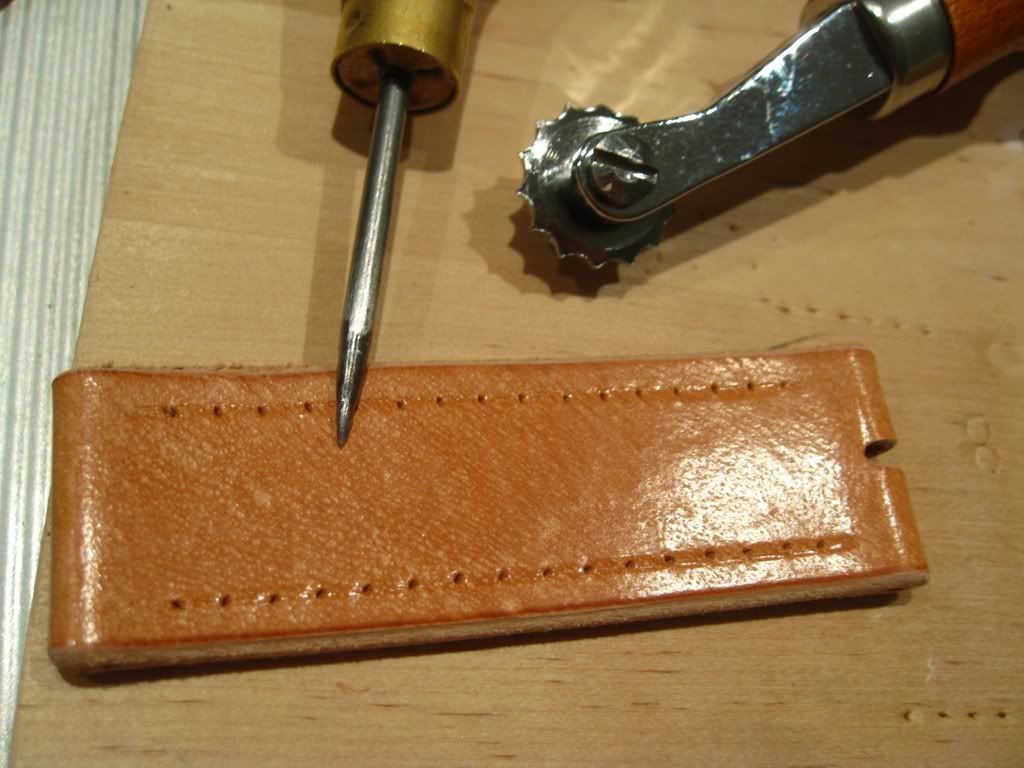
Punch the stitching holes.

The edge is ready to be burnish, apply two coat of gum tragacanth (first layer to dry, second slightly dry), then rub friskily with slicking wheel resulting in slick smooth edge.
Optional step: apply clear sealer to preserve the edge further.

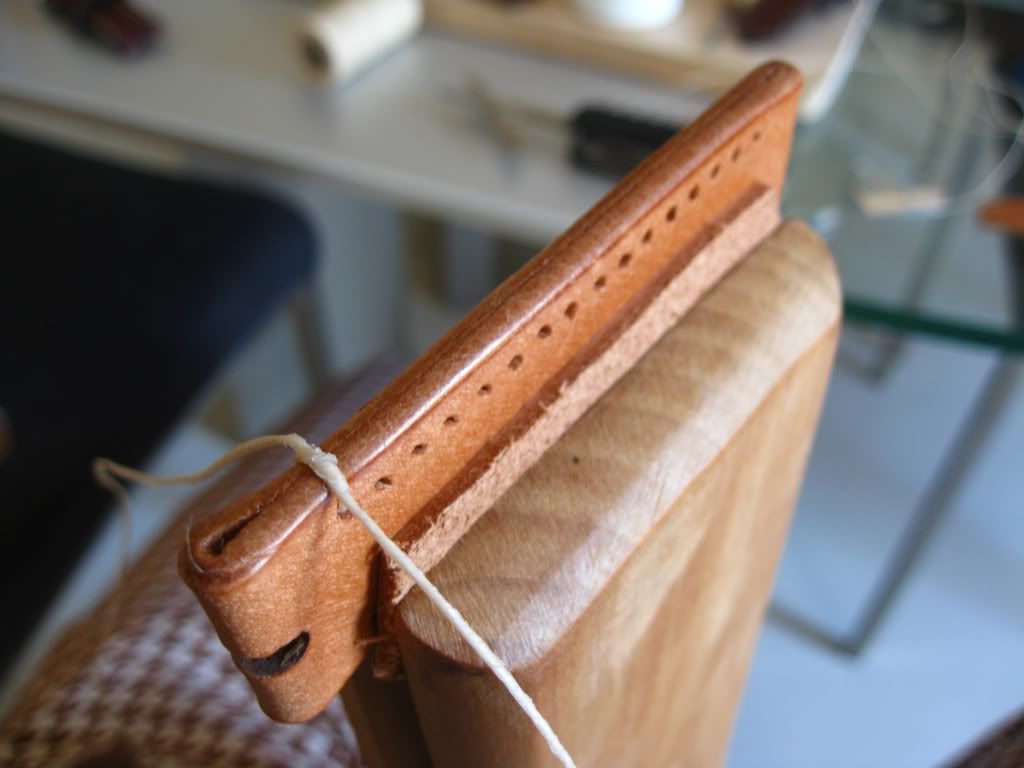
Use stitching pony to assist with stitching the strap, use the same thread colour as the long end.

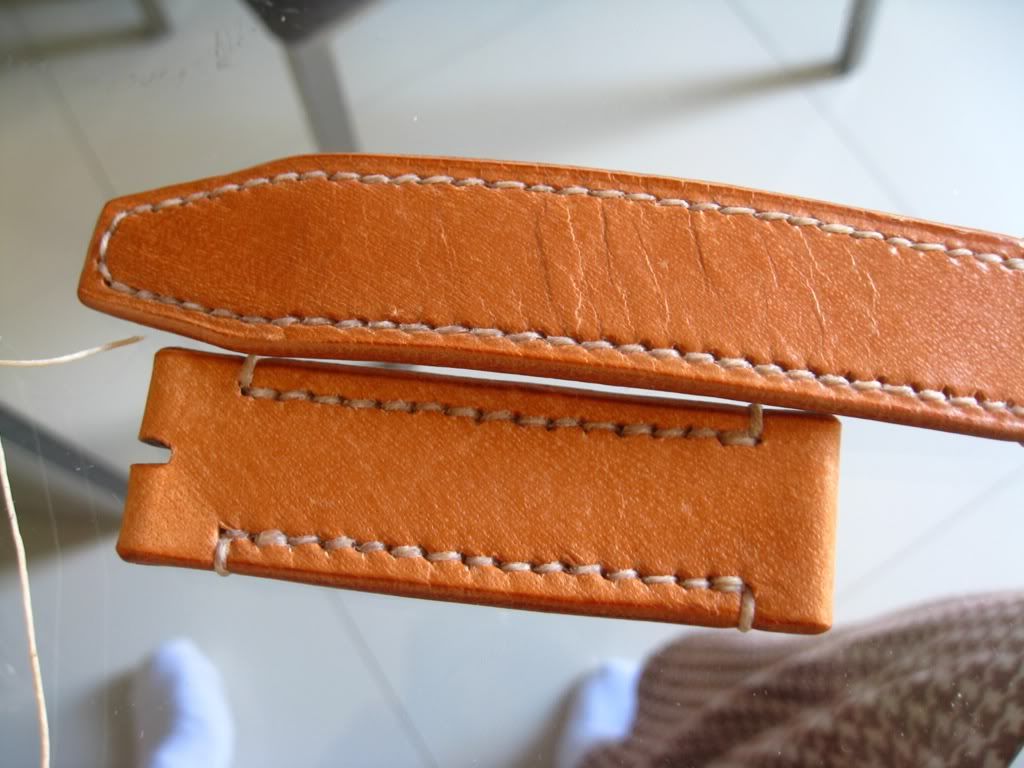
Both straps fully stitched.
Now let's make the keeper!
I use the exact same leather to ensure similar texture and colour, the thickness will also be a perfect match.
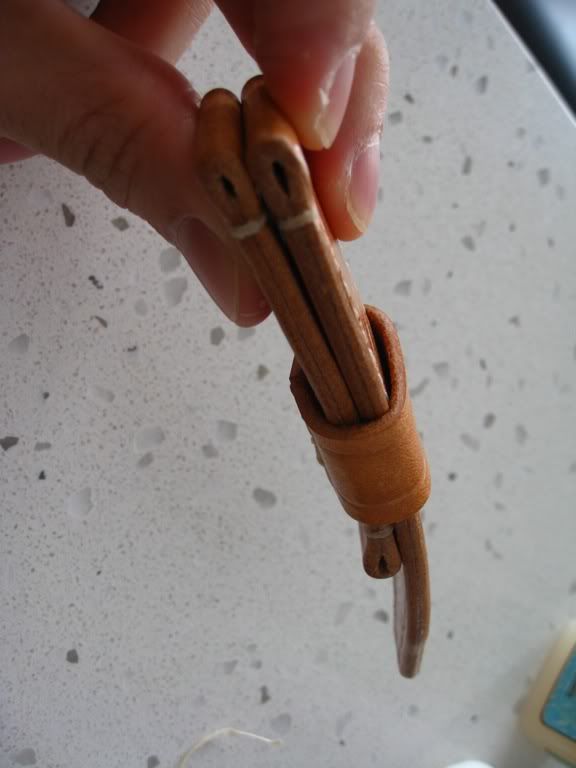
First step is to measure how long the leather piece should be, do this by stacking two completed strap on top of each other and run the leather strip around. Try to underestimate as loose keeper looks undesirable, it should be a snug fit (sorry forgot to take photo of this step).
Once done, cut the leather to size then case it or wet the leather.
Whilst the leather is still damp, run a creaser tool to make a line impression. The impression will remain once the leather has dried.

Rub the leather with a piece of canvas to burnish it.
Apply two layer of gum to the edge and rub friskily using slicking wheel.

Mark the holes for stitching using an awl. By pressing the awl harder, hole can be made. Stitch two part together.


I applied gum into the flesh side of the keeper to seal it so the strap can glide easier. I also apply sealer to the edge to preserve it.

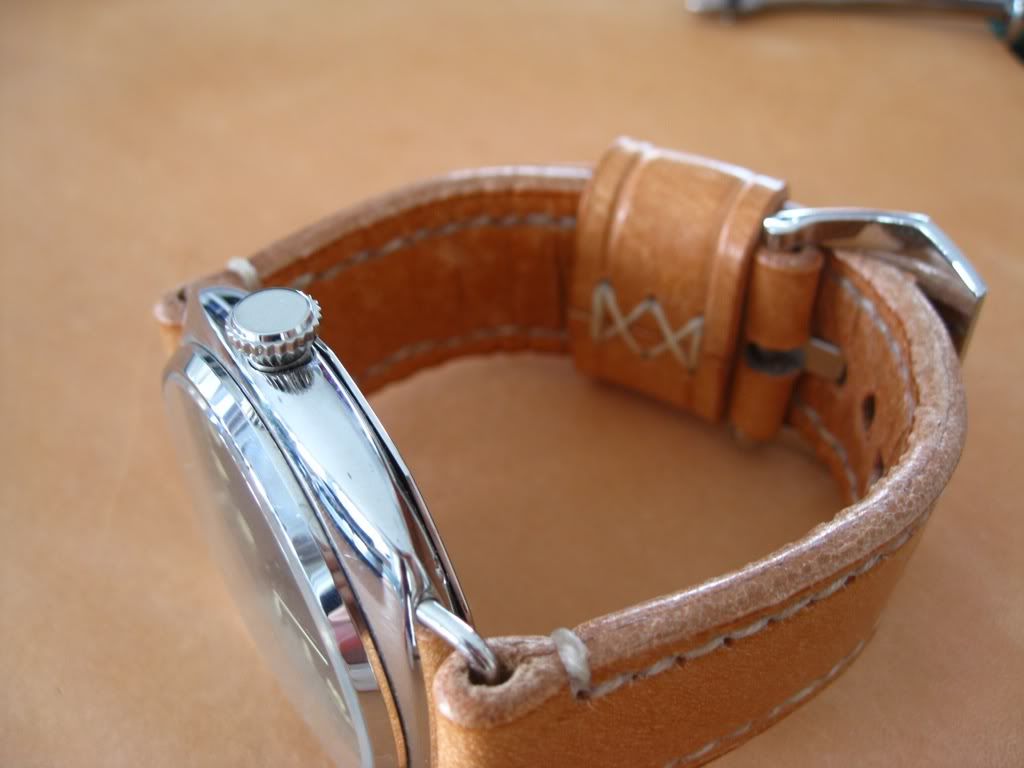
Done!! Test fitting keeper to ensure snug fit. Take a break and admire the work so far.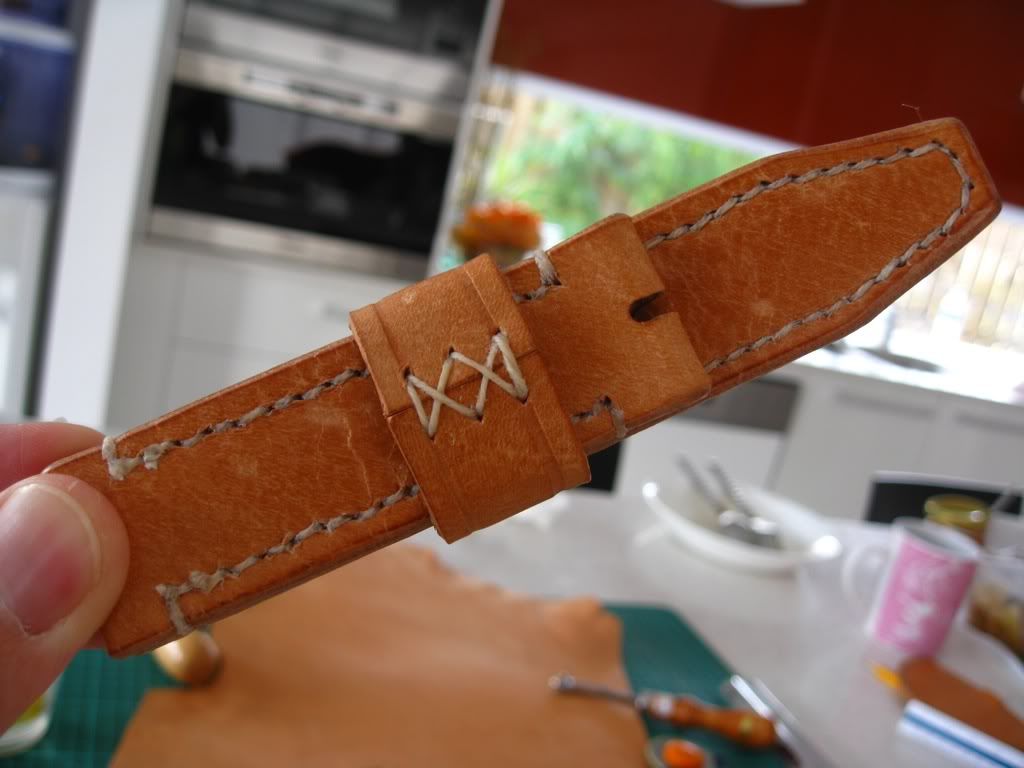

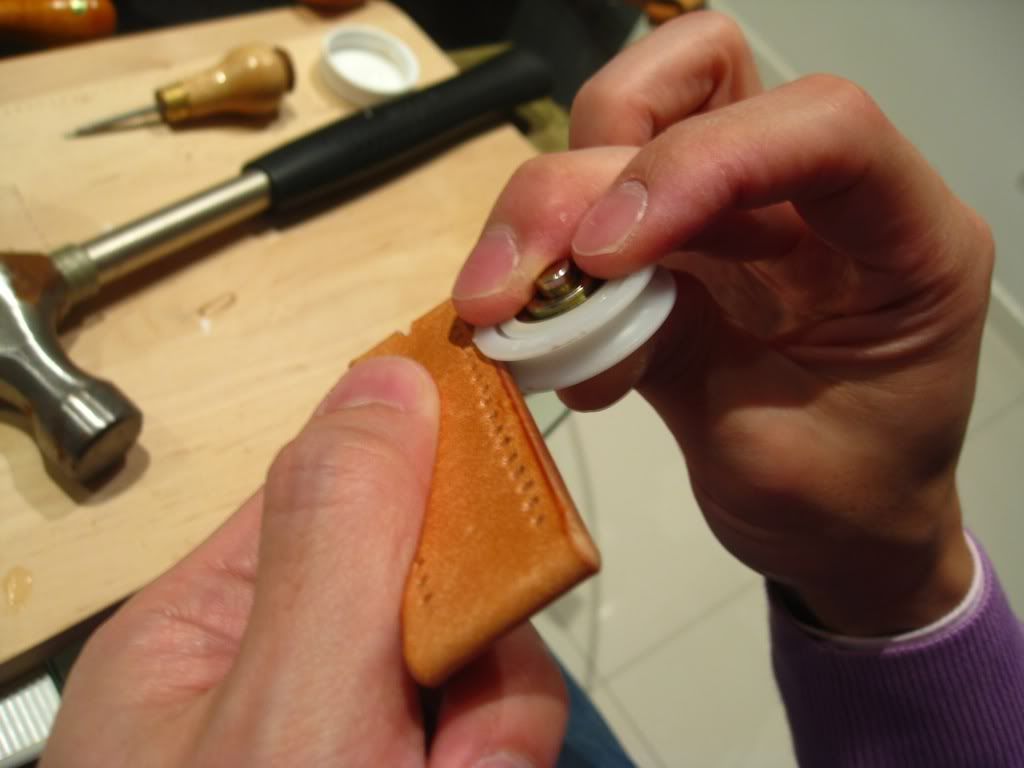
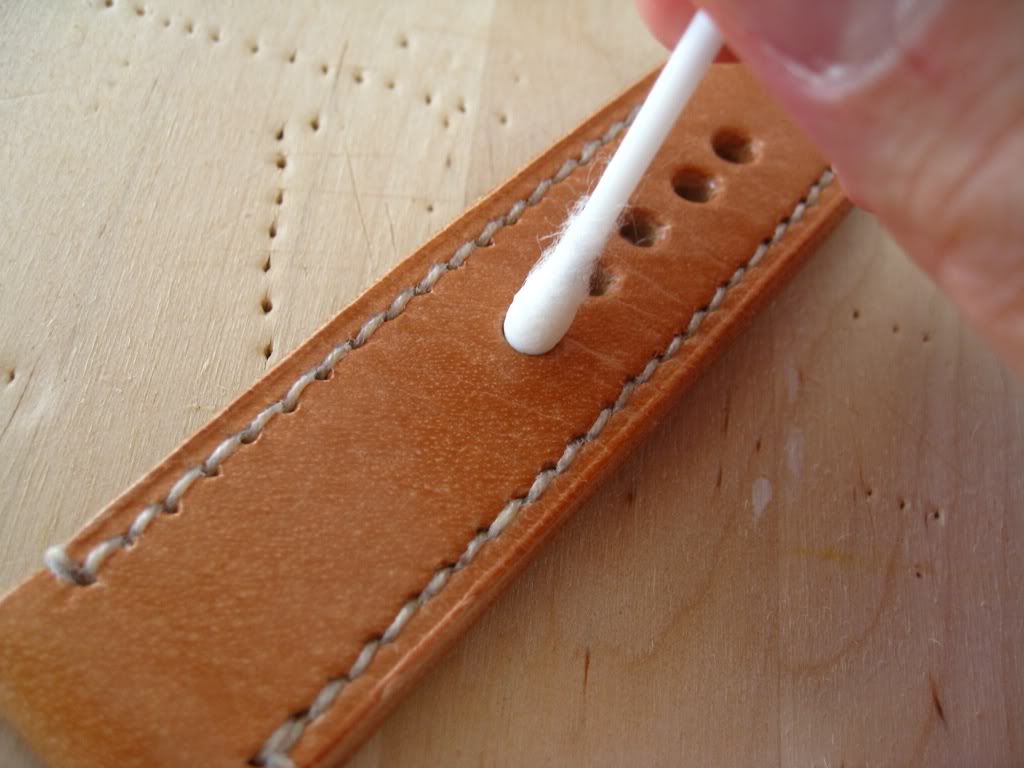
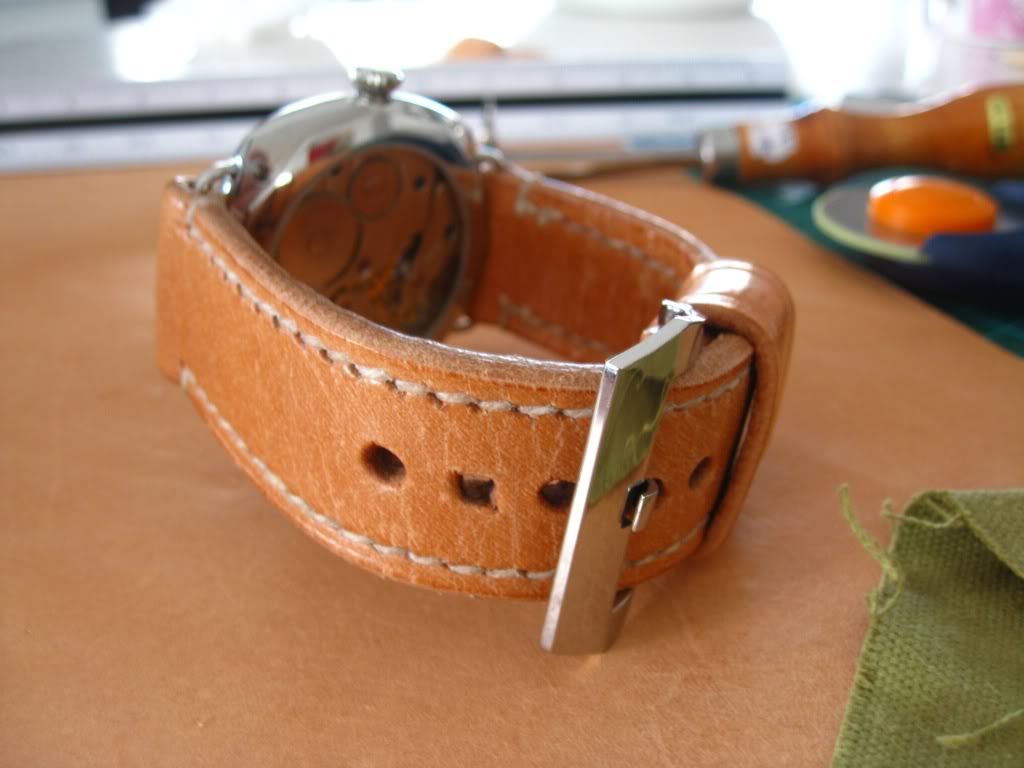
What's left now is to punch the buckle holes.
Use a ruler to ensure evenness (again, I apologise, no photo was taken). Once holes is punched, seal it with a cotton bud soak with sealer solution and burnish them with the punch tool (top and bottom side). This will add to the durability of the strap.
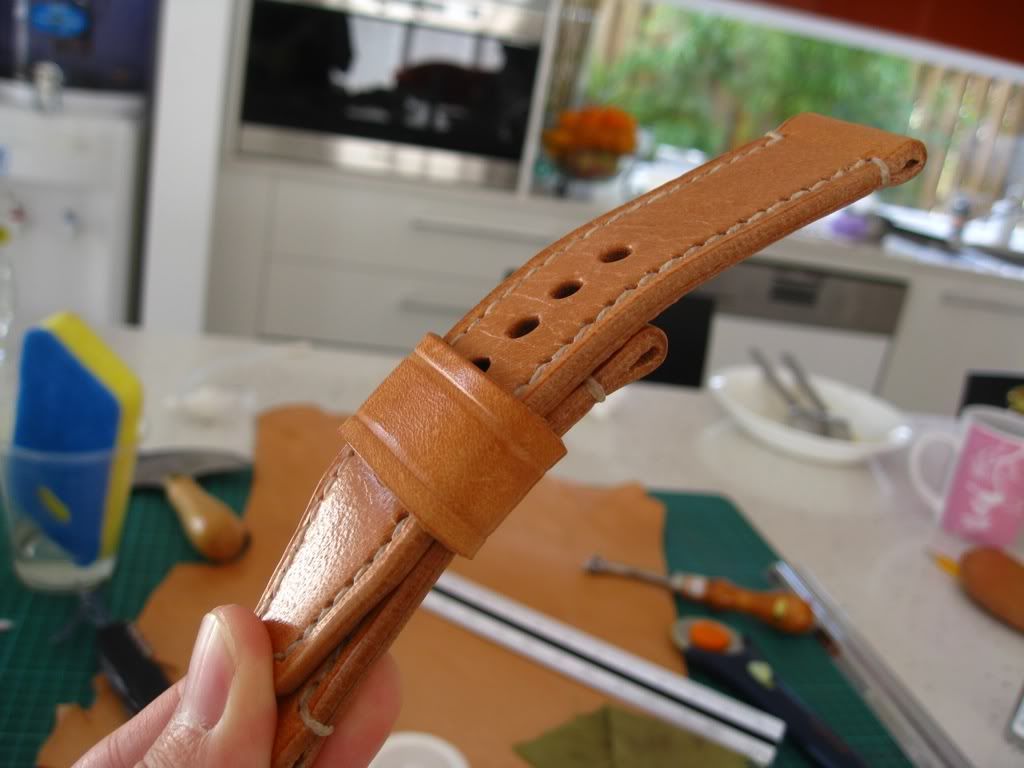
Test fitting a buckle.

Test fit in a watch.
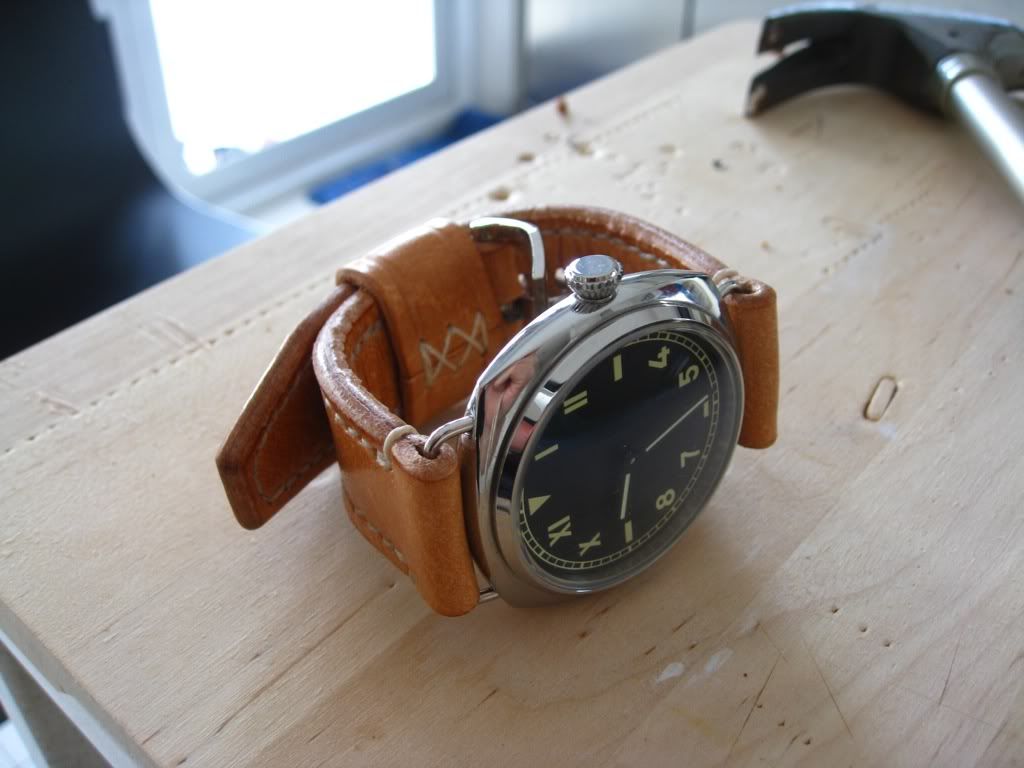
Final words, the tutorial can be apply to other types of leather, but the process will vary. Use this as a guide not as a definitive process. This is only one way of making a watch strap, there are hundreds of other ways of building a watch strap which might suit your style better. My best advise is to find your own style and do things in accordance to your own skill.
Having the correct tool greatly help the process and avoid frustration down the road. Persistent is the key when working with leather, it takes 10 days to learn everything about the leather but takes 10 years to truly master it. I'm on my third year and still learn a great deal about leather every day.
This concludes the strap making tutorial. I hope this will help someone in their quest working with leather. Please feel free to leave a comment or two to make this tutorial better.
If you apply the beeswax does that prevent the natural aging and patina you get with vegetable leather?
ReplyDeleteThe aging and the development of the patina should remain the same with beeswax as it is a natural product. In this case I applied it to enhance the finish, to bring out the grain.
ReplyDeleteIMO, Beeswax alone actually protect the leather the least compare to other leather product, they tend to 'disappear' after few days of constant use.
He what size oblong punch do you use? I'm trying to make some watch straps myself and I think the oblong punch I got is too thin.
ReplyDeleteI use 19mm (length) oblong punch. It's good for most buckle tongue.
ReplyDeleteHi, You tutorial is great. Just to check what type of sealer do you use? Is it specifically for watch straps?
ReplyDeleteThanks for the comment. The sealer that I used is just a normal sealer most leather supply stock. I believe it's intended to waterproof vegetable-tanned leather. I'm not a fan to use it on the surface (plasticky feel) but it's perfect for the edge as it harden and smooth the edge.
ReplyDeleteA wonderful job that you do !
ReplyDeleteIt inspires me a lot.
This is a really interesting post. While I don't make anything w/ leather, the process is fascinating & your attention to detail in presenting it is very appreciated.
ReplyDeleteThanks.
Thanks for the kind words.
ReplyDeleteHey have you thought about making a video series and selling it? Tell what tools are needed etc, I would love to learn how to do this.
ReplyDeleteDan K: Just replied to your email. Cheers.
Deletewould love to know the tools needed too.
Deleteand do the edge beveling really needed to make a watch strap? because i dont see the point of doing it. just asking :)
Basically for the tools you will need:
ReplyDelete1. Cutting tool - Head knife, rotary cutter, strap cutter, etc
2. Edge Beveller - Should you choose to bevel the edge
3. Skiving tool
4. Edge Creaser
5. Stitching spacer
6. Tools to punch hole for stitching - Scratch awl, stitching chisel
7. Oblong punch
8. Hole punch
Those are leather specific tools I use to make straps.
Edge bevelling is done to reduce the appearance of bulkiness and also yield extra comfort on the skin. The strap above is almost 5mm thick, without bevelling it will look almost too thick IMO, but then again this is very dependent on your styling. This is the beauty of leathercraft, you built things according to your style :).
Hi Fateh,
ReplyDeleteDepending on where you are, I purchased my tools from local shop and also from Ebay. If you have Tandy Leather in your area, I'll start with them, otherwise Ebay is a good source.
I'd like to make something like this. Where would I start?
ReplyDeleteGreat tutorial! I wasnt confident to do a two piece strap so I work on an old style nato one as a Xmas presesnt for my Dad.
ReplyDeleteResults can be seen here : http://clamldn.wordpress.com/2013/12/22/how-to-make-a-leather-watch-strap/
Love to know what you thought!
Wow...you have specified every point in your blog about how to make a strap watch, I am impressed dear.
ReplyDeleteI've been trying to find this info in your tutorial, but cannot find it anywhere...
ReplyDeleteWhat are the measurements for the LENGTH for each strap piece, please? I understand you can make them however long you want, but what would be a "standard" length...say to fit around a 6.00"-7.50" circumference wrist?
Thanks...looking forward to any other tutorials you do...maybe some different styles of watchbands?
Hi,
DeleteThanks for the kind word.
That strap is 80mm for the buckle end and 130mm for the long end. My wrist is just over 6.00". If the leather is thicker i would make it longer and vice versa for thinner leather.
I have another blog entry showing Strap I made for a Panerai watch. It's very simple to make, there wasn't any steps but you should be able to picture it. Let me know if you need help with those.
Cheers.
Just found it...looks great! I need to find some nice "vintage" leather like that...
DeleteI'm having trouble burnishing the edges on some Horween leather I've been trying to use...not sure how best to fix that.
Also, do you have any sources for buckles you can recommend? I am in the US, but I am not too picky about where I source them. It looks like the ones you use are very well made and that's what's most important to me.
Thanks again!
Believe it or not, that 'vintage' leather you referring to is the cleanest and whitest veg-tan leather I have ever come across. Some wax treatment and few days on the sun certainly brings out the character.
DeleteIs the Horween you are suing a Chromexcel one? Burnishing is really intended for veg-tan leather. You will need some machinery to successfully burnish other type of leather.
I normally scoured the net and ebay for buckles, no definite sources. You just have to make sure that the buckle has rounded edges which can be easily seen from the picture.
Cheers.
Ahhh...it looks similar to the ammo pouch leather I've seen used for watch bands before.
ReplyDeleteI have a side of Wicket & Craig veg tanned in chestnut, but it doesn't burnish well at all. The edges end up smooshy and sort of collapse when I try to burnish them. Maybe it's the part of the side I've been using.
Thanks again for the tips!!
Hello!
ReplyDeleteCool tutorial! Could you please explain, how to make that edge loop, at the ends of stitch? I am talking about buckle strap. That loops, how did you hide knots?
Hi Tommy,
DeleteI just tie a knot as close as possible to the stitching hole. If you are using waxed thread you can simply back stitch few holes, no need to tie into a knot, the friction is enough to hold the thread in place.
Regards,
Reza
Great tutorial, real craftsmanship. Thank you.
ReplyDeleteThis comment has been removed by a blog administrator.
ReplyDeleteThis comment has been removed by a blog administrator.
ReplyDeleteMas beli tools dan perlengkapannya dimana yah klo di Indonesia? salam
ReplyDeleteMas beli tools dan perlengkapannya dimana yah klo di Indonesia? salam
ReplyDeleteHalo,
ReplyDeleteKalau di indonesia saya kurang tahu di mana bisa beli tool tersebut. Kamu bisa coba http://goodsjapan.com/. Ini tool dari Jepang, ongkir gratis. Untuk informasi, saya sudah sering beli, kualitasnya bagus. Transit time sedikit lama.
Regards,
Reza
makasih mas, ternyata di ebay ada kit-nya, tinggal refer tools yg mas sdh mentioned diatas.. terima kasih mas infonya... (Y)
DeleteLeather strap or metal band? Each material has its own pros and cons, that’s why they don’t eliminate each other and co-exist in the watch market. You had better go to a local store to get the real feeling before making the purchase. Lots of people only make their decision through pictures on retailers’ websites, and then get disappointed when the Wrist watch band is not as comfortable as they thought, or it just simply does not suit their using purpose and routine.
ReplyDeleteI know your expertise on this. I must say we should have an online discussion on this. Writing only comments will close the discussion straight away! And will restrict the benefits from this information.
ReplyDeleteiwatch strap
You have performed a great job on this article. It’s very precise and highly qualitative. You have even managed to make it readable and easy to read. You have some real writing talent. Thank you so much. Best Leather Repair Kits For Couches
ReplyDeleteToday, while I was at work, my cousin stole my iPad and tested to see if it can survive a twenty five foot drop, just so she can be a youtube sensation. My iPad is now destroyed and she has 83 views. I know this is entirely off topic but I had to share it with someone! stone bracelet set uk
ReplyDeleteNice Article
ReplyDeleteThanks for Sharing
Buy Watch Straps Online from Our Shop, here you can buy Silicone Apple Watch Bands at best price.
More info visit our site.
apple watch band leather Thanks for a very interesting blog. What else may I get that kind of info written in such a perfect approach? I’ve a undertaking that I am simply now operating on, and I have been at the look out for such info.
ReplyDelete