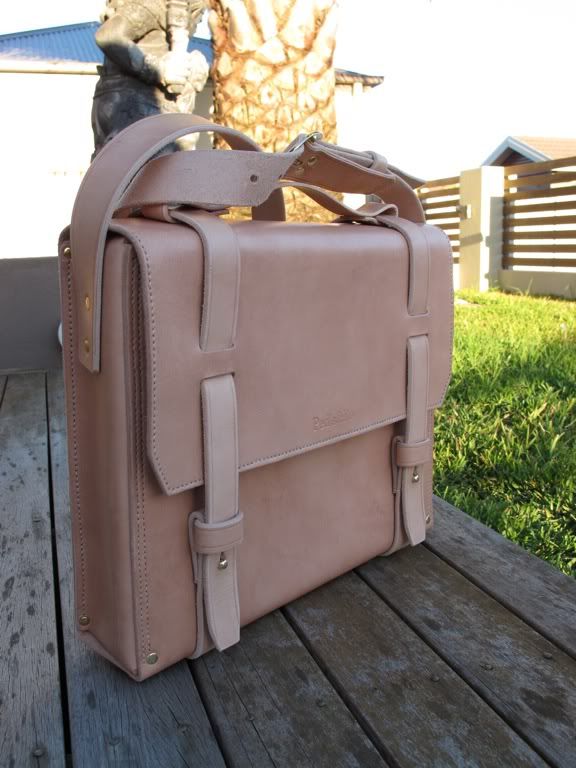
It takes 6,215 centimeters square of leather, 10 meters of leather-edge thinned and smoothed out, 700 stitching holes, 13 meters of stitching thread and 32 rivets to complete this project.
I was approached by Michael via email to build him a Messenger bag. He explained to me his great interest in Vegetable Tanned leather and must have a bag made from this leather. He liked the look of the Laptop Bag prototype and wanted a similar style for the messenger bag that he has envisioned. He's quite particular on the style and even drew sketches using a computer program which is fantastic! After many exchanges of emails, we finally settled on the design, dimensions and other details.
The bag is constructed from 4mm (10oz) bark tanned bridle leather. I procured the leather from a tannery located in the Ballarat region of Victoria. The tannery supplied the leather during gold rush in the area back in 1800s. The leather itself is beautiful, lots of character showing in the leather. It has a slightly different tint from the other vegetable-tanned leather I have bought before, possibly due to the differences in tanning material. It's a tough leather to cut but also very supple and easily mold-able. It's the perfect foundation for the project.
The bag is to have two internal pockets with closure and a couple of pen holders. To retain the 'cleanliness' look on the exterior of the bag, a divider is utilised for the pockets and pen holders. Other than the divider, the bag's interior is raw.
As per the laptop bag prototype, a wrap around straps with handle is also incorporated into the design. We decided to do without buckles, a stud closure is used instead. A buckle however is used for the shoulder straps, which is attached on the side of the bag.
Double cap rivets is placed strategically throughout the bag for durability and longevity purpose. They will also help preserve the stitching thread from excessive wear.
It has been a rich experience with this project from start to finish. Learned new techniques that I never imagined could work. The bag itself is fantastic, the thick leather gives the bag real structure and presence. It has the casual tone of a messenger bag and the formality of a briefcase. I would love to see the patina developed in this bag.
It was sad to see the bag packed up and sent away. I would proudly wear it as my daily bag, however it's destined to be with it's deserving owner.
As always, photos of the completed bag: