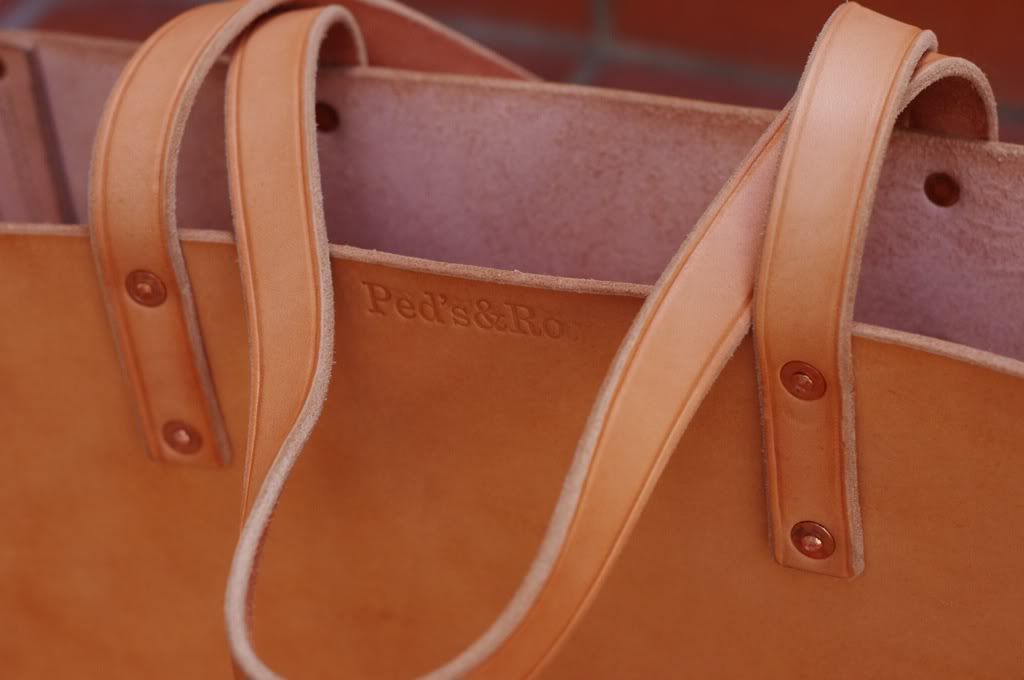
It's constructed using 10oz (4mm) bridle leather in natural colour. Construction method is simple, the main body of the bag consists of three components and is secured with copper rivets on the bottom and each corner of the bag. Stitching is done in natural colour. The handles are made from one long piece leather, secure with two copper rivets on each side. All exposed edges was rounded and smoothed out.
Although it is a very simple bag, stitching the rear portion of the bag was quite a challenge due to the limited space, it had to be done very slowly. I've also shaped the bottom rivet so that it can act as a feet for the bag, this is to reduce the wear on the grain of the leather. The shaping was done with different size riveting tool and finishing up with 'ball and peen' hammer.
Overall, I'm very happy with the way this bag turn out. The uniformity of the material gives the bag minimalist elegant look.
I really am looking forward to see the patina in person on the bag after few months of usage.
As always, some photos of the completed bag:
 |
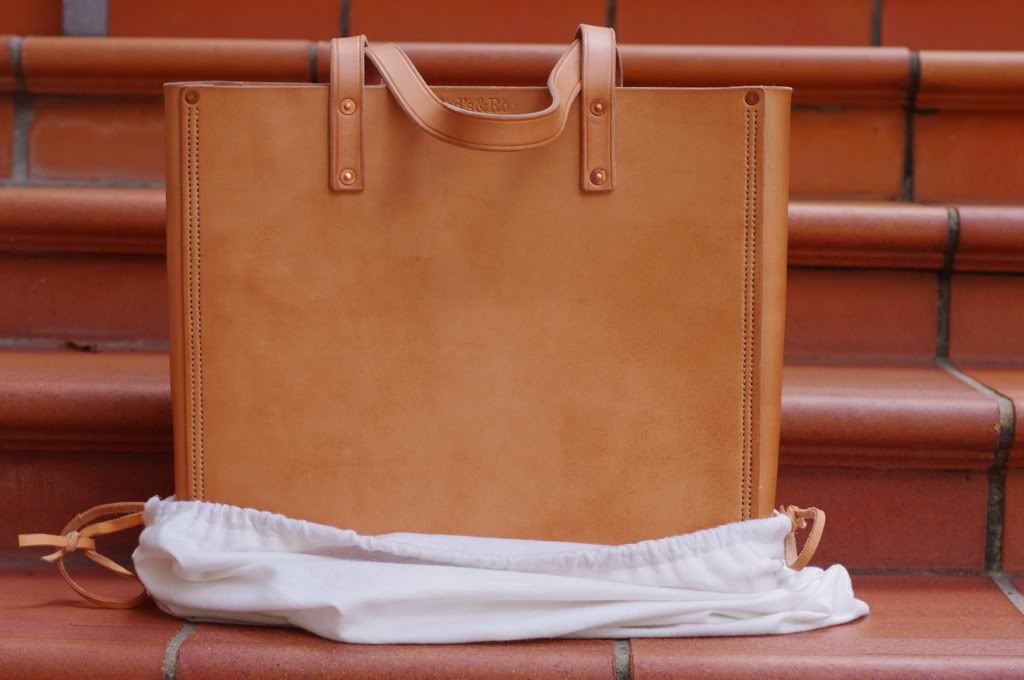
| Complimentary cloth case with leather draw-string |
 |
 |
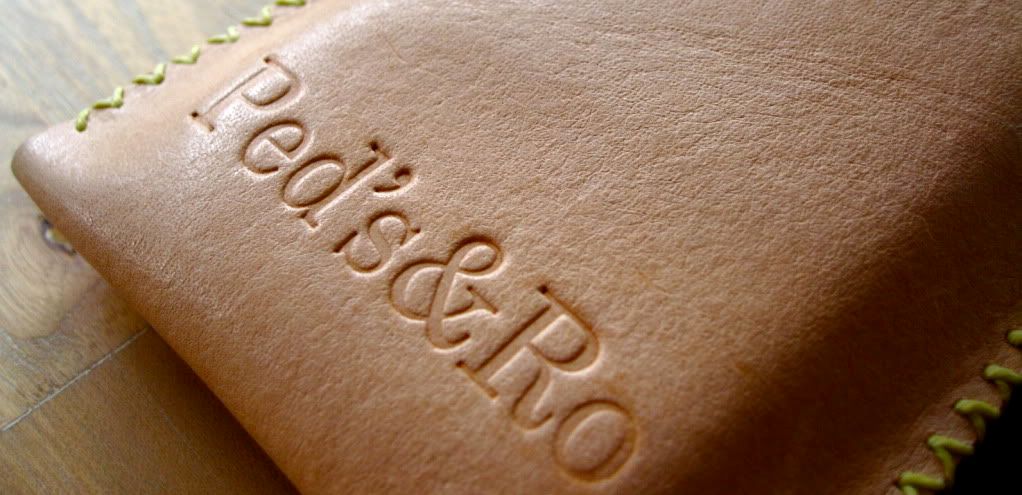
| Logo |
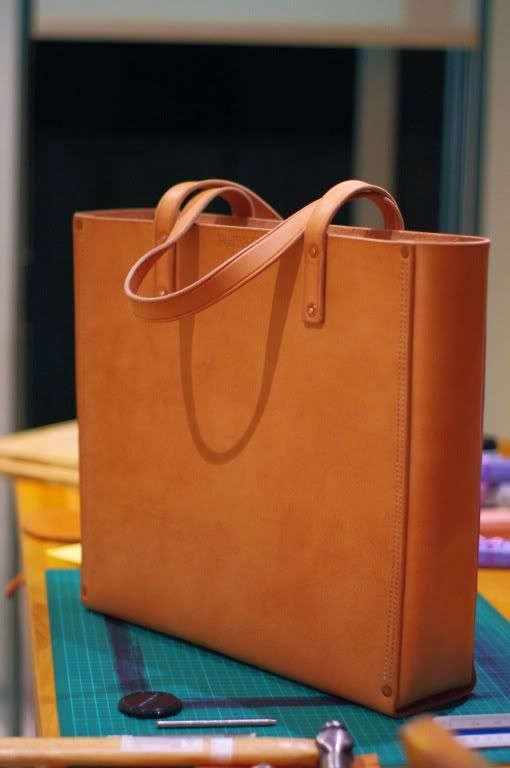 |
| Side profile |
 |
Beautiful bag. I'm curious why you choose to use rivet & burrs instead of double caps or rapid rivets? Also, any thing new as of late?
ReplyDeleteHi There,
ReplyDeleteThanks for the comment.
I always try to use the best material in my product whenever possible. Solid copper rivet is vastly superior in term of strength compare to a double caps rivet. With normal everyday use, it's quite hard to damage/dislodge/bent a double cap rivet which makes it near impossible to damage/dislodge/bent a solid copper rivet. In term of neatness and turnaround time, double cap win hands down.
I'm working on another version of tote bag as we speak, I'm hoping to get this done in the next couple of weeks, blog post will follow for sure.
Visit our site at https://www.obenaufs.com to take advantage of our year around Holiday special offers. Obenauf's is your best Leather Protection. Always treat your leather with our restorative oil or LP to replenish all of the necessary oils that keep your leather healthy. This combination pack provides cleaning and conditioning in two easy steps that are natural and safe to use.
ReplyDeleteTell me where you buy Copper Rivets & Burrs.
ReplyDeleteI normally buy them from my local leather supplies. There are plenty on Ebay as well.
ReplyDeleteHello Reza,
ReplyDeleteplease can you send me a tutorial about that rivet down in the corner, I wonder if you used a handy plier or with the stand machine? and if it's possible the pattern of this tote bag,
best regards
Hi,
DeleteFor the rivet down in the corner, I only use a ball peen hammer and a slab of granite underneath. I cut the rivet to size first before peening them.
For all of my bag, I don't actually use any pattern. I keep the dimension in numbers and use ruler accordingly. I'm not a big fan of patterns especially for making my bag and the way I build the bag. Unless you have access to a laser cutter that can cut acrylic to a metre long, I suggest do without a pattern for accuracy reason.
I would like to make this agenda for a friend but am unable to get the pattern with dementions to come up if you could send it to my email I would greatly appreciate it address is ldennett50ld@gmail.com
ReplyDelete