Ped's & Ro Leather Blog

Ped's & Ro Leather Blog

Tuesday, March 1, 2011

Update...'Tool-Box' Bag

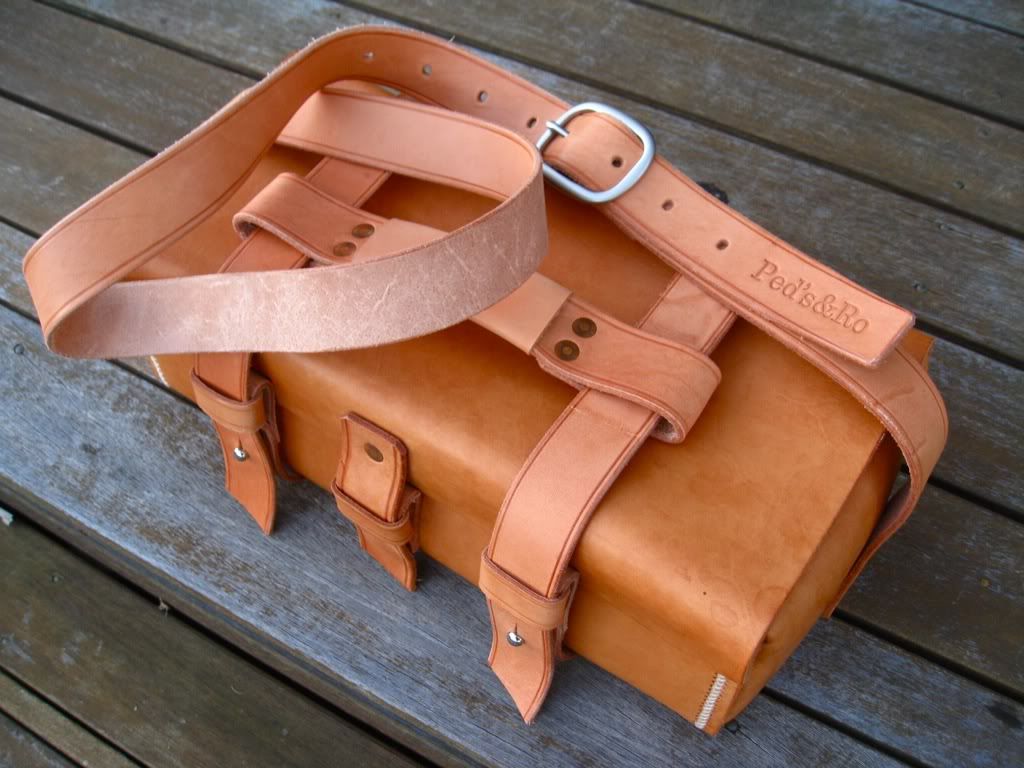
Finally! I have completed the supporting straps with handle. Look purposeful and rugged. I have tested the bag with 9 kilo of high density weight and it didn't even break a sweat, will try with heavier weight soon.

Here's the pictures:


Friday, February 18, 2011

Money Bag....

Made this bag a while back as a prototype and was originally made for my iPad, but it ended up being too small (oops!)...I used the thinnest veg-tanned leather I have in my inventory for lightness and texture.

The strap is constructed from scrap leather that I have lying around, which is handy, I only need to seal the flesh side for cleaner presentation.

I also experimented with different type of stitching. I found that saddle stitch doesn't work well with thinner leather across long surface, it buckled the leather. The cross stitch on the other hand is perfect since it spread the tension across the surface of the leather. I implemented this finding on the 'Shoe-Box' bag, perfected it by making the stitching space smaller.

Two piece rivets was used (I haven't discovered Copper rivet yet), quick and easy to apply, also looks great on the bag.

Why the 'Money Bag' name? Earlier this week, me and my wife 'pop' open Kenny (our piggy bank). We ended up with lots of coins and was wondering what will be the best way to transport it to the bank. Plastic bag is no good, she didn't want to use one of her bag either in case it can't take the weight. We can use the 'Shoe-Box' but it was too big, then I remembered I made a smaller bag that will be perfect for the task.

We loaded up the bag with the coins, everything fits nicely and the weight didn't seem to bother the bag (3Kg worth of coins). It actually looks better with all that weight in the bag, looks more organic. Now the wife is claiming the bag to be hers, she really like using it after the bank trip.

Here's the obligatory pictures:


Wednesday, February 16, 2011

Dreaming of Leather...

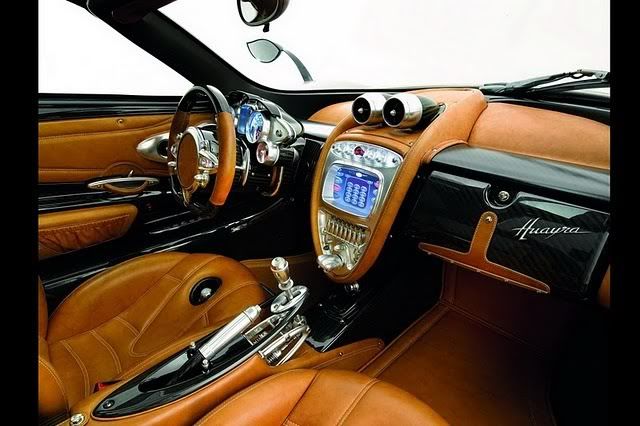
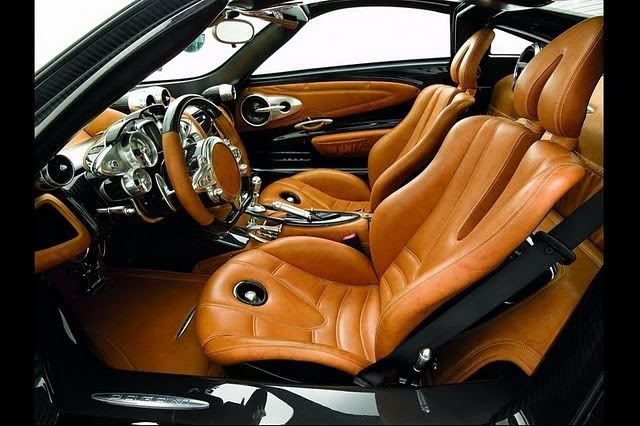
Leave it to Italian to design a sexy interior for a car. I've always admired the interior of an Italian car, be it an Alfa, Lamborghini, Ferrari or Maserati. They all share a common ground, elegant and sophisticated.

One Italian car manufacturer take this to the next level, in my opinion they have created the sexiest interior a car can have, very exotic and elegant at the same time, rare combination.

The car manufacturer is none other than Pagani. What they did with the Zonda is mind blowing, but in the case with Huayra, it's just out of this world. Well, I'll let the pictures do the talking.


I know what I'll dream of tonight...

Tuesday, February 8, 2011

Monday, February 7, 2011

A touch of leather

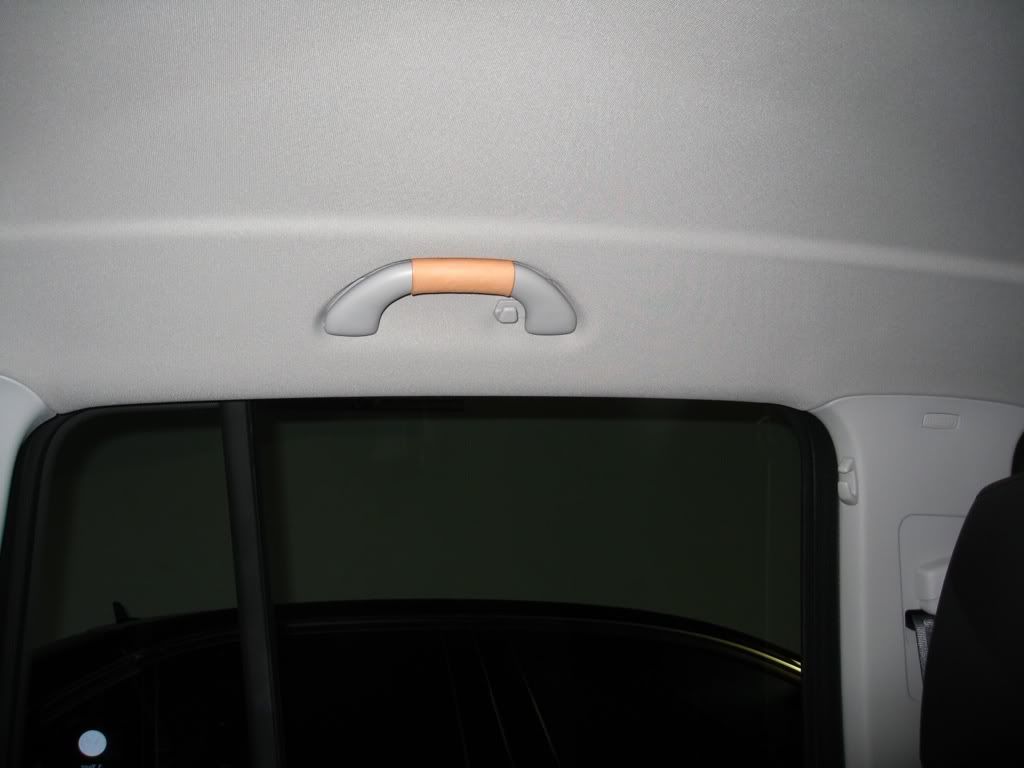
We picked up a new car recently. It's a VW Tiguan, looks and drives beautifully.

I'm adding some Ped's & Ro touch for the car.

Starting with the key chain, naturally...


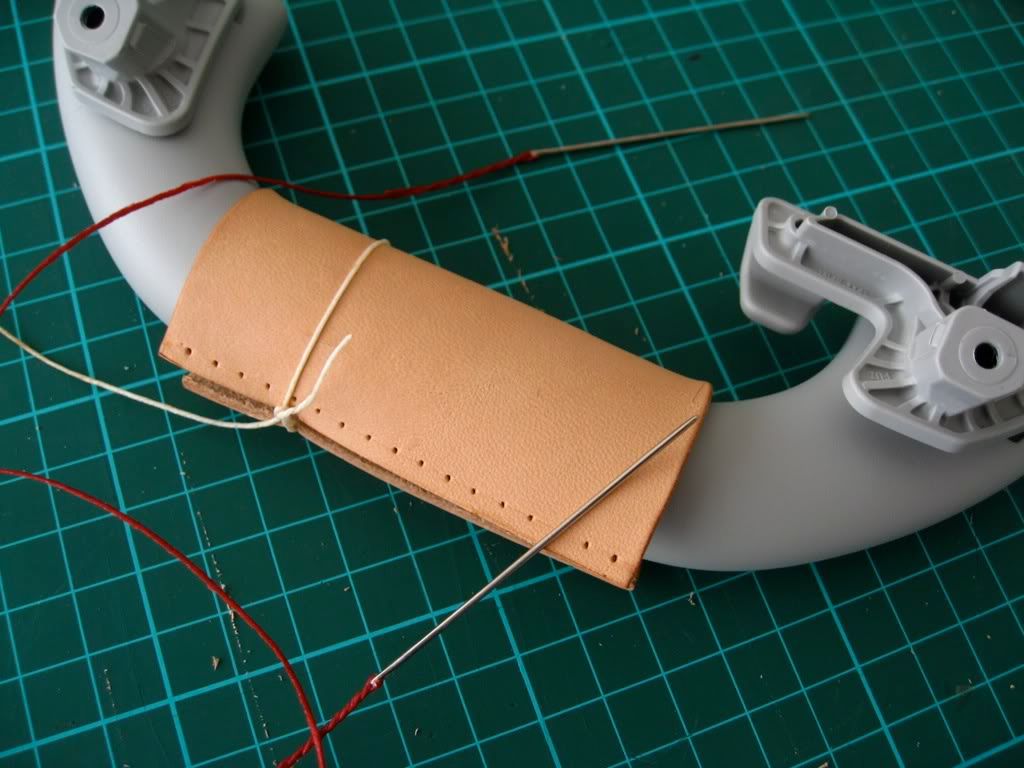
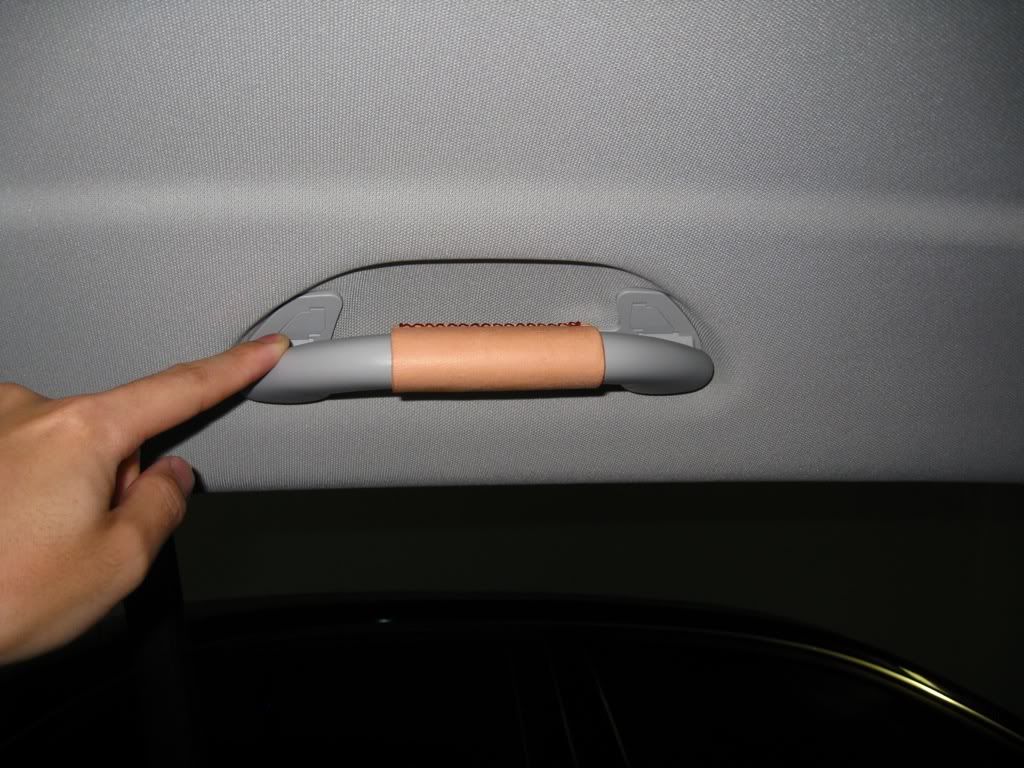
Next up is the handle grab, nice little thing to start the project.


Getting ready to stich


I'm utilising cross stitching method for look and strength


Final step is casing the leather with hot water, hopefully it will shrink to a nice snug fit


I'll be keeping an eye on how the leather holding up. It should develop a nice patina quite quickly due to the environment it resides. I have other ideas where to put leather accent in the car, watch this space!!

Monday, January 10, 2011

Workshop

Just wanted to share my workshop, this is where all the action is happening. I have a rather large laminated birch island benchtop in the middle to accommodate big leather hides. I build it myself using IKEA parts. It's robust enough to take a pounding and social enough to host a Poker games with few mates.

Saturday, January 8, 2011

Tools

I strongly believe in a good quality tools. It's like an investment. This of course come with a price, more often than not, multiple fold on the price of the lesser quality tools. However, with proper care and handling, these high quality tools will last for lifetime, it comes out cheaper at the end. Not only that, it will also deliver a better and consistent result. My motto whenever I want/need to buy an expensive tools is 'Cry only once not many times'.

In my opinion, the cutting tool is one of the most, if not the most, important tool in the leathercraft. A clean and straight cut is the foundation of a good product. I find myself always looking for the best knife or cutting tool over the web or local shop. Right now, I have four different tools for cutting; 1) Head knife 2) Swiss Army knife 3) Logan Adapt-A-Rule with straight edge and 4)Mini ceramic knive.

Head knife is one of the most versatile knife you can get your hands on, it allows you to cut straight and curve. It will also skive a leather rather quickly. However, certain skill is required before it can be fully utilised. My experience with this type of knife has been wonderfull. I have to admit that my skill with this knife is not up to scratch, haven't been able to cut a nice curve with this.

Swiss army knife is very useful for those small to medium project. Extremely reliable for cutting straight edge. It can also do cut curve rather well. The blade is robust enough for cutting heavier leather not to mention extremely sharp out of the box.

Some people will settle on 'Stanley' knife for cutting straight edge. I've tried using those knife, I didn't quite like it. The blade is thin and tend to flex a lot when cutting heavier leather. The cutting tip is also 'gritty' it tends to grab the cutting board. An upside with the Stanley is you can economically replace the blade whenever it's dull.

My secret tool for cutting long straight edge is Logan Adapt-A-Rule. This is designed for Graphic purposes, but I don't see why I couldn't 'adapt' this tool for leather work. This is a nifty tools, basically it's a long aluminum ruler (comes in 3 different sizes) with gutter for the blade attachment to glide through. It uses Stanley type blade, very economical to replace.

The latest tool I bought is a small ceramic knife. I was fascinated by a ceramic knife few months ago, it's an extremely hard material that stays sharp longer. Kyocera pioneered the technology for kitchen use.

I found a small company in Canada that manufactured folding ceramic knife, which will be perfect for leather work. I decided to email the owner to see if he ships to Australia. To my surprise he often ships one of his product to Australia for cutting kangaroo leather. Kangaroo leather is the toughest leather you can get your hands on. If it cuts roo leather just fine it will definitely handle cow leather without drama. Placed my order and received the pocket knife 2 weeks later.

First impression, I didn't realise how tiny the knife is, was expecting a bigger knife. Moving on to scrap leather to assess it's cutting ability. First up, 2.5mm oiled leather, cut the leather like a butter without much effort, impressive!! Next up is 3.5mm hardened veg-tanned leather, having a bit difficulty cutting this, I suspected it's the size of the blade and the knife itself, it doesn't allow me to exert enough pressure. Tried on multiple veg-tanned and chrome-tanned leather, cut like a butter, this one is definitely a keeper. To sum it up, it's a much sharper blade than my Swiss Army knife, as a result it doesn't require extra pressure to cut through the leather, however the size is problematic for heavier leather. Rest assured I will be ordering a bigger ceramic knife from his company (http://ceramicknife.org/).

Some picture of the tools:


Some Sharpening stone to keep the tools sharp: