We are finally finished with our website!! Please have a look at Ped's & Ro and tell us what you think.
New blog post will be started on the new site. This blog will still be open and monitored, any comment will be replied accordingly.
Thank you for being patience.
Ped's & Ro Leather Blog

Monday, March 9, 2015


Sunday, February 22, 2015
Veikko: The Backpack - Slim
Backpack has lately became a fashionable thing to carry behind your shoulder, it is functional as well as stylish.
I was recently commissioned to create one. Unlike the hybrid Messenger/Backpack I made a while back, the request was to create a more traditional looking backpack.
During my research I stumbled upon traditional Japanese Backpack which is called 'Randoseru'. The styling really resonate with me and decided to use this as an inspiration. Traditional 'Randoseru' was designed to carry a full day's worth of student's items hence the need for the large space. The client however demanded a slimmer version to make it more wearable as well as versatility with different outfit.
Photo of the final product:
I was recently commissioned to create one. Unlike the hybrid Messenger/Backpack I made a while back, the request was to create a more traditional looking backpack.
During my research I stumbled upon traditional Japanese Backpack which is called 'Randoseru'. The styling really resonate with me and decided to use this as an inspiration. Traditional 'Randoseru' was designed to carry a full day's worth of student's items hence the need for the large space. The client however demanded a slimmer version to make it more wearable as well as versatility with different outfit.
Photo of the final product:
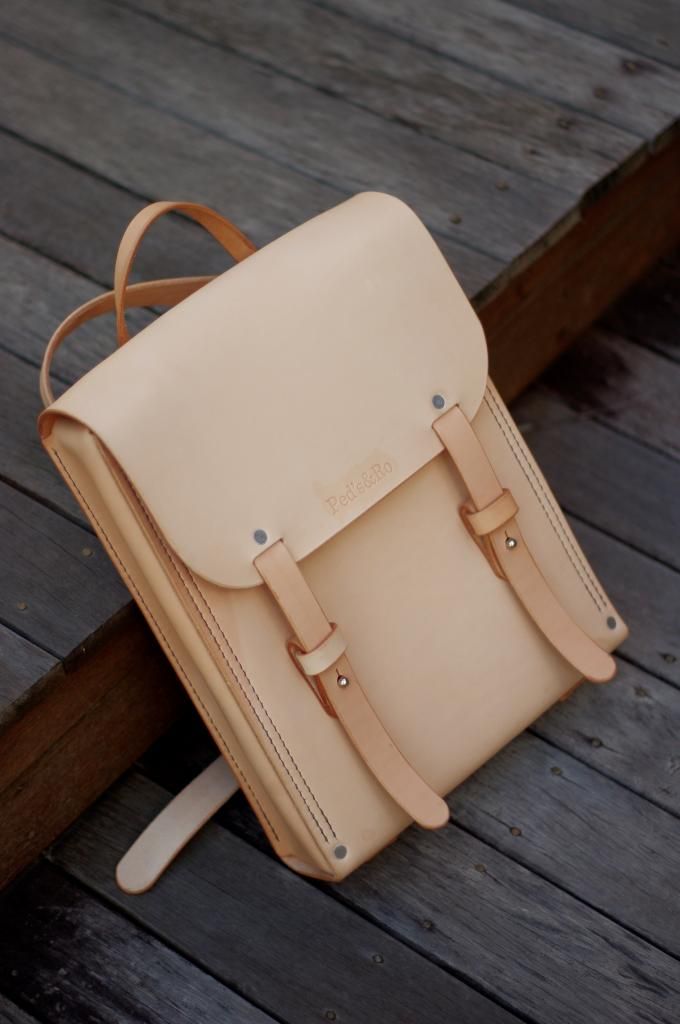 |
| Front Look |
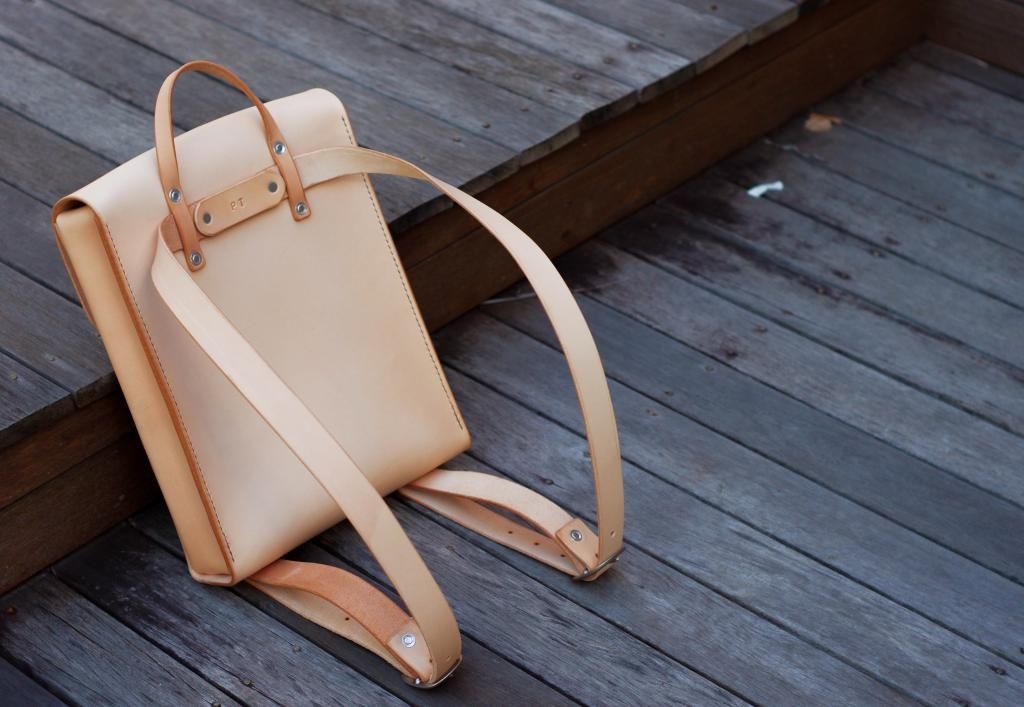 |
| Back look |
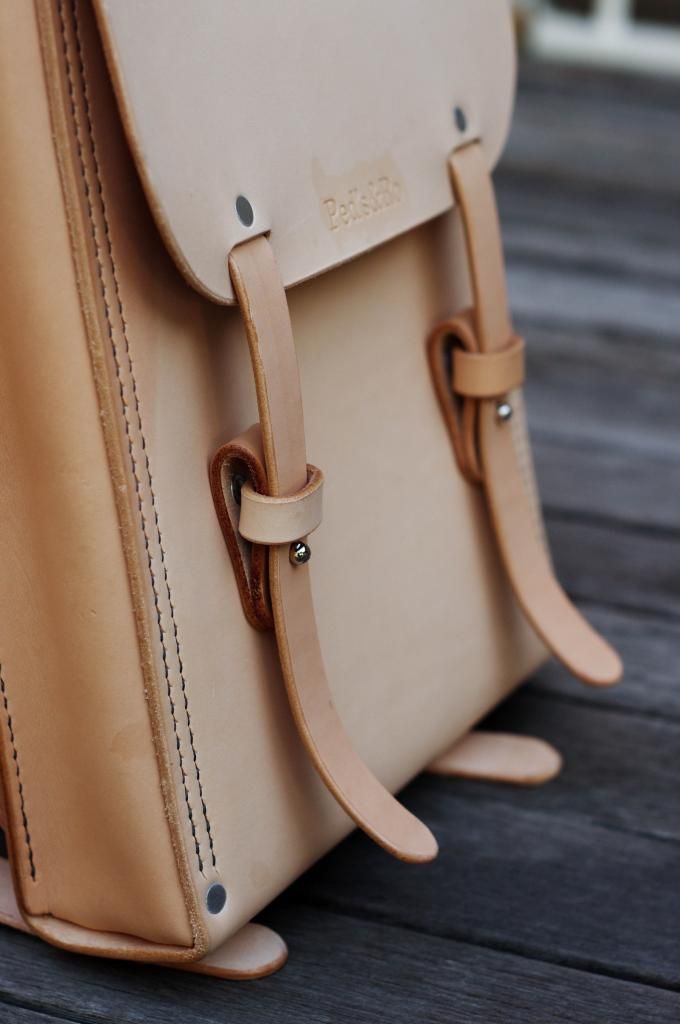 |
| Closure details |
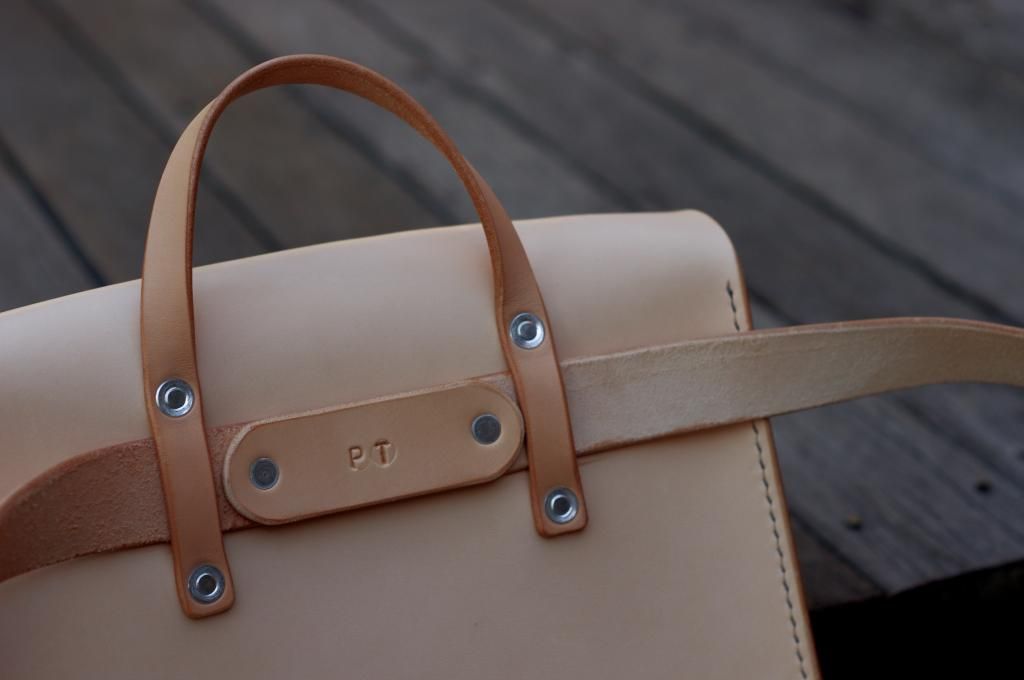 |
| Strap details |
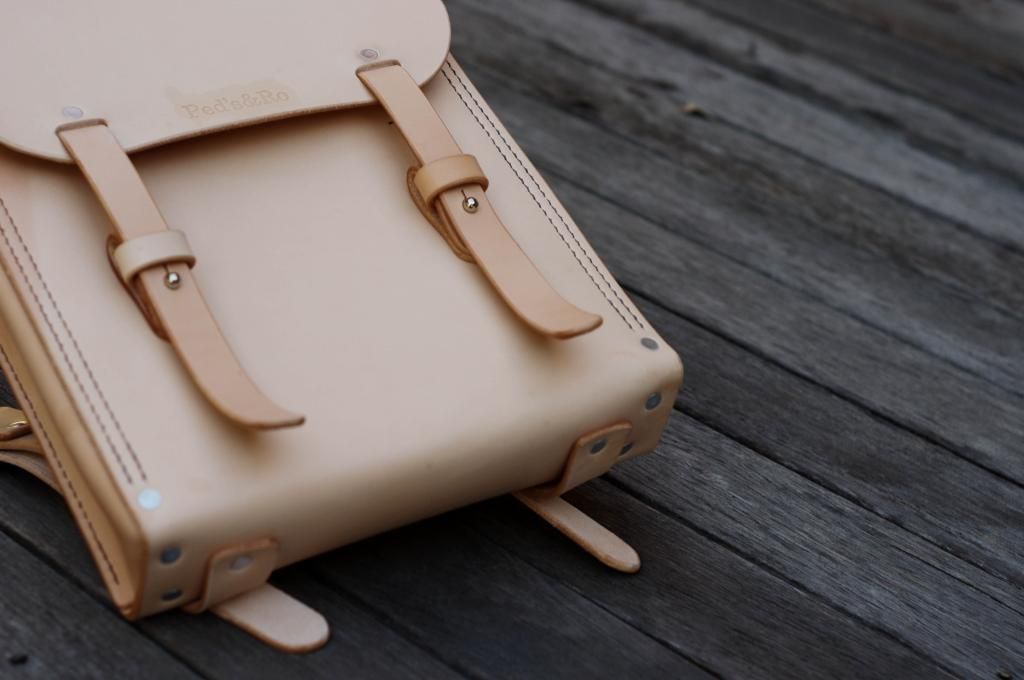 |
| Strap Attachment |
Friday, November 14, 2014
Kimmi: Redesign
As the title suggest, I have recently made some slight adjustment in Kimmi bag.
I felt that the double closure does not give the right balance for the bag. A single centre closure was selected instead. By having only single closure also makes the bag easier to open and close.
The result is a much more simpler looking bag with better proportion.
Photo of the new Kimmi:
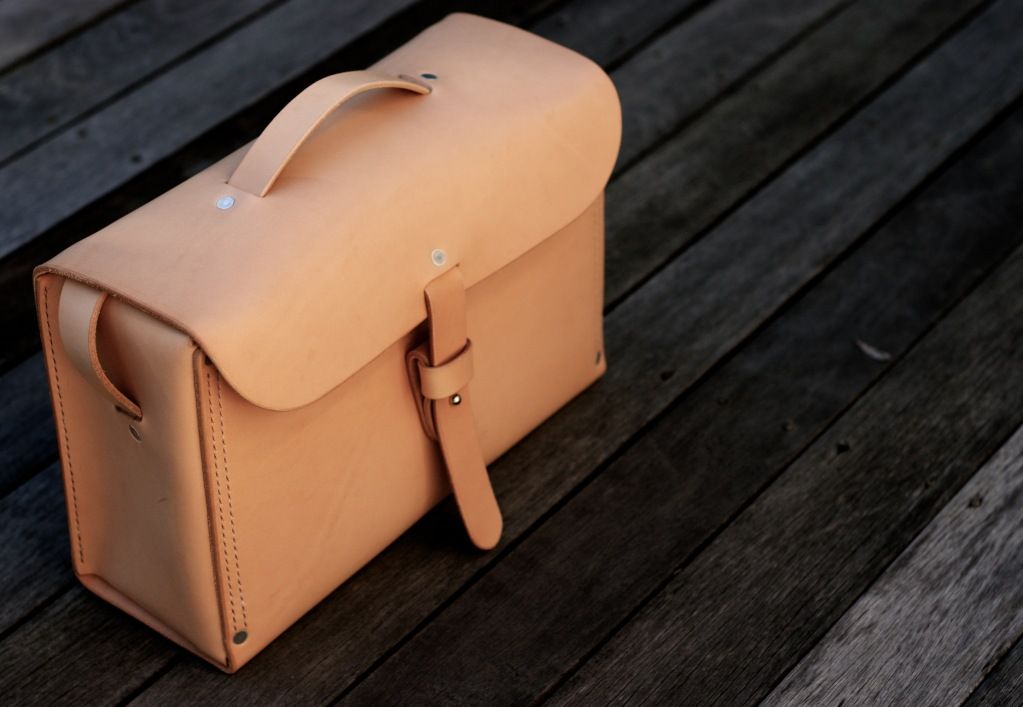 |
| Redesign Kimmi |
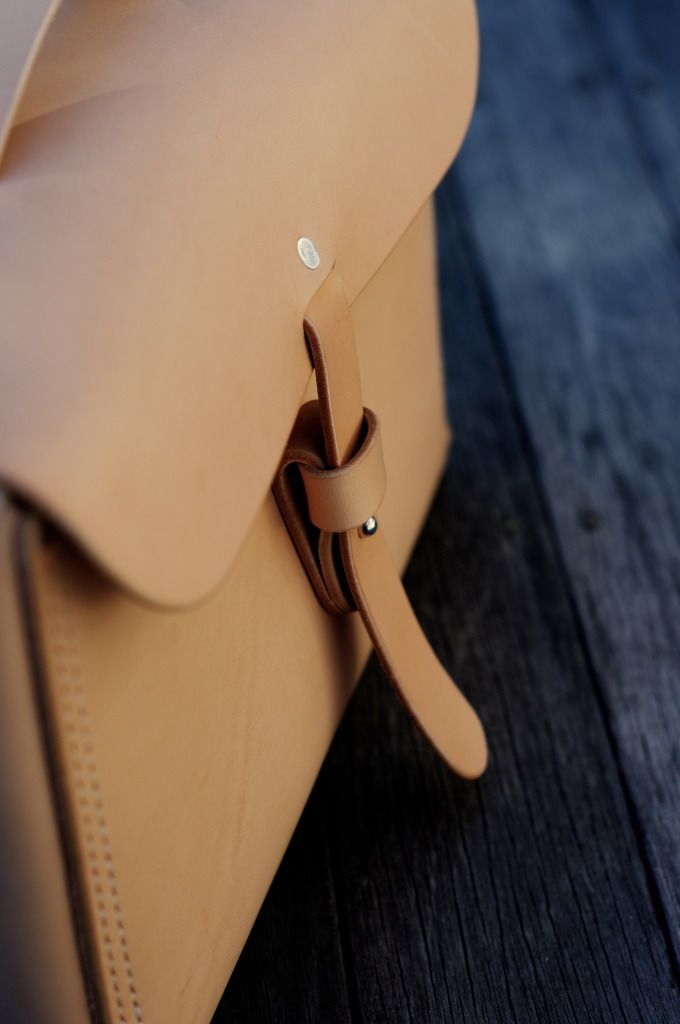 |
| Detail photo |
New colours
Over the past few months I've been experimenting with coloured veg-tan leather. After few trials and purchases from different supplier, I'm happy to say that I have found such leathers.
My criteria is simple, high quality. Smooth and supple 'hand', burnished flesh side, rich aroma are some of the characteristic of such leather.
When crafting bags with these coloured leather, special consideration needs to be given in regards to finishing the edge. There are two ways of finishing edges, coating with special paint or hand burnished. I have opted for hand burnished method. I believe this is the only way to finish bags made of vegetable tanned leather. The end result provides rich and three dimensional looking edge that cannot be replicated by just simply painting it.
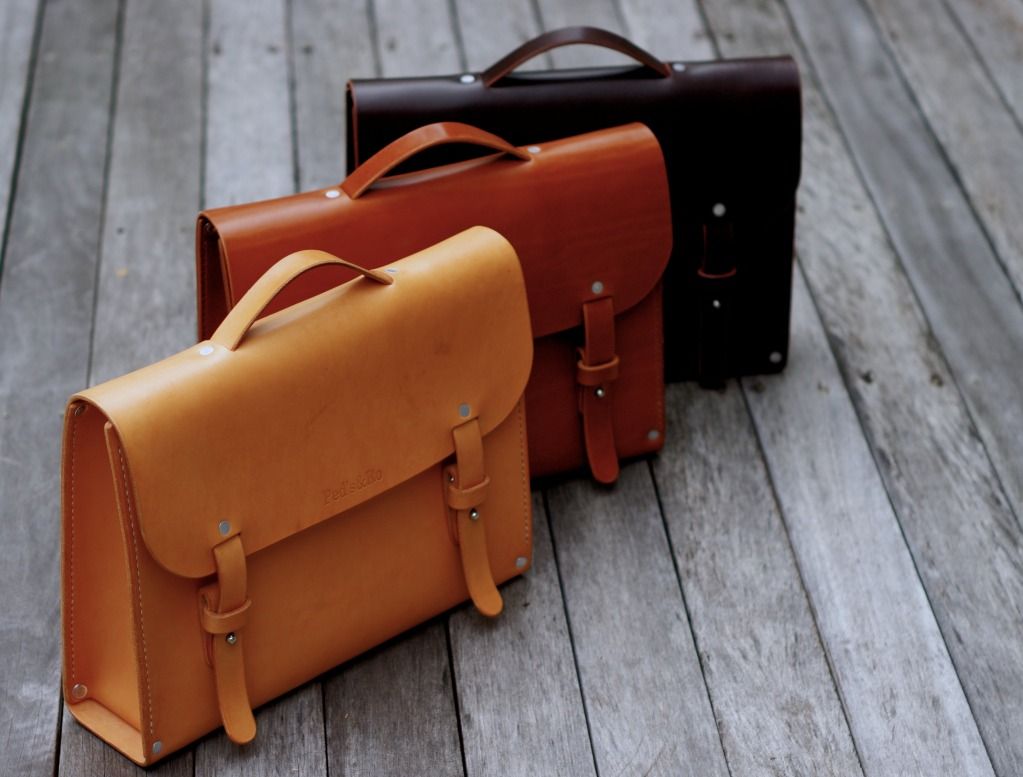
For now I have chosen Dark Chocolate and Cognac colour to compliment the existing natural veg-tan. There will be more colour coming, I'm still trialling them and will release it once I'm happy with them.
As always some photos:
My criteria is simple, high quality. Smooth and supple 'hand', burnished flesh side, rich aroma are some of the characteristic of such leather.
When crafting bags with these coloured leather, special consideration needs to be given in regards to finishing the edge. There are two ways of finishing edges, coating with special paint or hand burnished. I have opted for hand burnished method. I believe this is the only way to finish bags made of vegetable tanned leather. The end result provides rich and three dimensional looking edge that cannot be replicated by just simply painting it.
For now I have chosen Dark Chocolate and Cognac colour to compliment the existing natural veg-tan. There will be more colour coming, I'm still trialling them and will release it once I'm happy with them.
As always some photos:
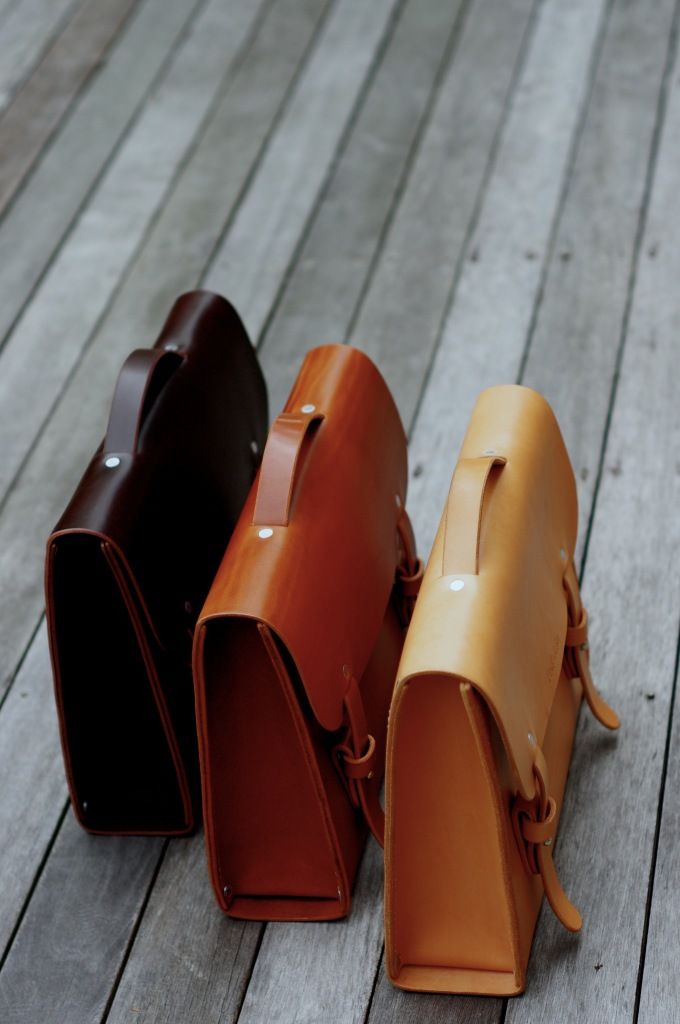 |
| Dark Chocolate, Cognac and Natural |
 |
| Front View |
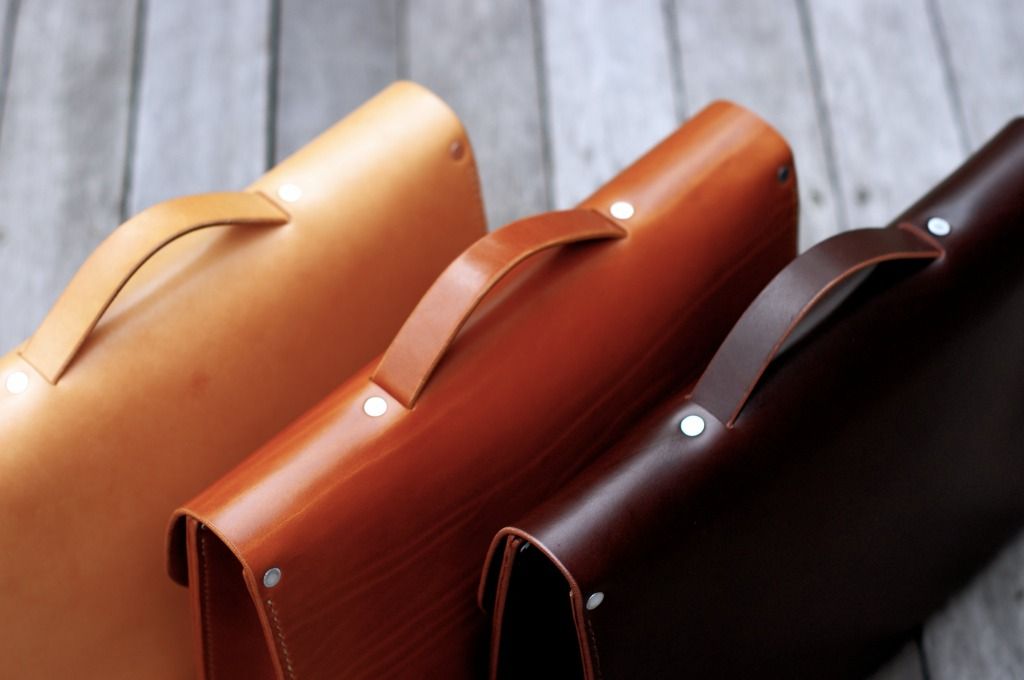 |
| Detail View |
Sunday, April 27, 2014
Olki: The Classic Briefcase
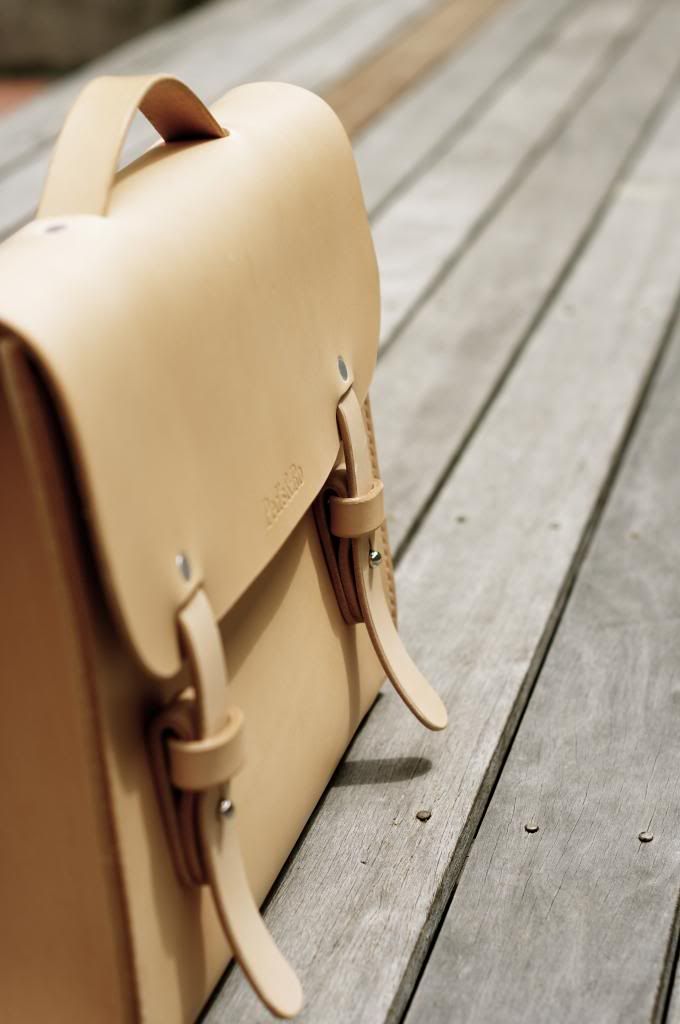
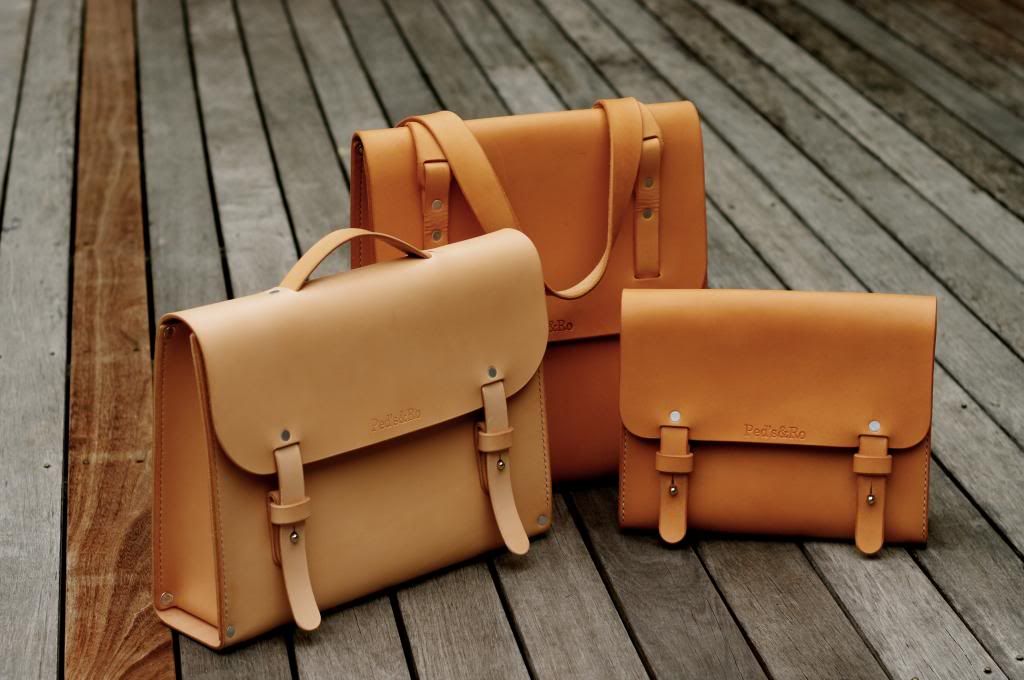
Olki is our take on the classic briefcase. As per our previous design, it emphasise on minimalistic approach.
As per Kimmi, it is entirely handcrafted from Scandinavian vegetable-tanned hides, linen thread and solid aluminium rivets.
With generous space to fit slim 13" laptop plus A4 size documents, it's the perfect companion for business and leisure.
Olki is simple yet sophisticated.
As always, some photos:
As per Kimmi, it is entirely handcrafted from Scandinavian vegetable-tanned hides, linen thread and solid aluminium rivets.
With generous space to fit slim 13" laptop plus A4 size documents, it's the perfect companion for business and leisure.
Olki is simple yet sophisticated.
As always, some photos:
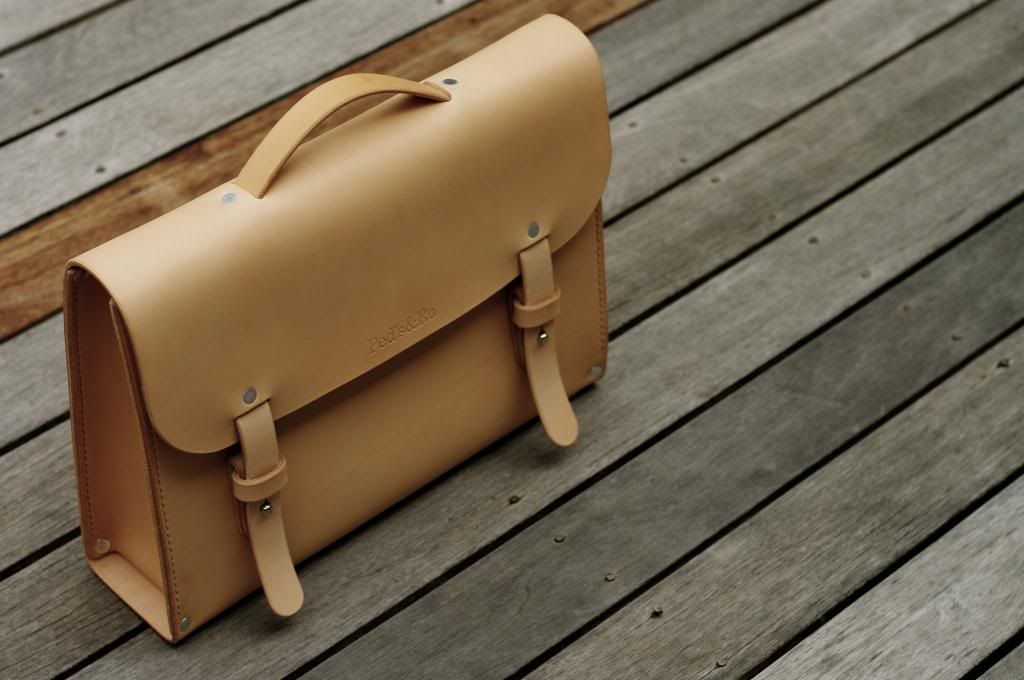 |
| Front profile |
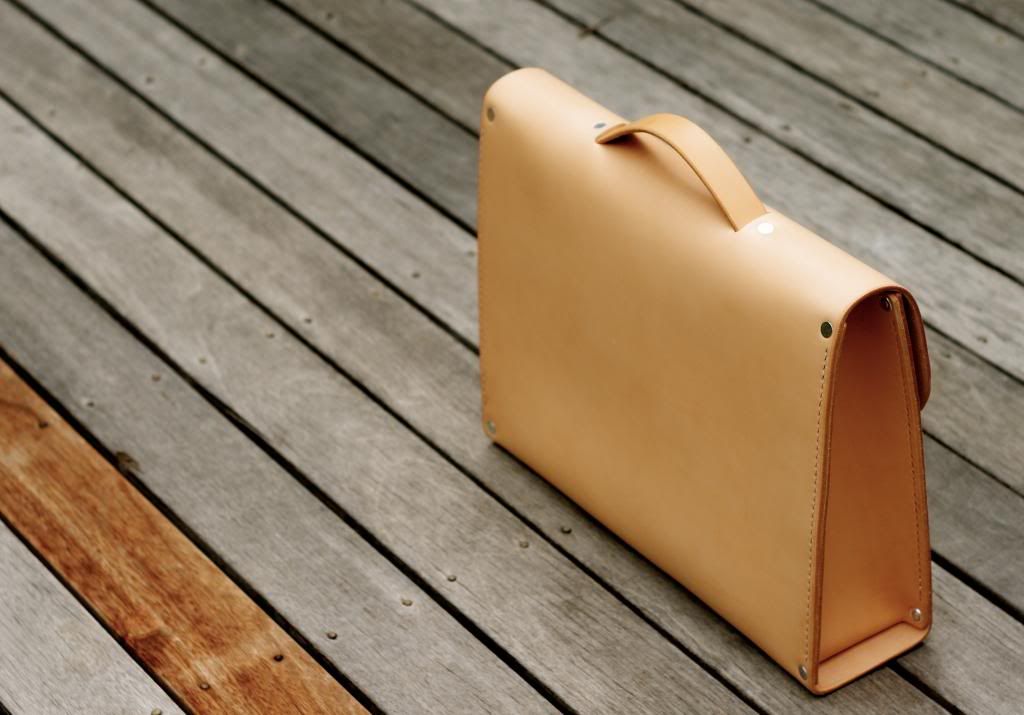 |
| Rear profile |
 |
| Side profile |
 |
| Family Shot |
Tuesday, November 12, 2013
Blog posts
We are currently in the process of moving house and this new activity has taken it's toll on the frequency of the blog post. I'm happy to say that the new place will have a separate garage/workshop which will better accomodate the leather-crafting, this means that I can keep working throughout the night without waking up everyone in the house.
We will also carry out minor renovation around the new place which will be infused with leather elements. Hopefully this will enabled us to look at venturing into an exciting area of leather accessory.
If you are a frequent reader of this blog, thank you and we are still here. We will post something new and exciting very soon.
We will also carry out minor renovation around the new place which will be infused with leather elements. Hopefully this will enabled us to look at venturing into an exciting area of leather accessory.
If you are a frequent reader of this blog, thank you and we are still here. We will post something new and exciting very soon.
Sunday, September 8, 2013
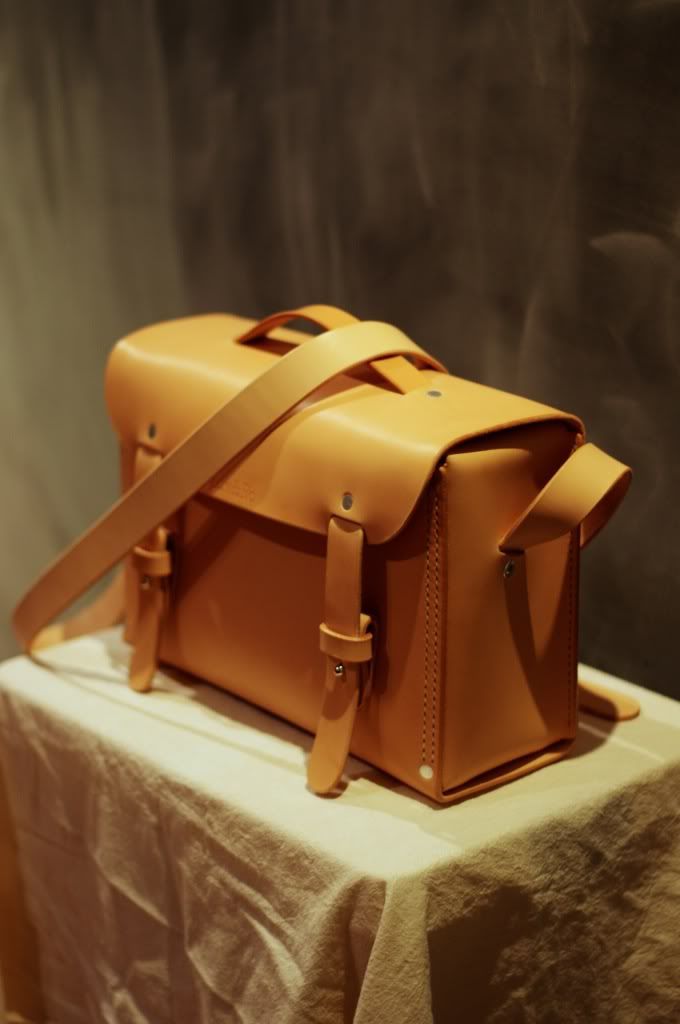
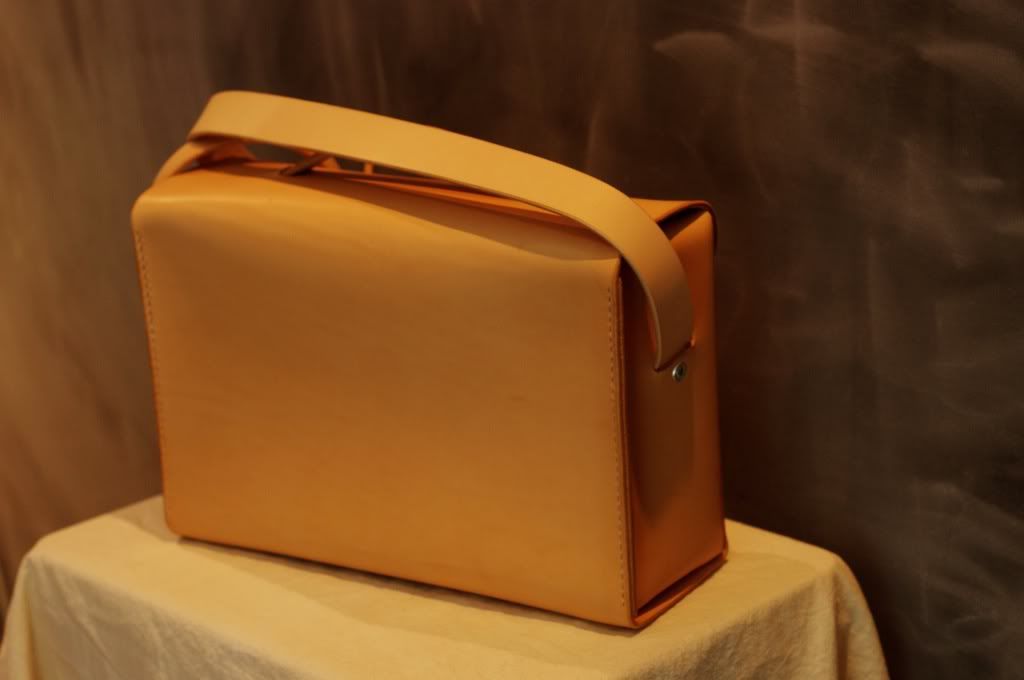
Kimmi: The classic Satchel
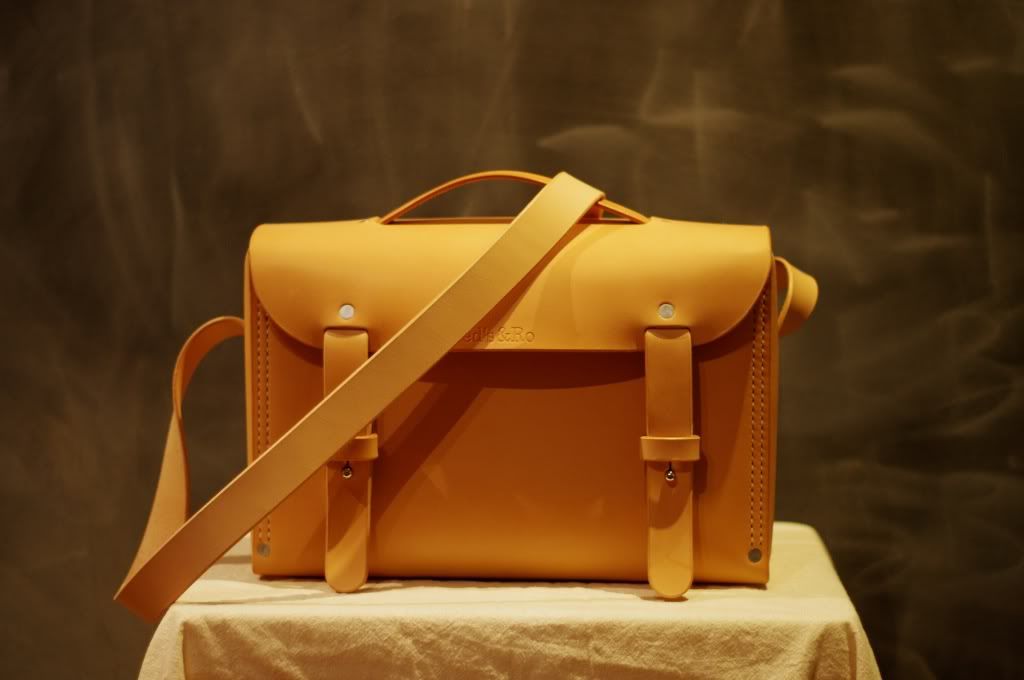
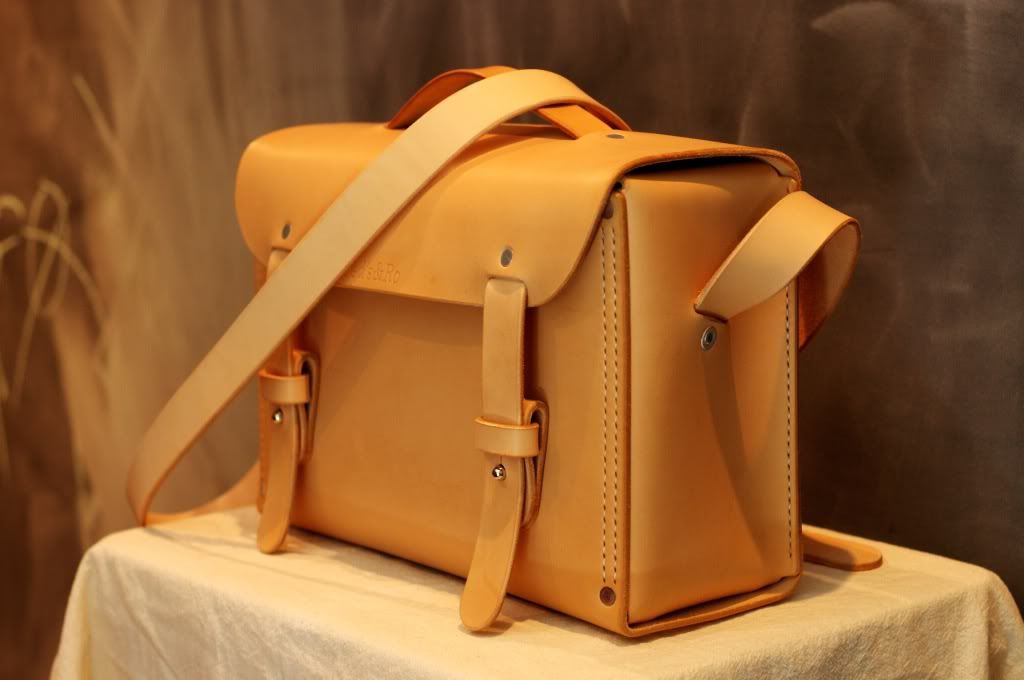
Kimmi is our portrayal of the classic leather satchel. Its design and construction is heavily influenced by minimalist theme.
Entirely handcrafted from natural Scandinavian vegetable-tanned hides, linen thread and aluminium rivet. The colder climate of Scandinavian country and teamed with industry's best tanning practice, the hides has an exceptionally luxurious feel that will get better with age.
As per all our Signature line, it is constructed with 3.5mm /10 oz leather that provides the perfect foundation for the distinctive structure.
The bag is envisioned with urban excursion as its natural environment. Single undivided internal space provides plenty of space for everyday neccesities, be it a laptop, books, tablet, notebook, lunch box, Digital SLR and anything else in between.
Kimmi is distinctively simple.
 |
| Front look |
 |
| Side look |
 |
| Side look |
 |
| Back look |
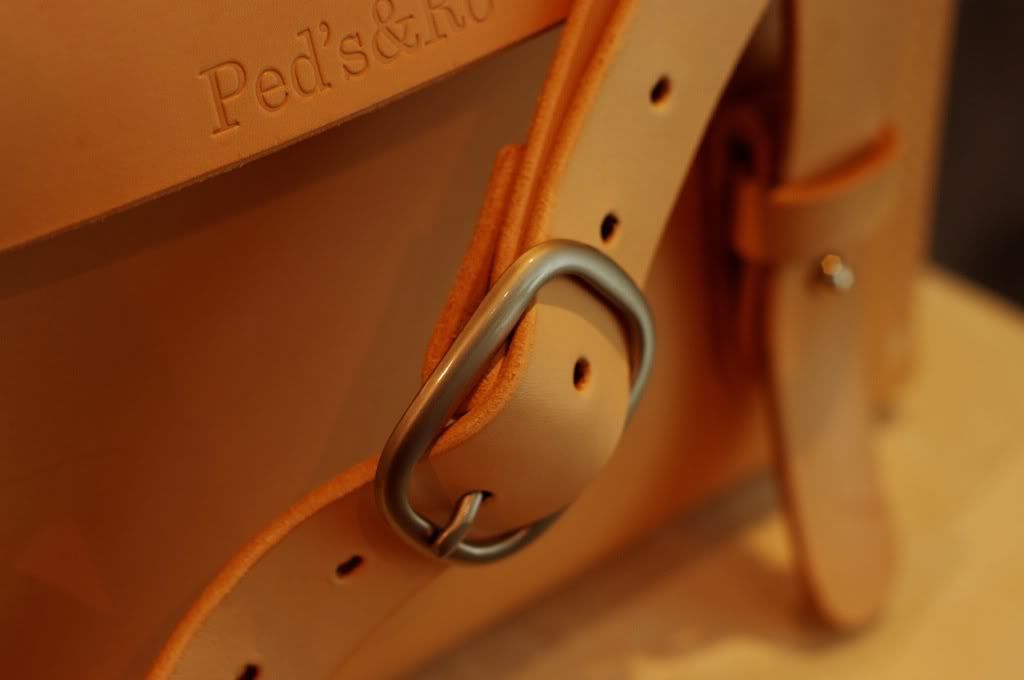 |
| Buckle detail |
Friday, July 12, 2013
Strap for Panerai
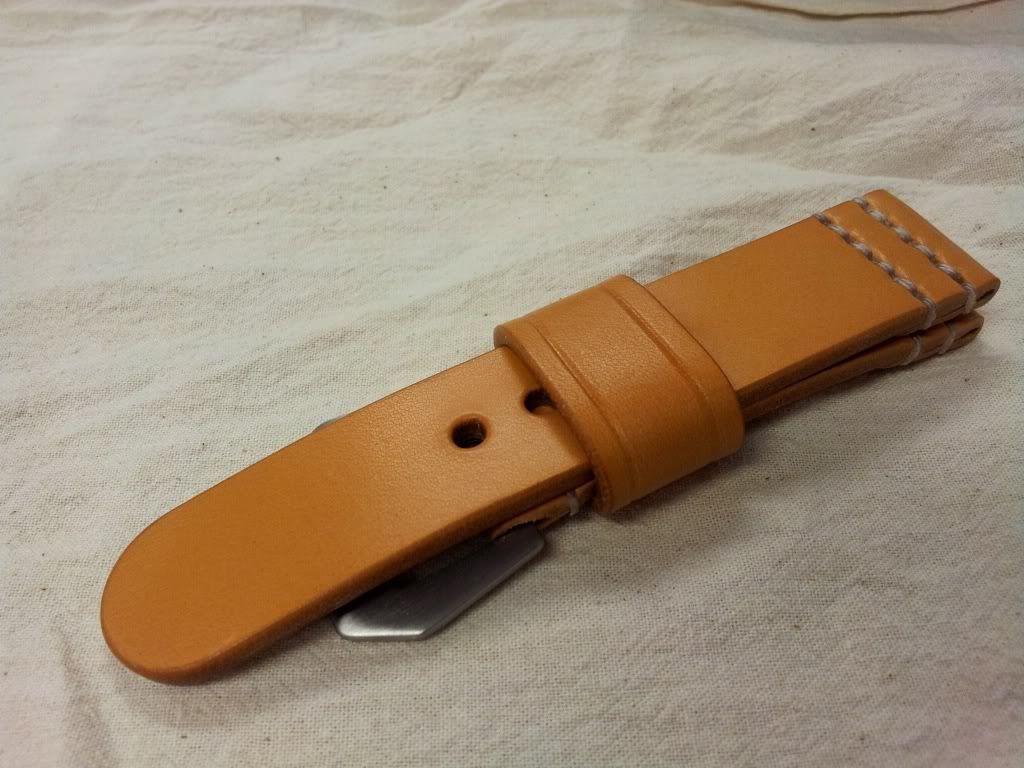
I was recently commissioned to create a strap for a panerai watch. I understand that there are tons of straps for the band in the world wide web. I wanted this to be unique as well as minimalist in style.
My research suggest that most of the straps in the market are thick (5mm and more), usually double layered and somewhat longer to give that long tail effect. There's also a few that's made of vintage leather which is famously known as 'Ammo Strap'. The execution of the 'Ammo' type really resonate with me. Some of these straps is done minimally to really show the character of the leather which would have begin as a typical vegetable-tanned leather.
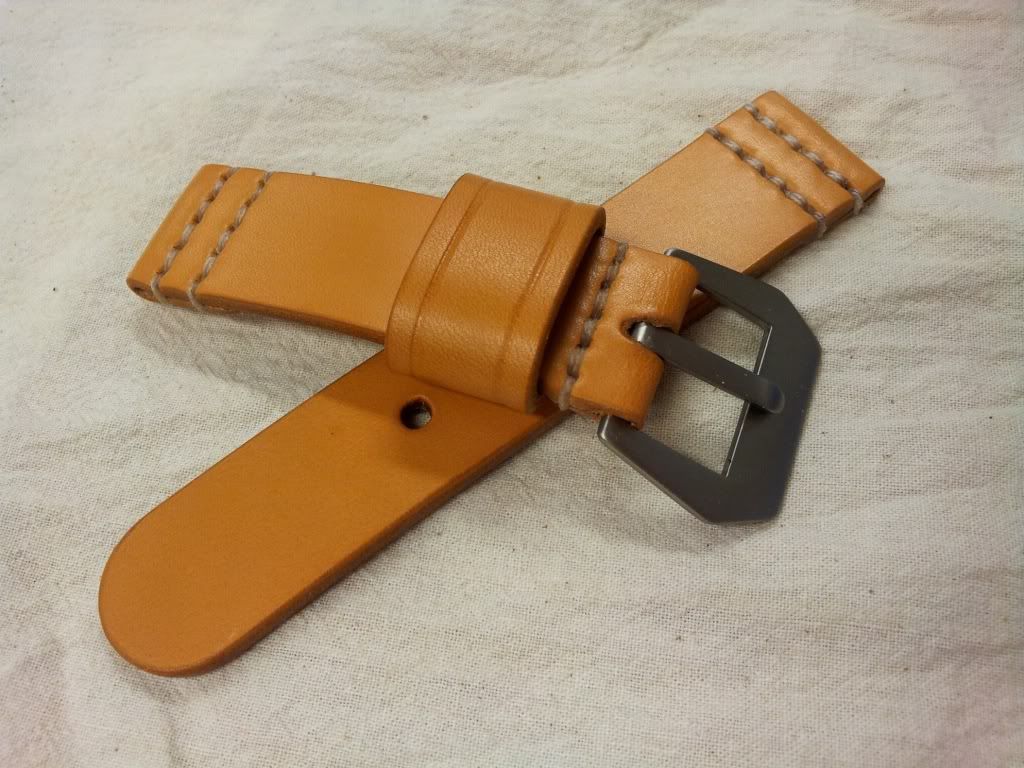
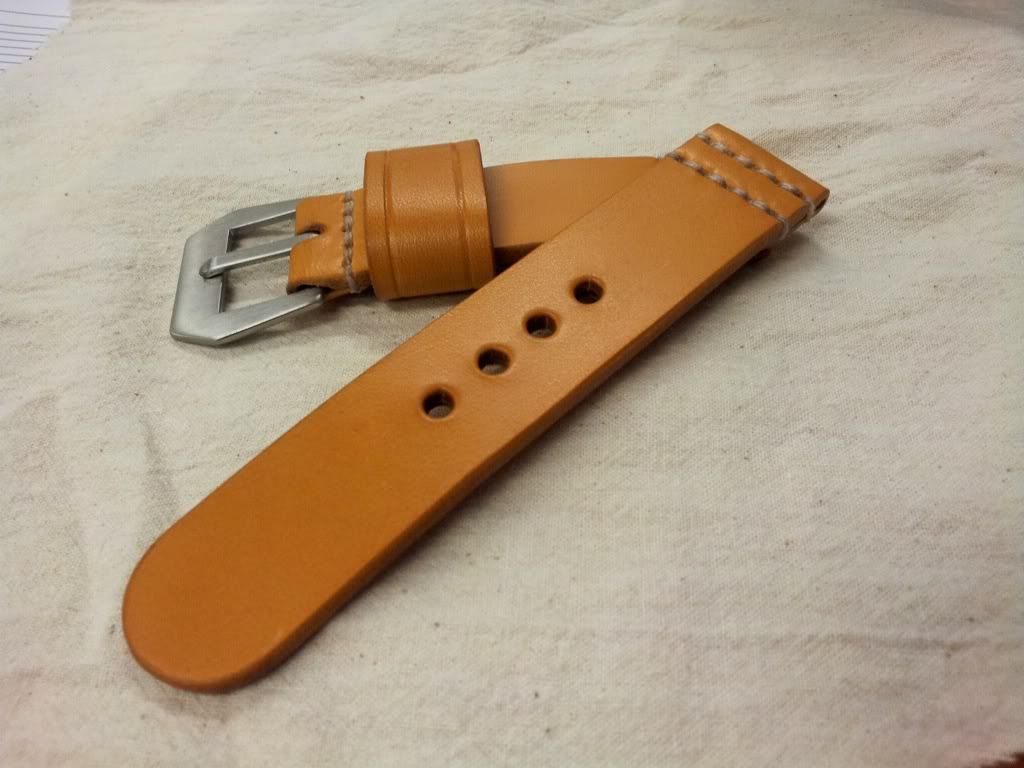
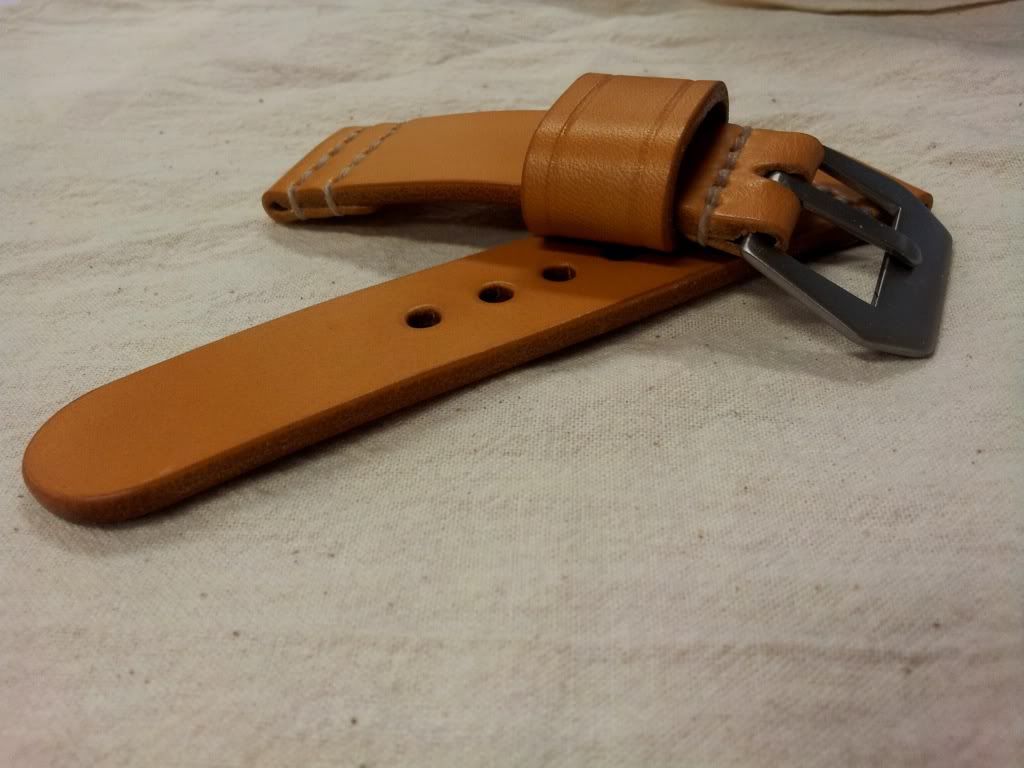
Drawing inspiration from this 'Ammo Strap' I proceed to create the strap. Each part of the strap is minimally constructed from one piece of leather, chemical adhesive was excluded from the process. At 4mm it's far from the thickest strap out there, quite the opposite as a matter of fact. This should make the strap very supple and easily conform to the wrist. Since there will be no lining the flesh side is smoothed. I'm very excited to see how the strap will age with use.
Photos of the finished strap:
My research suggest that most of the straps in the market are thick (5mm and more), usually double layered and somewhat longer to give that long tail effect. There's also a few that's made of vintage leather which is famously known as 'Ammo Strap'. The execution of the 'Ammo' type really resonate with me. Some of these straps is done minimally to really show the character of the leather which would have begin as a typical vegetable-tanned leather.
Drawing inspiration from this 'Ammo Strap' I proceed to create the strap. Each part of the strap is minimally constructed from one piece of leather, chemical adhesive was excluded from the process. At 4mm it's far from the thickest strap out there, quite the opposite as a matter of fact. This should make the strap very supple and easily conform to the wrist. Since there will be no lining the flesh side is smoothed. I'm very excited to see how the strap will age with use.
Photos of the finished strap:
 |
 |
 |
 |
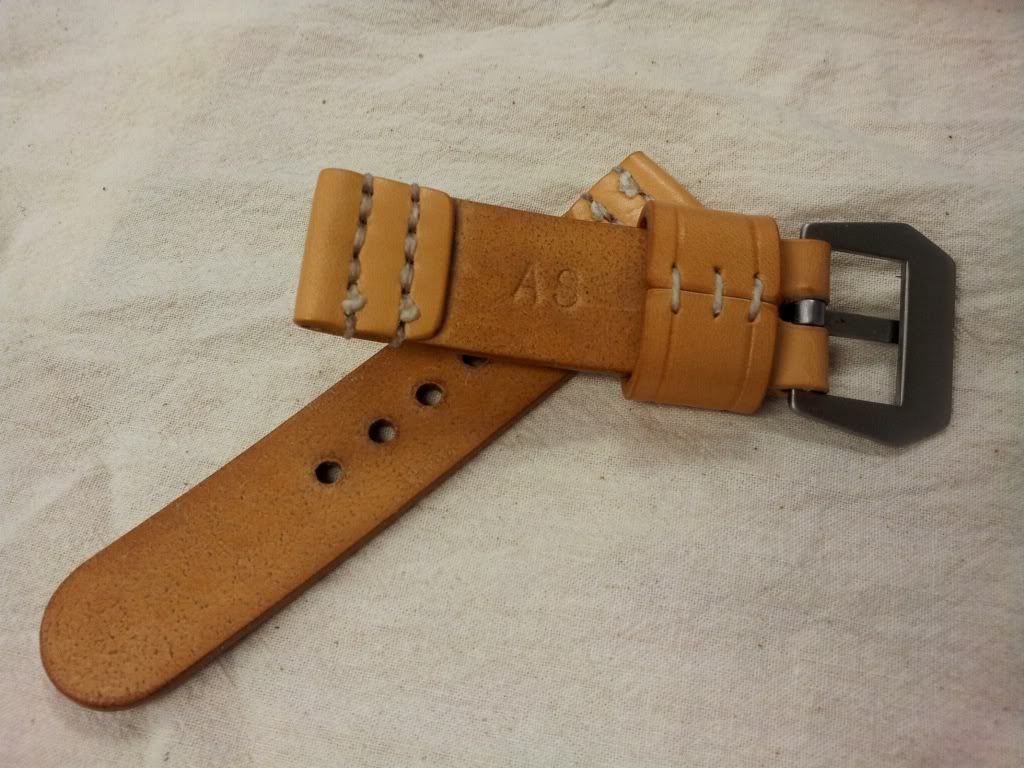 |
| Monogramming on smoothed underside |
Tuesday, July 9, 2013
Website for Ped's & Ro collection
It's been busy few months for me as I'm in the process of creating a website to serve as a storefront for my products. I'm also working in tandem to create a line of bags that will form as the brand's initial collection. I'm hoping to get everything done later this year.
In the meantime I have placed 'Under Construction' page on Ped's & Ro website. I'm starting to use the new logo on the website that will trickle down to the bag itself. Please feel free to have a look and drop a comment or two.
In the meantime I have placed 'Under Construction' page on Ped's & Ro website. I'm starting to use the new logo on the website that will trickle down to the bag itself. Please feel free to have a look and drop a comment or two.
Friday, March 29, 2013
Project: Dog Collar
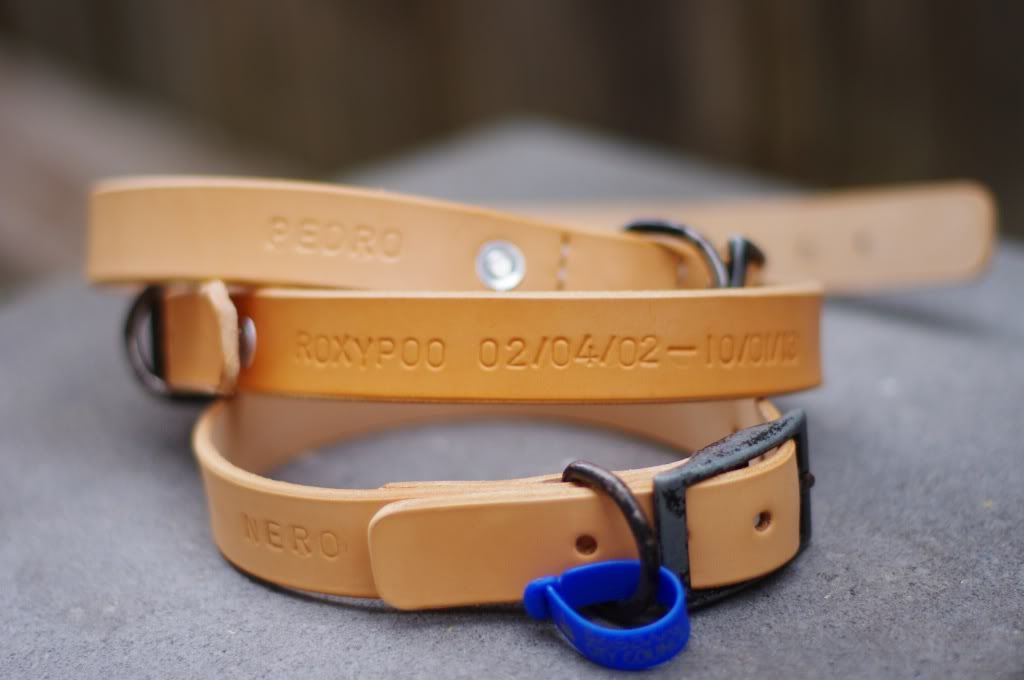
The idea came about after our bubbly husky passed away. I wanted to make something to remember him by and what's better than a customised leather collar. While at it, I also made two collar for my rough collies.
I recycled the hardwares from their existing collar. It's heavy duty and looks very aged which is perfect for the project.
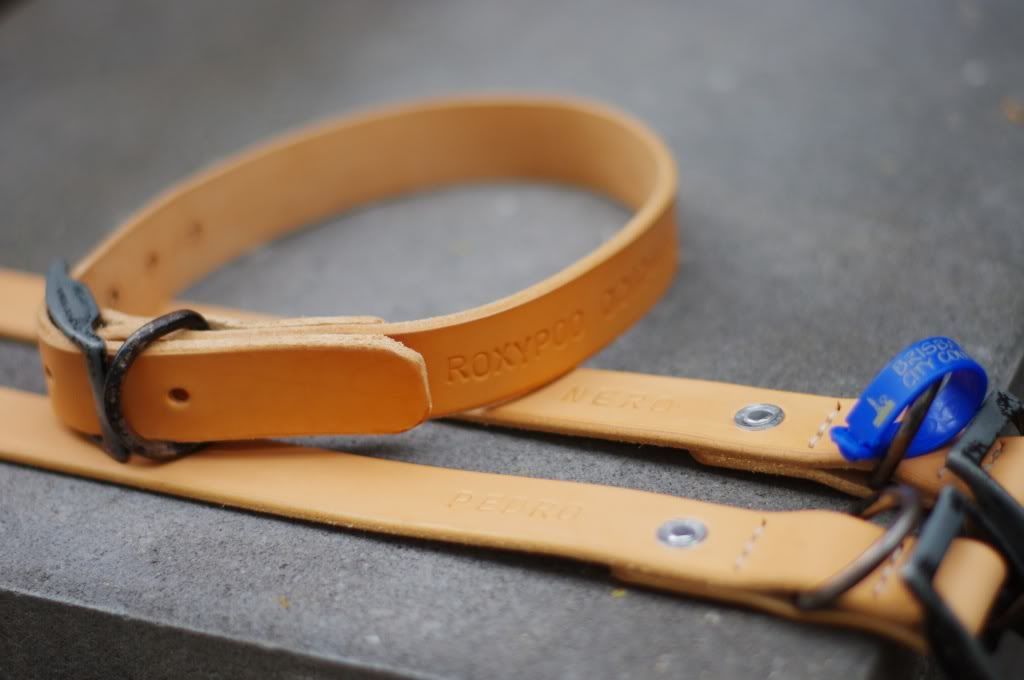
Construction is simple, aluminium rivet and few rows of stitching. To finish it up, I embossed their name on the leather.
As always, some photos of the finished project.
I recycled the hardwares from their existing collar. It's heavy duty and looks very aged which is perfect for the project.
Construction is simple, aluminium rivet and few rows of stitching. To finish it up, I embossed their name on the leather.
As always, some photos of the finished project.
 |
| Embossed name |
 |
| The rivets and stitching |
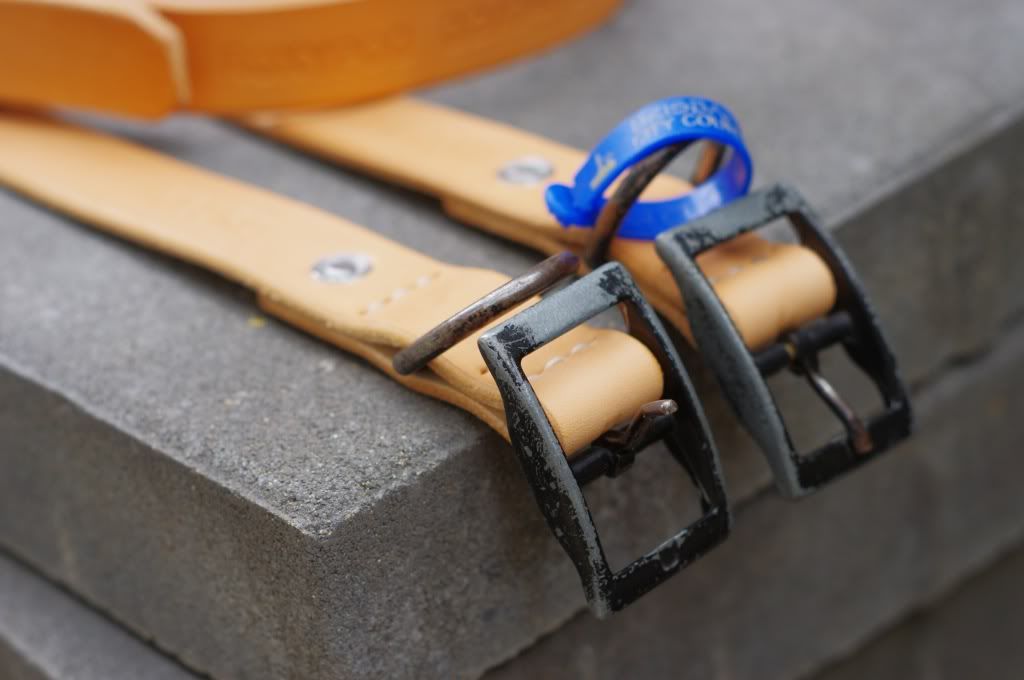 |
| Detail shot of the hardware |
Monday, March 4, 2013
Project: Leather Belt
I found myself doing some smaller projects lately, this is a great way to recycle some of the leftover leather from a bigger project as well as honing attention to detail skill.
I've always wanted to make myself a belt from a vegetable tanned leather. The opportunity arise after completing Project Messenger/Backpack. I had a scrap cut of perfect length leather suitable for belt. I wanted the belt to be clean and as simple as possible with minimal work done to the leather.
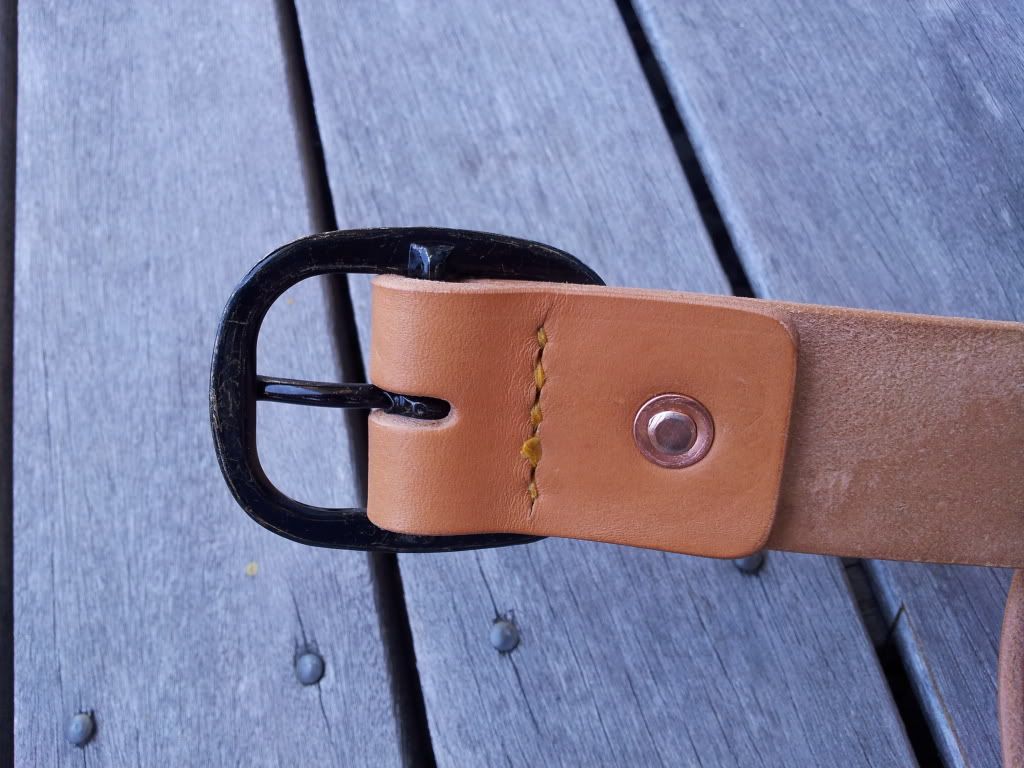
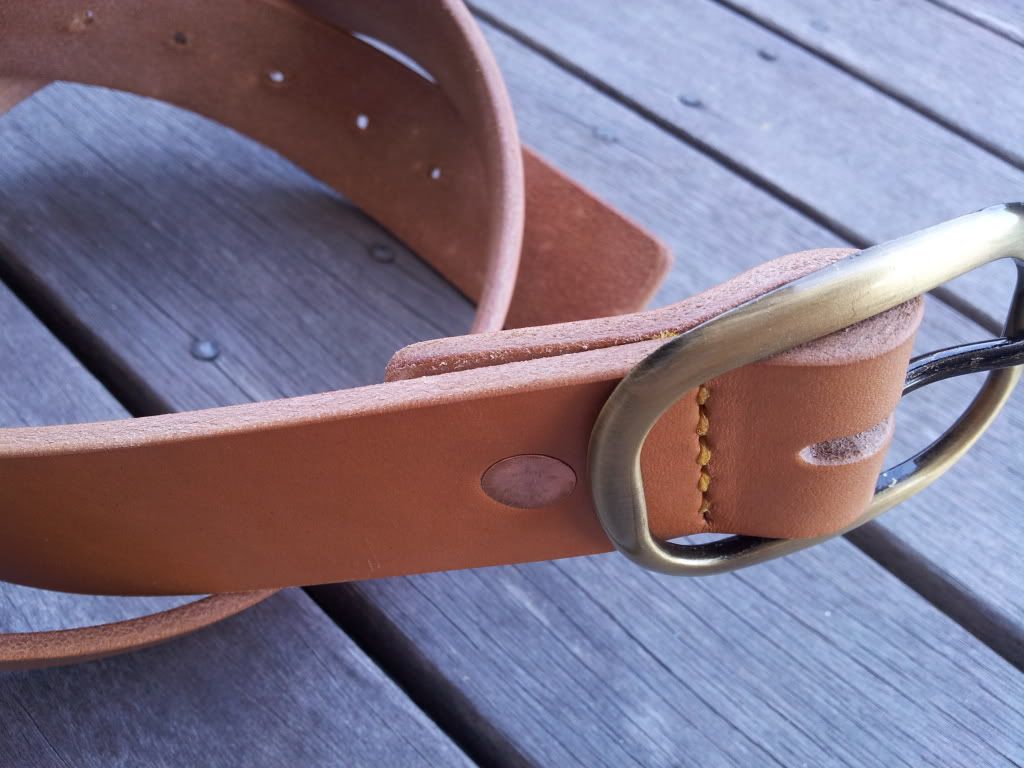
To preserve the thickness appearance I chose to skip the bevelling process, sanding and burnishing the edge smooth is more than sufficient for this purpose. Center bar buckle is chosen so the belt can be worn without keeper. Fastening is done with copper rivet and one line of stitching. Finally to complete the look and increase practicality, I smooth out and burnish the flesh side, this also gives a more uniform look with the edge.
As always, photo of the completed belt:
I've always wanted to make myself a belt from a vegetable tanned leather. The opportunity arise after completing Project Messenger/Backpack. I had a scrap cut of perfect length leather suitable for belt. I wanted the belt to be clean and as simple as possible with minimal work done to the leather.
To preserve the thickness appearance I chose to skip the bevelling process, sanding and burnishing the edge smooth is more than sufficient for this purpose. Center bar buckle is chosen so the belt can be worn without keeper. Fastening is done with copper rivet and one line of stitching. Finally to complete the look and increase practicality, I smooth out and burnish the flesh side, this also gives a more uniform look with the edge.
As always, photo of the completed belt:
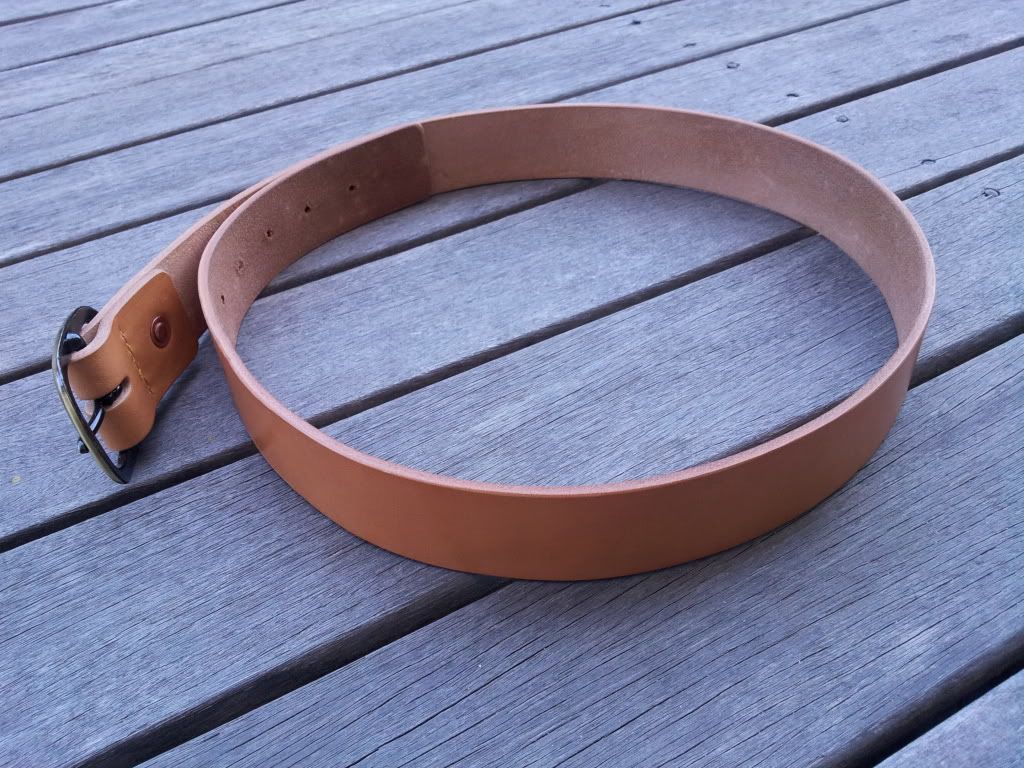 |
| The belt |
 |
| Shot of buckle fastened with stitching and copper rivet |
 |
| Rear shot of the buckle |
 |
| Side profile of the belt |
Monday, February 25, 2013
Project: Messenger/Backpack
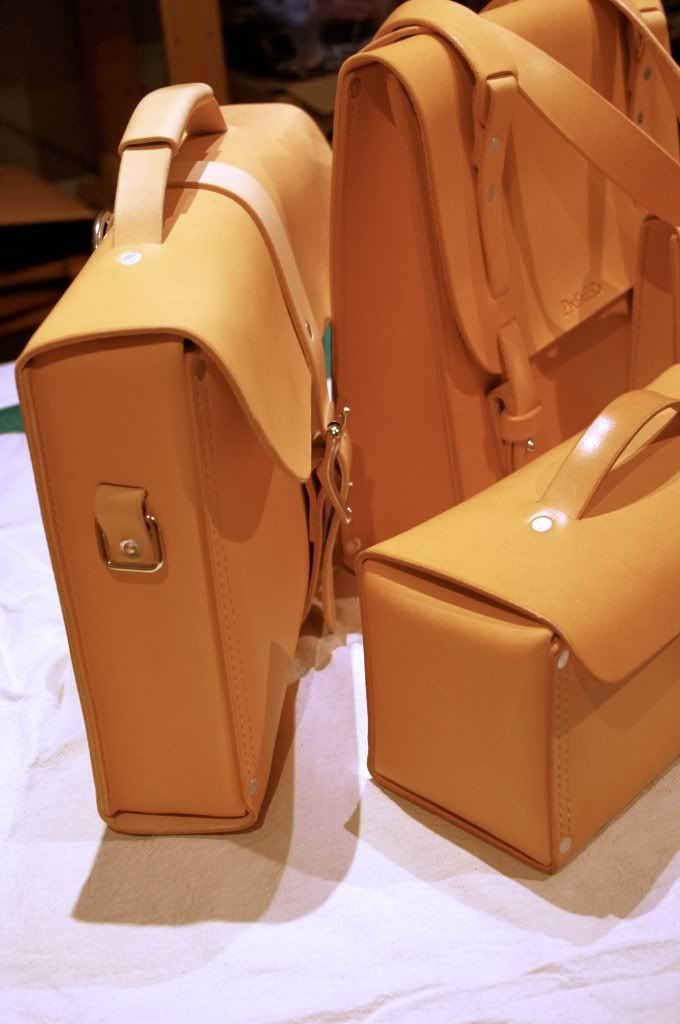
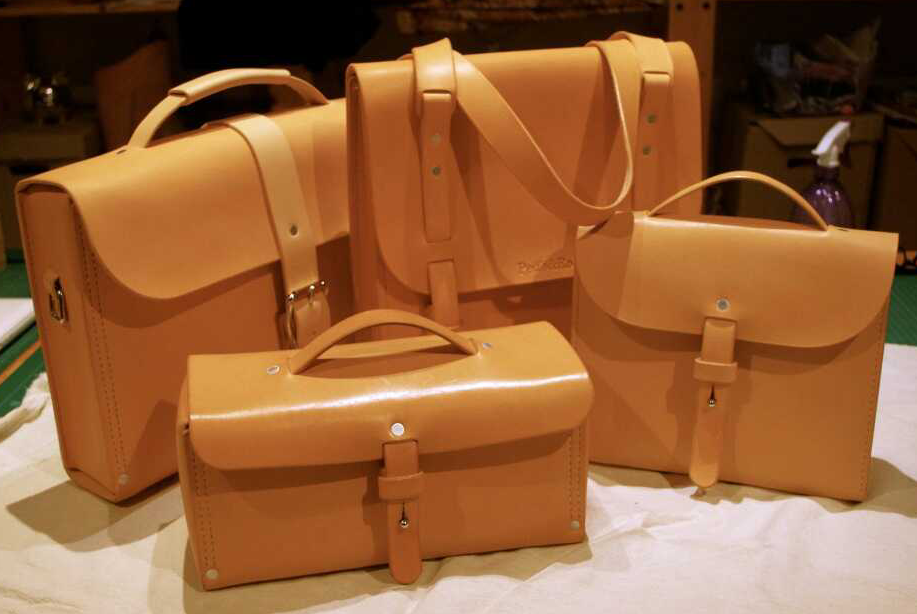
I was recently commissioned to built a messenger style bag that can be double duty as a backpack.
The bag is to have a center strap wrap-around with buckle closure. The strap is removable for carrying both messenger-style and backpack. To achieve this, I've used square ring on each gusset for messenger style and D-ring incorporated in the center strap for backpack.
The strap is one very long piece, looping is done with two conway buckle. For comfort, I also built two shoulder pad.
Handle is added for carrying as briefcase and finally Internal divider with two pockets and pen holder is sewn inside the bag.
As always, photo of the completed bag:
The bag is to have a center strap wrap-around with buckle closure. The strap is removable for carrying both messenger-style and backpack. To achieve this, I've used square ring on each gusset for messenger style and D-ring incorporated in the center strap for backpack.
The strap is one very long piece, looping is done with two conway buckle. For comfort, I also built two shoulder pad.
Handle is added for carrying as briefcase and finally Internal divider with two pockets and pen holder is sewn inside the bag.
As always, photo of the completed bag:
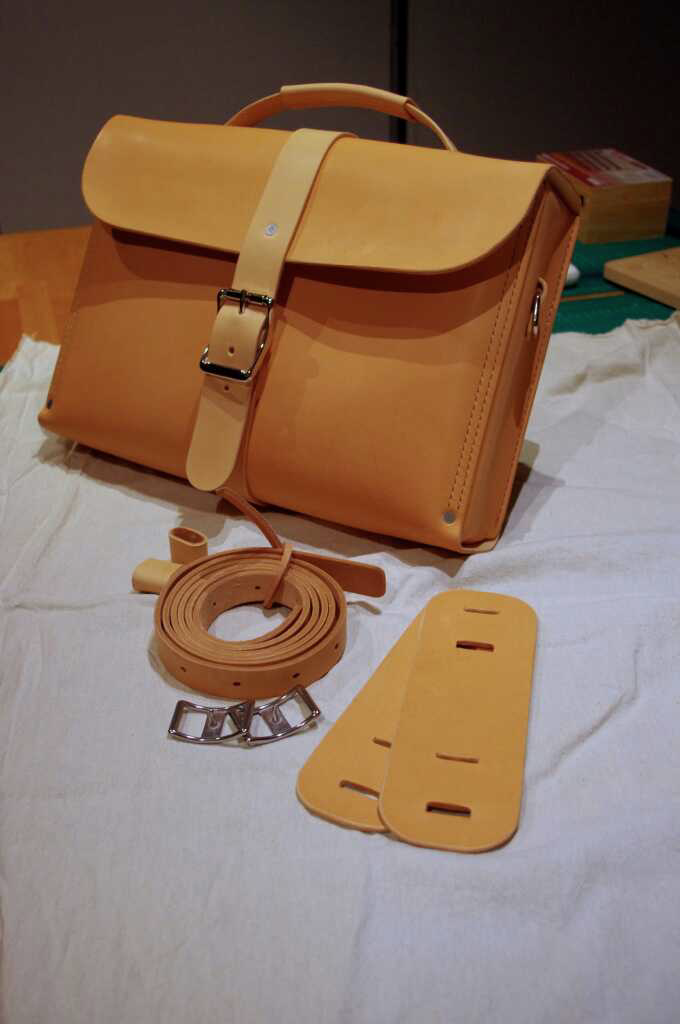 |
| The bag with the straps part |
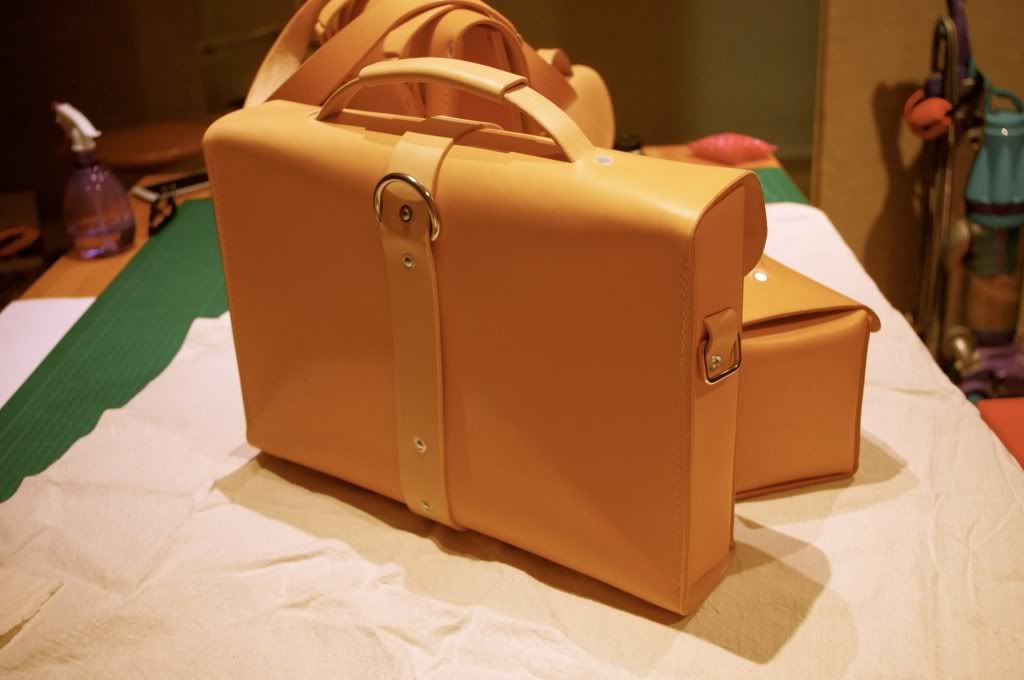 |
| Rear section of the bag |
 |
| Side shot |
 |
| Family photo :) |
Thursday, December 6, 2012
Project: Mini Tote
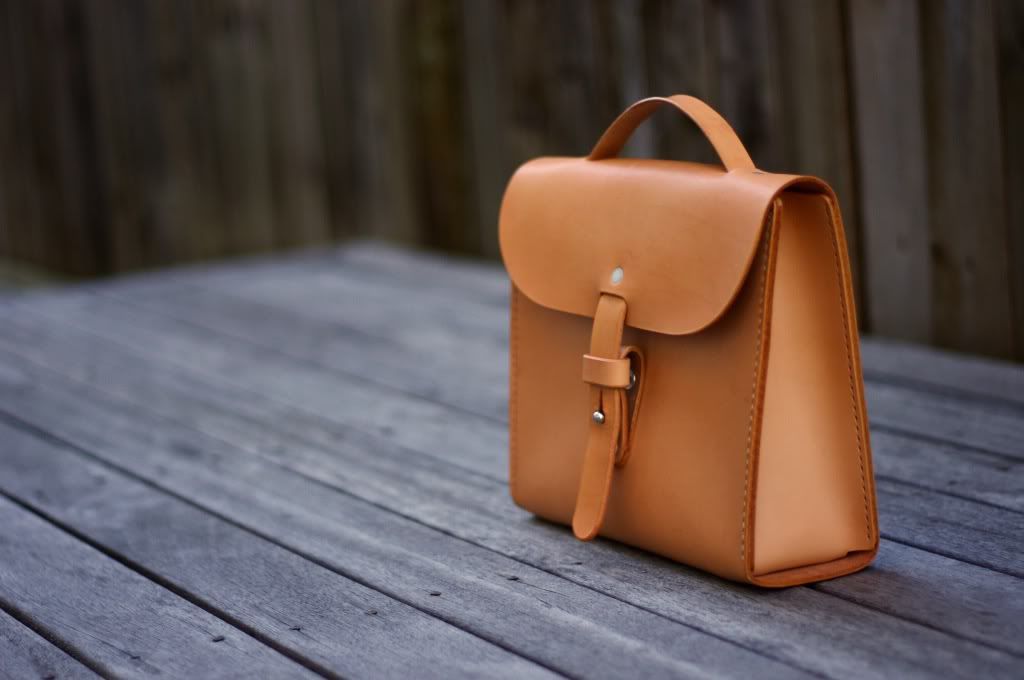
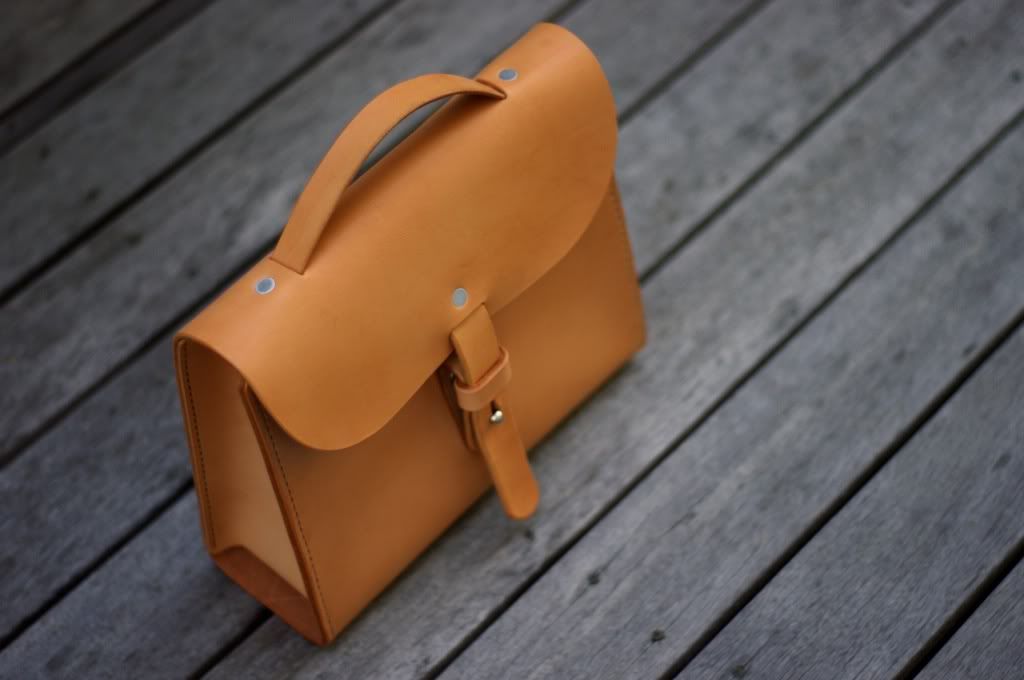
Originally I had the intention of making a backpack for my daughter, upon assembly, the size was still too large for her. I decided to turn it into a mini tote instead.
To minimise the weight, I used thinner leather measuring at 2 - 2.5mm. Construction is simpler than the original tote. Rivets is only used for the bottom portion. The handle is one piece of leather and the closure is single instead of double.
The adaptation works extremely well and looks well-proportioned. Size is just a tad smaller than the most famous tablet. It will be plenty of room to carry daily necessities.
As always photo of the completed bag.
To minimise the weight, I used thinner leather measuring at 2 - 2.5mm. Construction is simpler than the original tote. Rivets is only used for the bottom portion. The handle is one piece of leather and the closure is single instead of double.
The adaptation works extremely well and looks well-proportioned. Size is just a tad smaller than the most famous tablet. It will be plenty of room to carry daily necessities.
As always photo of the completed bag.
 | |||
| Side Shot |
 |
| Top Shot |
 |
| Back Shot |
Thursday, September 6, 2012
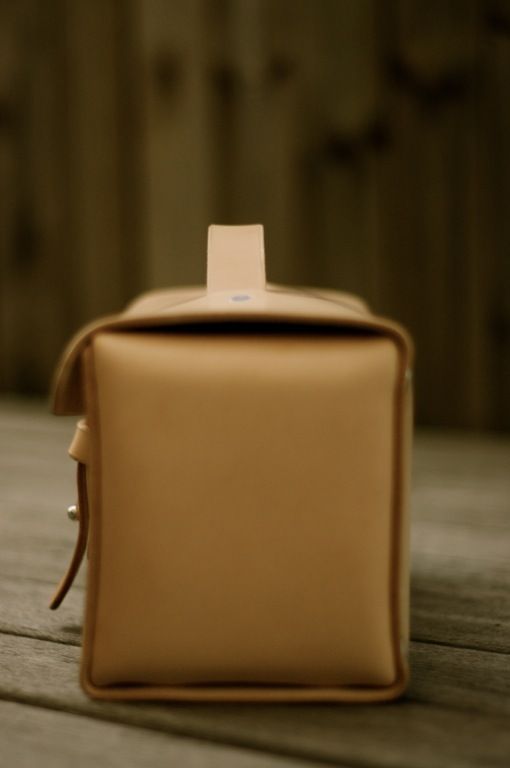
Project: Tool Bag design No.2
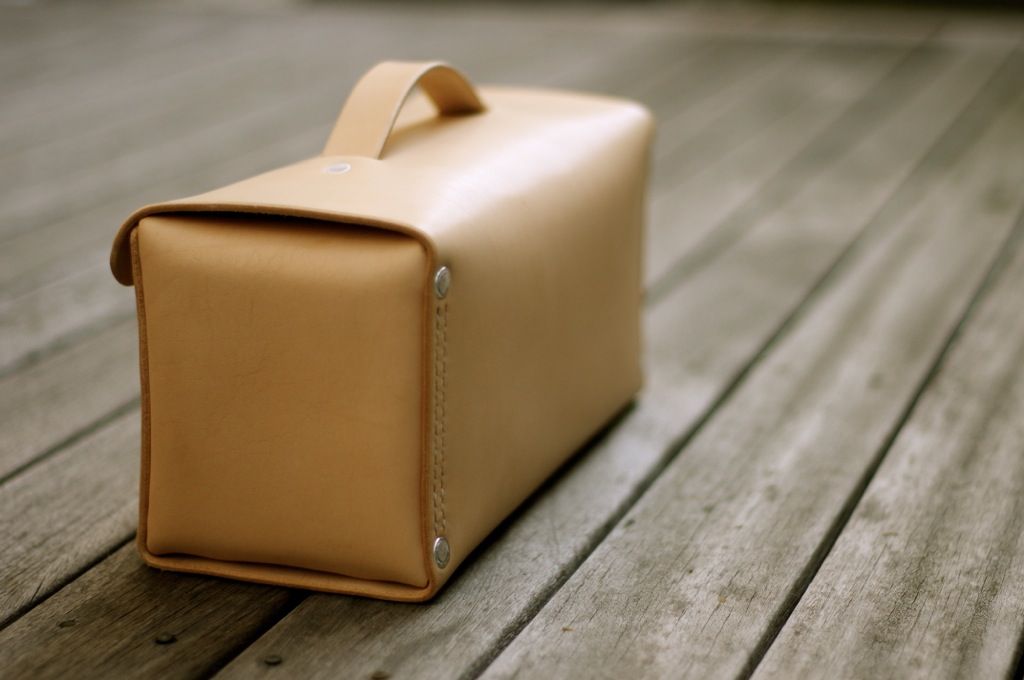
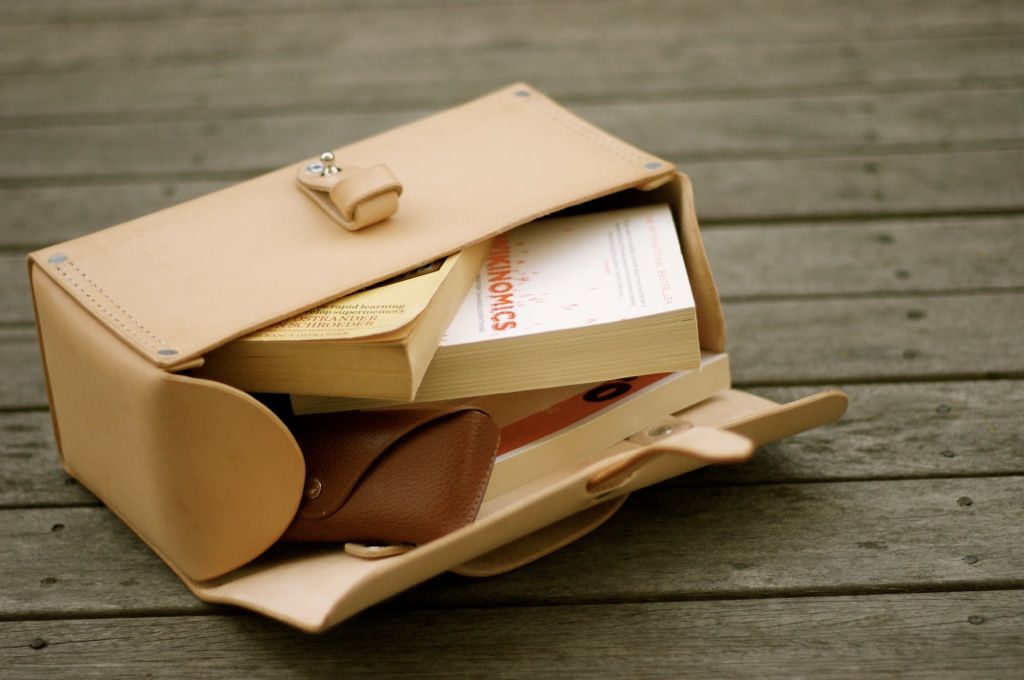
I have been thinking for a while of redesigning the 'Tool-Box' bag I made a while back. I really like the form of the bag, it has enough space to bring essentials for office dweller, i.e: Your lunch, keys, sun-glasses and other loose items. It's also very compact and forgiving to other commuter on the bus or train.
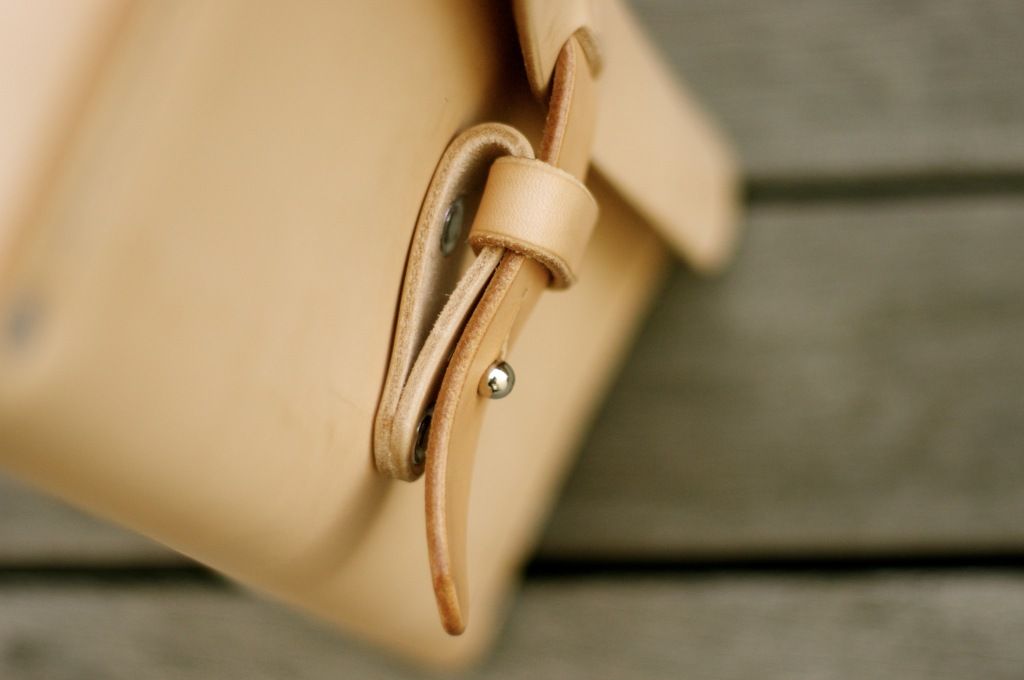
I had that chance last week. First up is to re-jig the sizing, I want the bag to have a slightly different ratio, this will (in my opinion) gives the bag a more appealing form factor, this also makes the bag smaller. Second is handle and closure placement, I want both of them to be more integrated for cleaner look, this is to complement the new leather.
Construction method is very similar to the first model, one long piece for the body and two gusset for the sides, standard for my line of bag. I uses aluminium rivet this time, I hand brush the rivet before fastening it for that worn look. Stitching is done with standard saddle-stitch this time.
There is no shoulder strap or wrap around strap this time. I wanted a clean and simple bag.
As always, some photo of the finished product.
I had that chance last week. First up is to re-jig the sizing, I want the bag to have a slightly different ratio, this will (in my opinion) gives the bag a more appealing form factor, this also makes the bag smaller. Second is handle and closure placement, I want both of them to be more integrated for cleaner look, this is to complement the new leather.
Construction method is very similar to the first model, one long piece for the body and two gusset for the sides, standard for my line of bag. I uses aluminium rivet this time, I hand brush the rivet before fastening it for that worn look. Stitching is done with standard saddle-stitch this time.
There is no shoulder strap or wrap around strap this time. I wanted a clean and simple bag.
As always, some photo of the finished product.
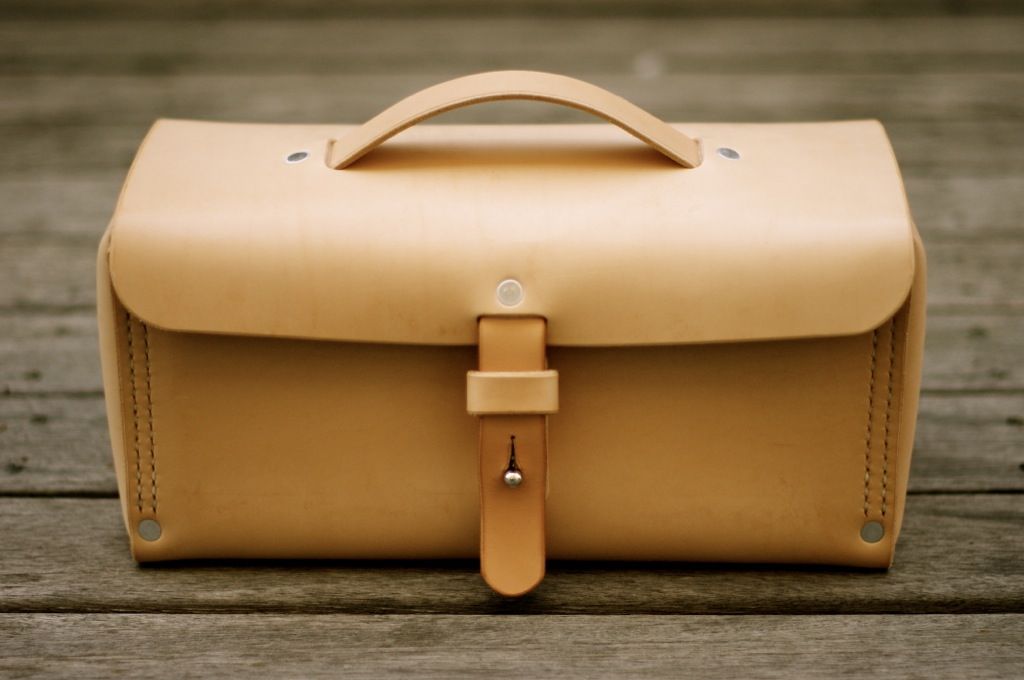 |
| Front |
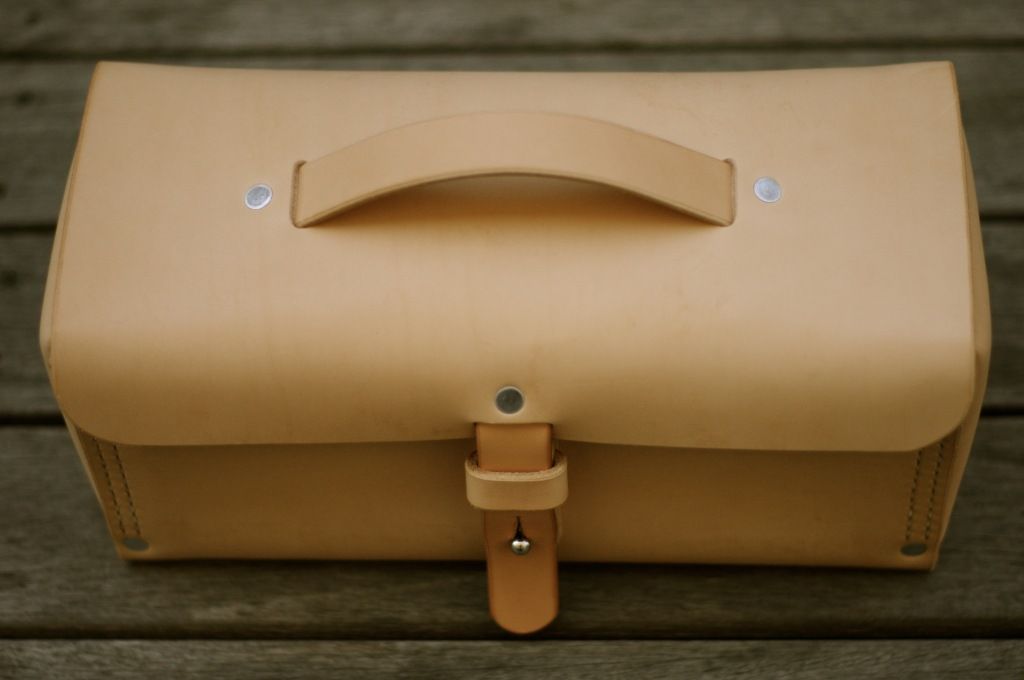 |
| Top |
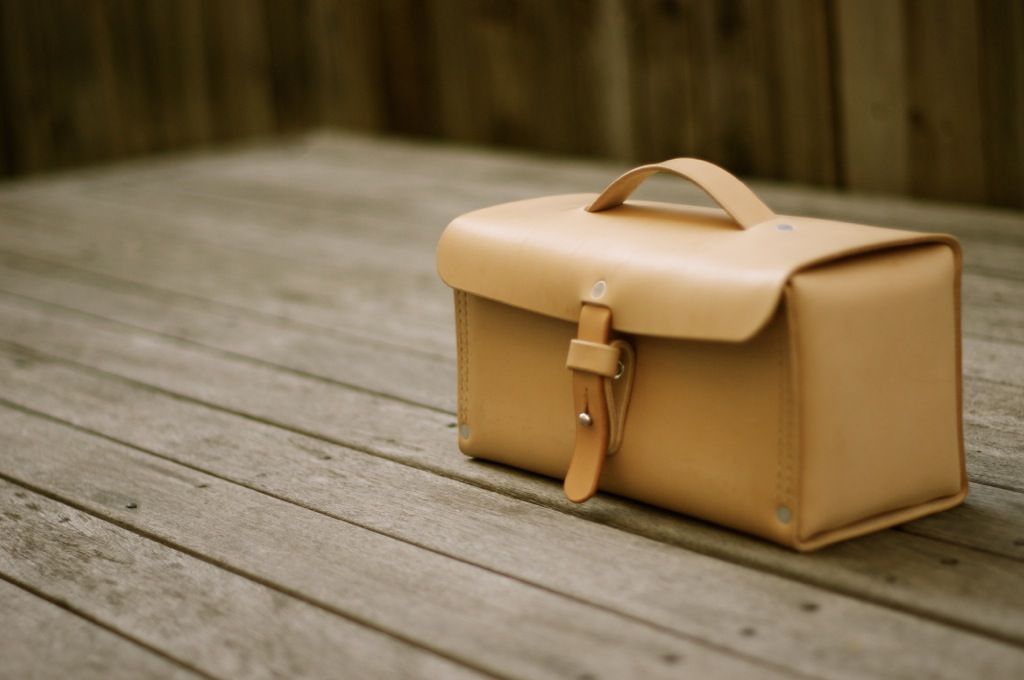 |
| Side Profile |
 |
| Side |
 |
| Back |
 |
| Inside |
 |
| Closure details |
Sunday, September 2, 2012
Leather Button
I've been playing with few different ideas for making closure for the bag. One of them is a leather button. In order for the button to work, the button need to be sturdy enough. One way of achieving this is via a method called 'cuir-bouilli' or boiled leather.
There isn't an exact procedure how to achieve the desirable end product, this is because every vegetable-tanned leather has different tanning composition. By boiling the leather, some or all part of the leather will be polymerised.
The method that I used was first soaking the leather into cold water then pour a boiling water into the leather surface without soaking it. I was hoping to fully polymerise the leather surface only and somewhat half polymerise the inside of the leather.
Few observation:
1. The hot water did what it supposed to do, polymerising the leather
2. There is shrinkage but was less that I expected. The shrinkage occurred on the surface that touch the hot water hence the curve upward shape.
3. The color has changed to dark brown permanently
4. Final result is brittle, can be torn with hands.
I need to experiment or fine-tune the boiling method to prevent the cracking at the end. It's been a fun experiment.
As always, some photos of the experiment:
There isn't an exact procedure how to achieve the desirable end product, this is because every vegetable-tanned leather has different tanning composition. By boiling the leather, some or all part of the leather will be polymerised.
The method that I used was first soaking the leather into cold water then pour a boiling water into the leather surface without soaking it. I was hoping to fully polymerise the leather surface only and somewhat half polymerise the inside of the leather.
Few observation:
1. The hot water did what it supposed to do, polymerising the leather
2. There is shrinkage but was less that I expected. The shrinkage occurred on the surface that touch the hot water hence the curve upward shape.
3. The color has changed to dark brown permanently
4. Final result is brittle, can be torn with hands.
I need to experiment or fine-tune the boiling method to prevent the cracking at the end. It's been a fun experiment.
As always, some photos of the experiment:
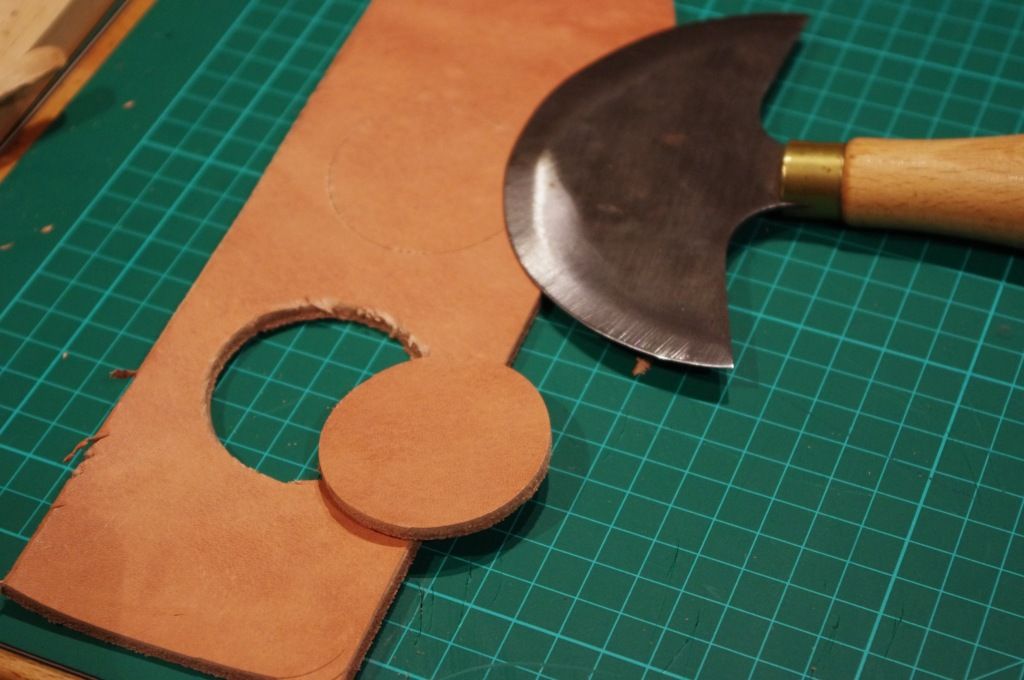 |
| Cutting the leather into circular shape |
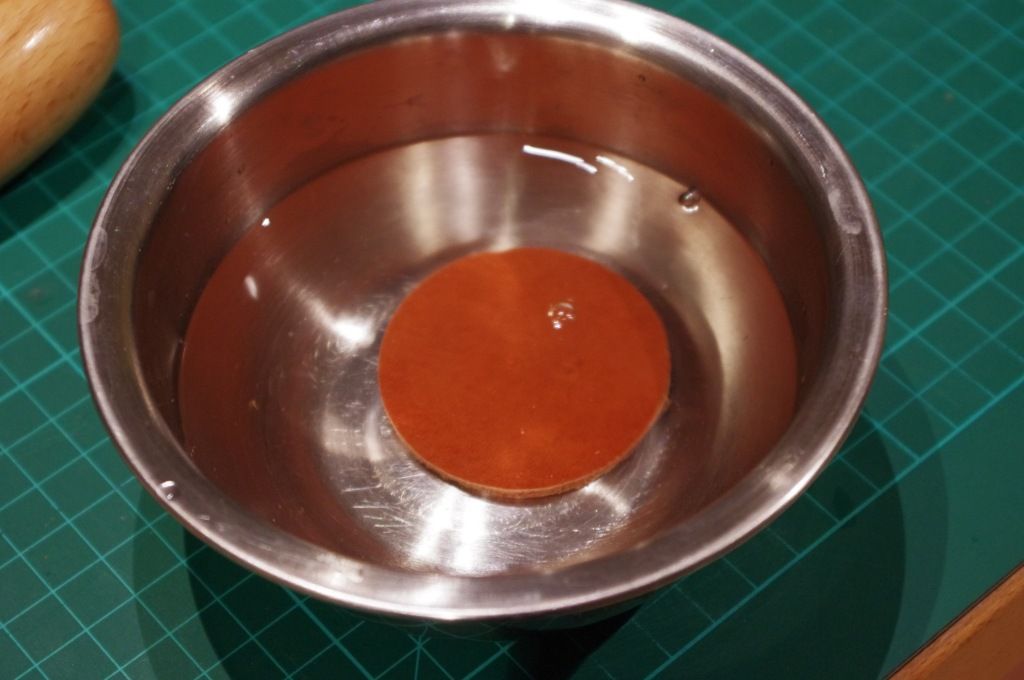 |
| Soaked completely in cold water |
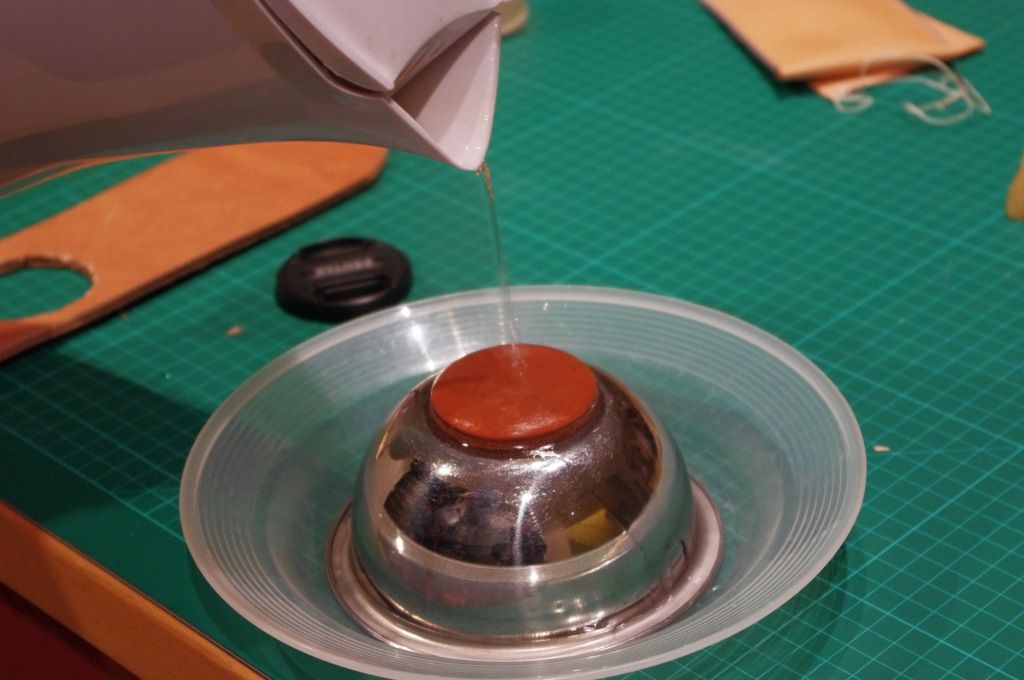 |
| Pouring boiling water into the leather surface |
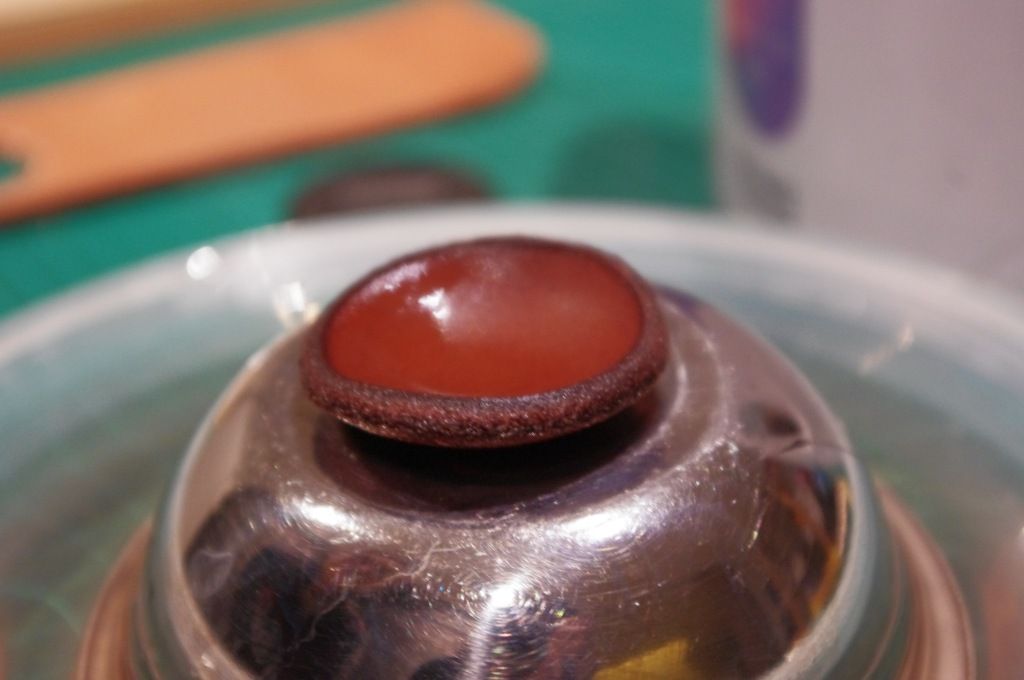 |
| After effect, notice the curve |
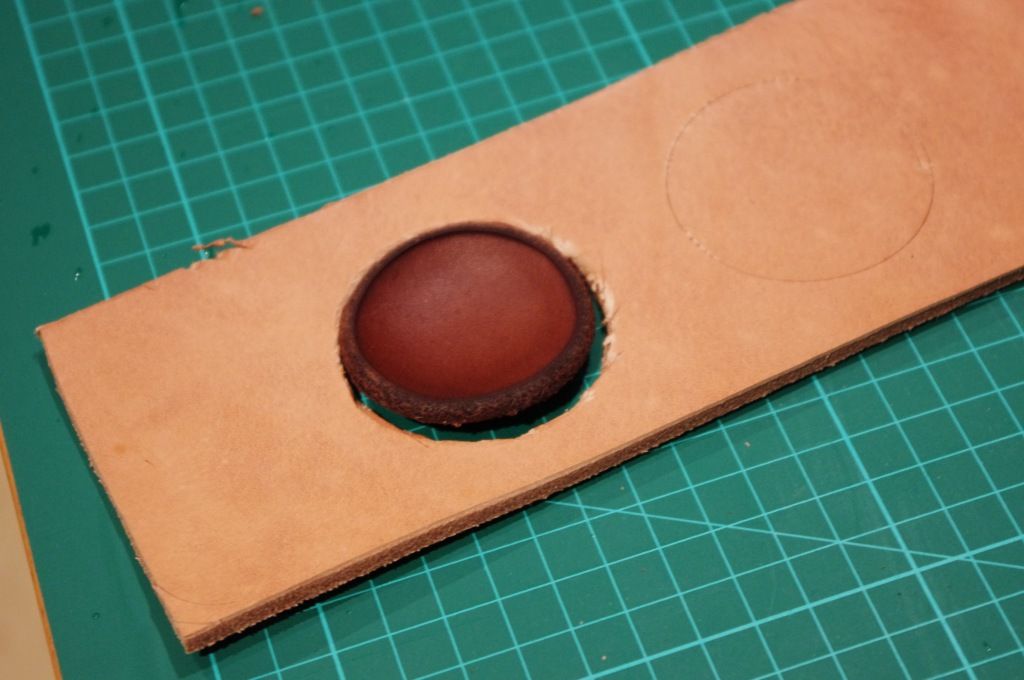 |
| Some shrinkage. Also notice the color |
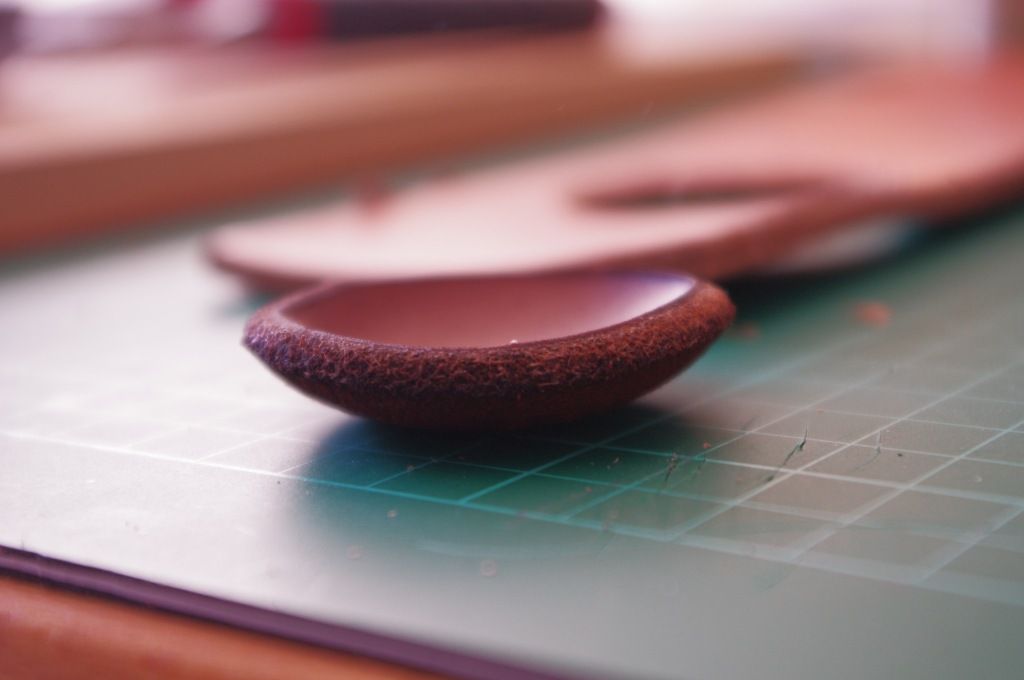 |
| Fully dried |
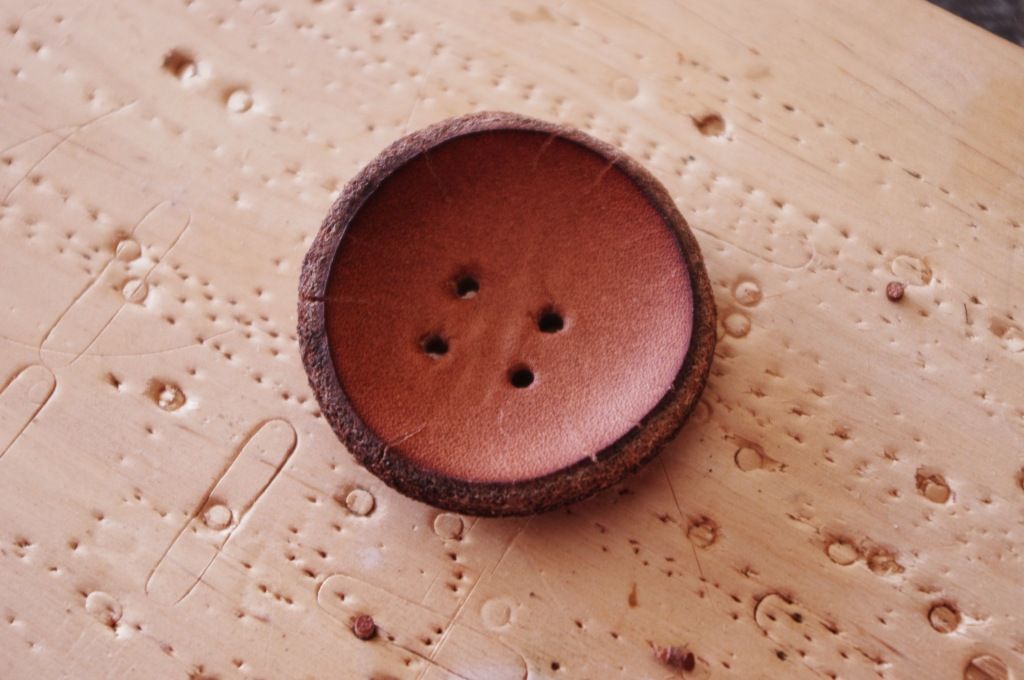 |
| Hole punched. Notice the cracking on the edge |
Subscribe to:
Posts (Atom)